

In my decade-long journey as an appliance repair technician, I’ve faced many challenges. But, there’s one issue that never fails to baffle me – black flakes in washing machines.
Over the years, these pesky invaders have become my nemesis. I remember countless calls, puzzled customers, and washers plagued by these mysterious flakes.
So here’s the deal:
To tackle this enigma head-on, I’ve teamed up with my good friend, Ian James. Hailing from the vibrant city of Austin, Texas, Ian’s experience with washer repairs is unmatched. Together, we’re on a mission to demystify these black flakes.
Let’s dive in!
Table of Contents
Why Are There Black Flakes In My Washing Machine?
The black flakes in a washer might be from a hardened buildup of detergent/fabric softener in between the inner and outer tubs or underneath the agitator base. Sometimes, they could be from a washer component that’s breaking down, hardened oil specks from the transmission, or from your clothing. For example, peelings from a faux leather jacket.
In the sections below:
Ian and I will guide you through the process of inspecting them to uncover what they are and pinpoint their origin.
How To Identify Black Flakes in Your Washing Machine
Now:
When I sat down to interview Ian, my first question was, “What’s the first step you take when you encounter black flakes in a washer?”
His answer – “I always start by inspecting the flakes to try to identify what they are.”
With that in mind:
This is a straightforward process. As Ian explains, here’s what you need to do…
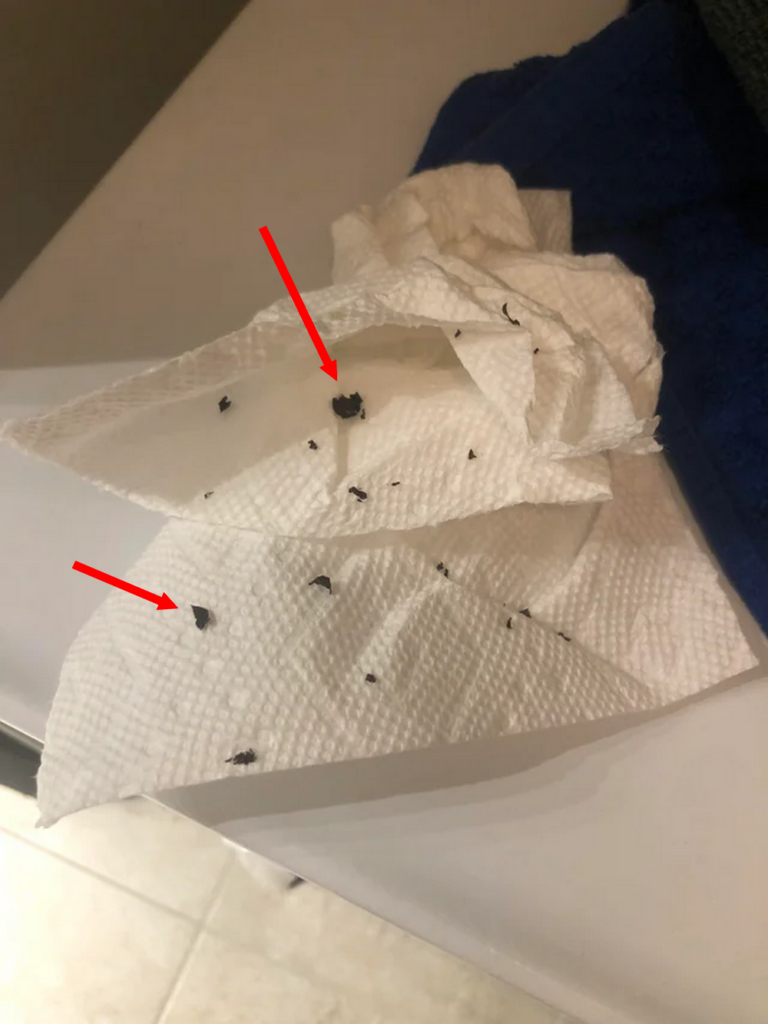
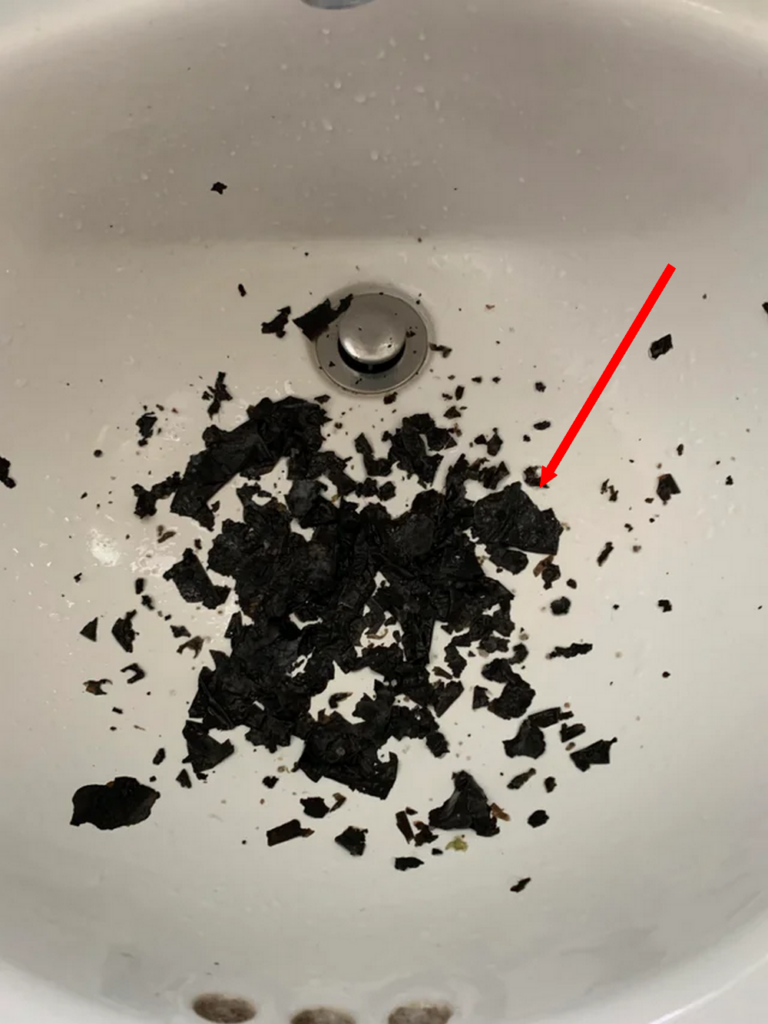
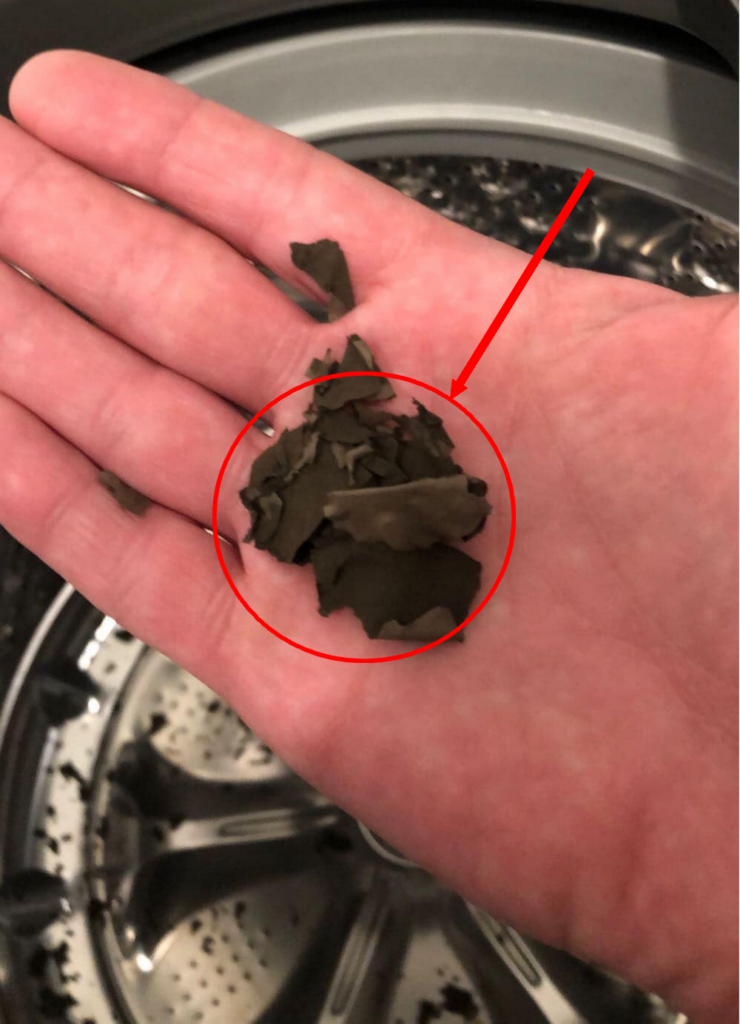
1. Do a Close Inspection
Grab a paper towel and collect several of these flakes for a closer examination. Then analyze their size and color to assist you in determining their origin.
2. The Feel Test
Grab a few flakes between your fingers and assess how they feel. Are they rubbery, hard, sandy, gunky, or perhaps oddly oily?
If they feel rubbery, it could be a washer component or peeling from a piece of clothing.
Next:
3. Test for Dissolution
To further verify their nature, you can conduct a dissolution test. Simply place a few flakes in a jar with warm water and observe whether they dissolve.
Note:
If they dissolve, you’re likely dealing with soap residue.
4. Burn Test
To verify if the flakes are rubbery, light one on fire and see if it burns. If it goes up in smoke, it could be rubber.
Adding on Ian’s point, rubbery flakes might also originate from something that was left in the pockets of your laundry.
Next:
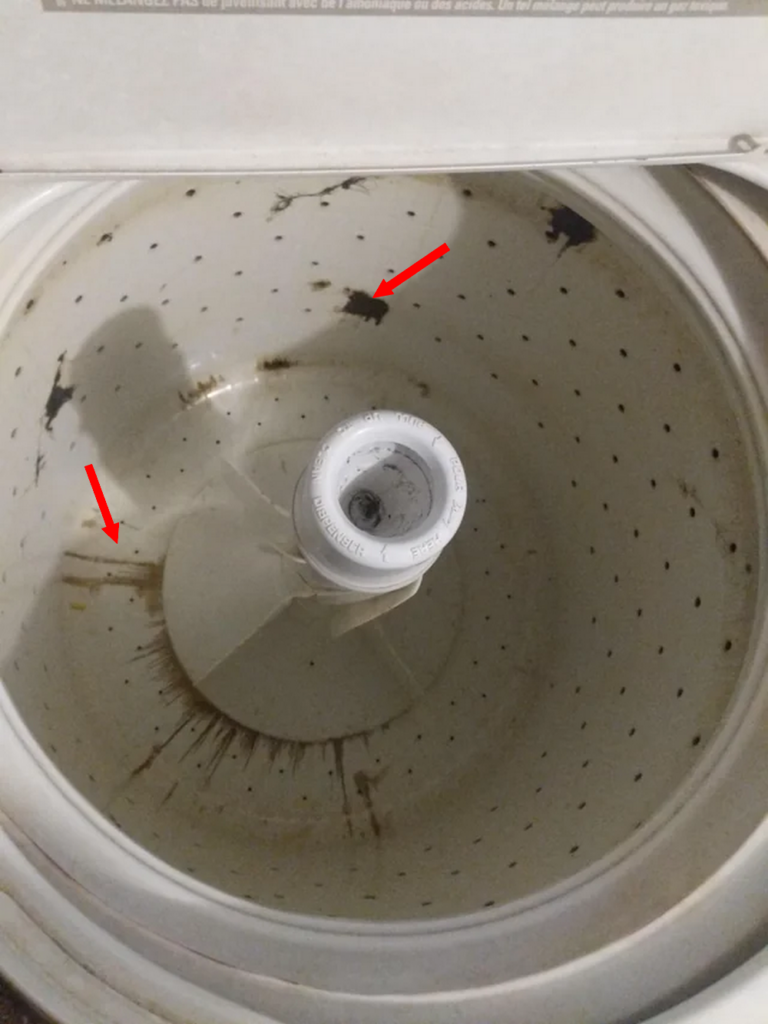
5. Consider the Timing
When are the flakes appearing?
For this Redditor, the black flakes only appeared during hot cycles on their GE top-load washer. This is a sign disintergrating soap and fabric softener buildup.
6. Lastly, Do a Color Transfer Test
Here:
Place a few wet flakes on a clean paper towel and observe if they will transfer color. This simple test can help you determine whether the flakes are hardened oil or grease.
Now:
Where do these flakes come from? Or better yet, what should you do if you spot them?
Read on to find out…
Black Flakes in Your Washer? Possible Sources and Quick Solutions
1. Hardened Buildup of Detergent Residues and Fabric Softener
Question:
What’s the leading cause of black flakes in washing machines?
According to Ian, “Most of the cases I’ve encountered are caused by a buildup of detergent and fabric softener.”
And I agree, 100%.
Get this:
Most detergents, fabric softeners, and other fabric additives don’t often dissolve or drain fully during a cycle.
That’s why…
“Over time, these residues accumulate in various parts of the washer, eventually leading to the mysterious flakes”, Ian explains.
Now:
According to Samsung, some of these residues cling to the inside of the tub, particularly if your water supply has low pressure.
However, the majority accumulate in hard-to-reach areas of the washer.
The detergent residues also react with minerals in the water forming scum, which forms a hardened layer on different surfaces.
Additionally:
LG Support explains that detergent and fabric softener can combine to form a waxy buildup known as scrub; usually during cold wash cycles.
Over time, due to the washer’s mechanical action, this buildup may start to flake off into the tub, ending up in your laundry.
Now:
The accumulation of soap scum, dirt, debris, lint, and softener buildup occurs in the following areas.
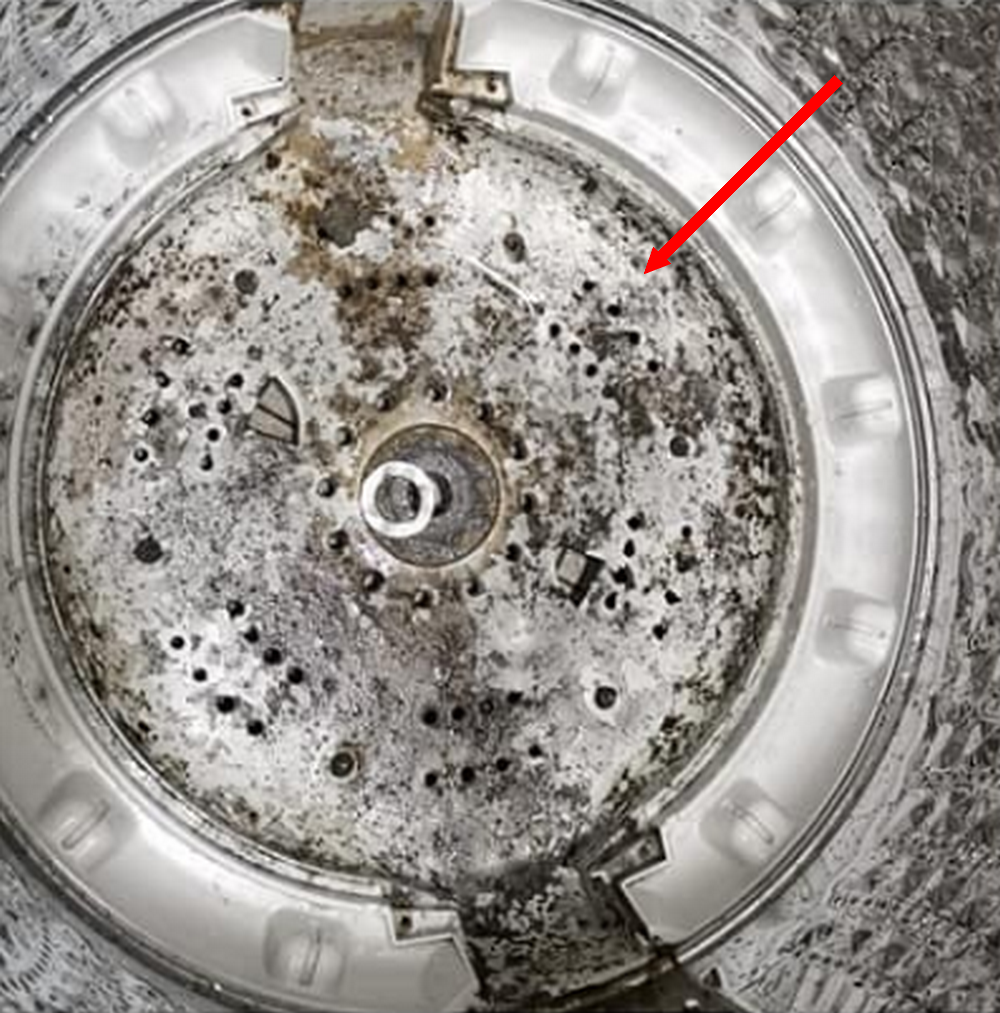
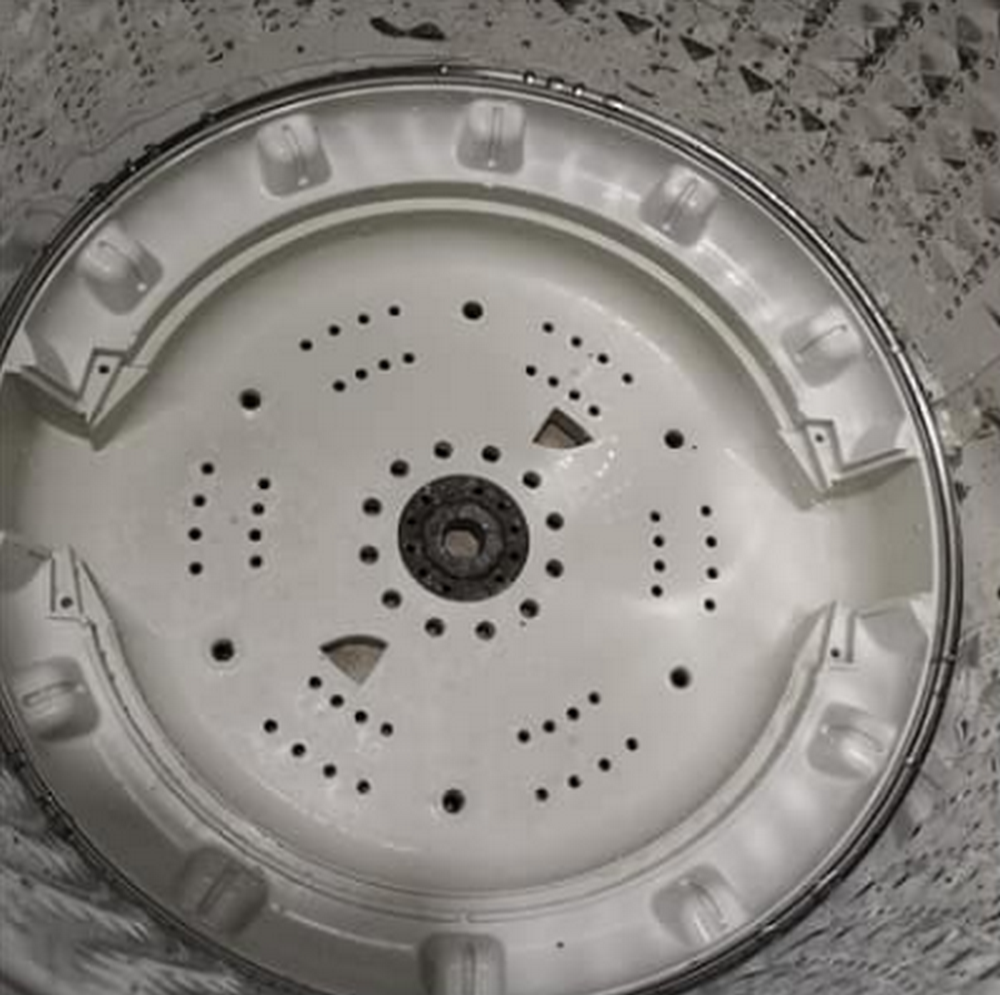
a. Underneath the Agitator Base or Bottom of the Pulsator
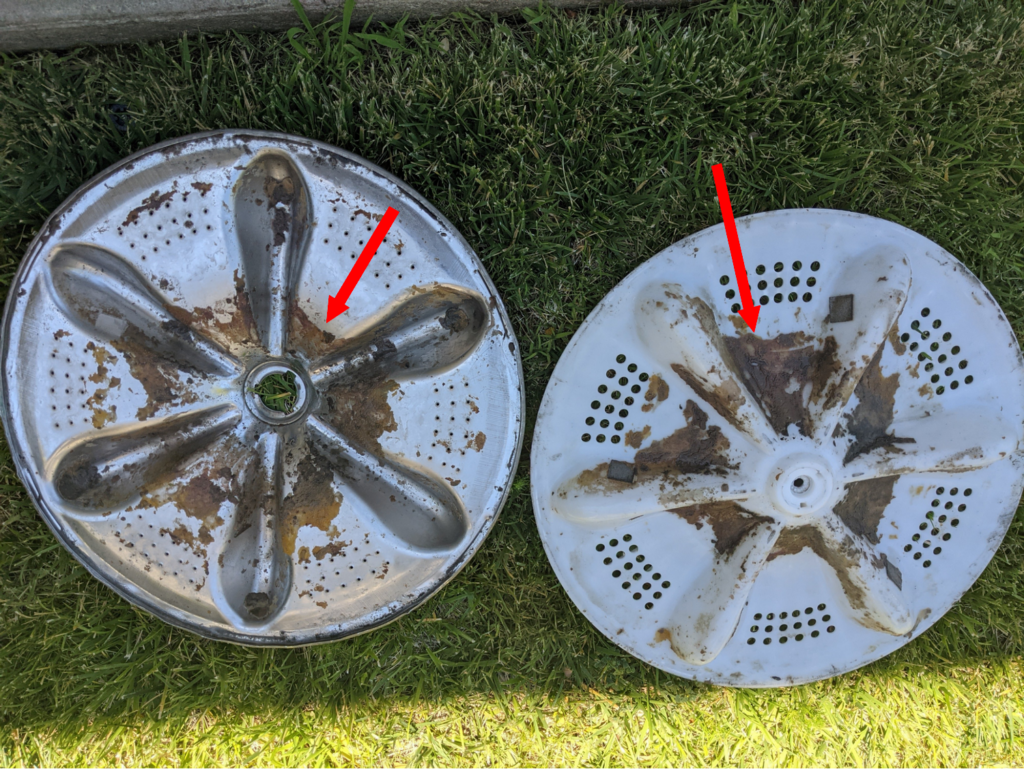
As Ian explains…
“This concealed area frequently traps detergent, fabric softener residues, lint, and pet hair. Occasionally, even small objects like coins or pins can become lodged there.”
For instance:
This repair technician was working on a Kenmore washer when he discovered dozens of coins trapped under the agitator. At the same time, the central area was coated with gunk.
Unbelievable, huh…?
Sometimes, the buildup can be around the base or inside of the auger.
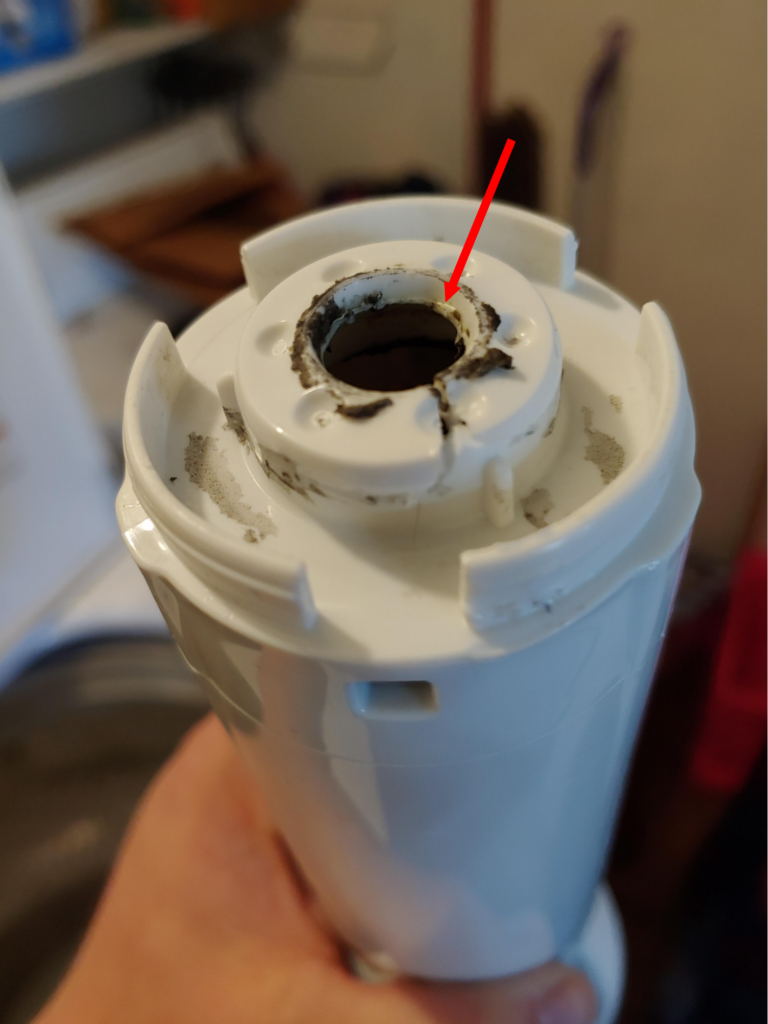
On the other hand:
For washers with a pulsator, the origin may be the bottom of the cap or its edges.
That said:
Here are a few Simply Swider tips on how to inspect and clean an agitator…
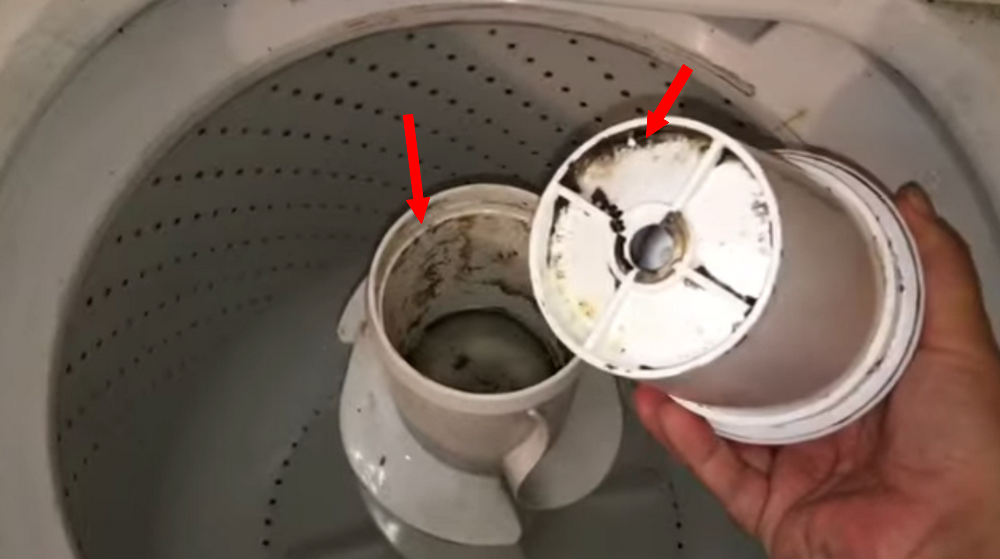
Step 1: Remove the agitator cap
Open up the auger and remove the dust cap so that you can access the inside.
Step 2: Remove the agitator
Since the bolt is deep at the bottom of the auger, you’ll need a socket with an extension. Unscrew the bolt and pull the agitator base out of the tub.
Step 3: Do some cleaning
First, use a soft cloth with a mild detergent or vinegar solution, to clean the inside of the auger. Then, gently scrape off all the gunk from beneath the agitator base.
You can place them in a tub or bucket or use a pressure hose to remove any stubborn buildup.
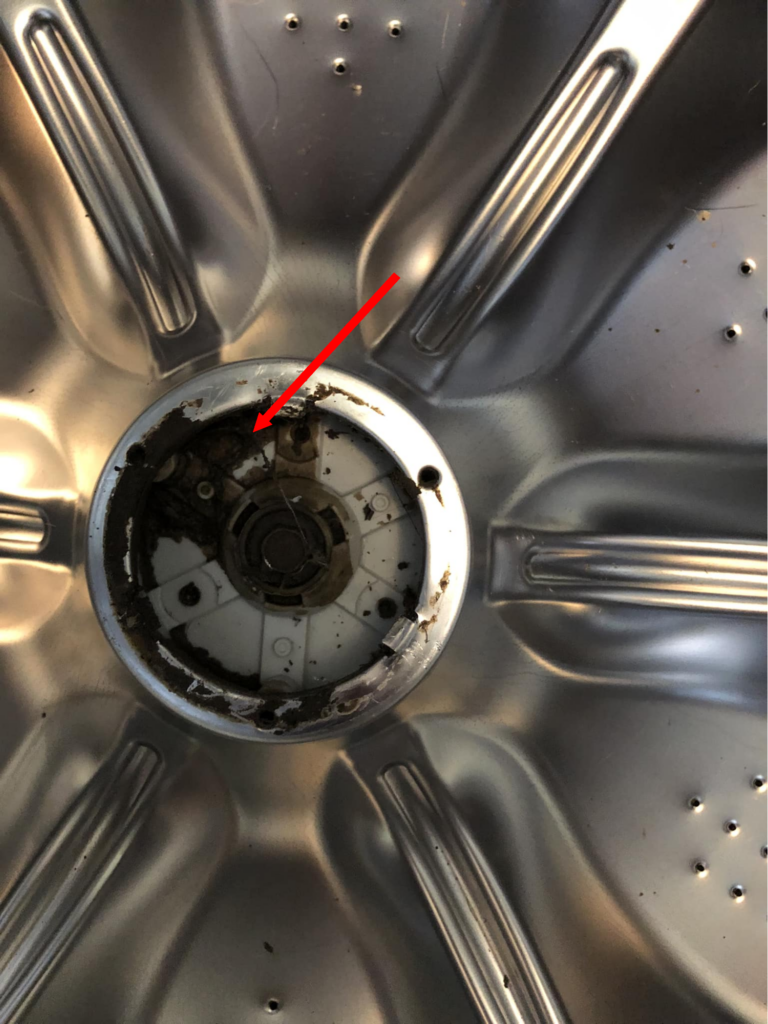
Step 4: Clean the bottom of the tub
Cleaning the base of the tub will be different since it’s not removable. To scrape out all the buildup, use a soft brush and wipe it clean with a rag or paper towel.
If the gunk is particularly stubborn, add some water and continue scraping with the brush.
Pro Tip:
Run a quick wash without the pulsator or agitator base to help loosen and remove some of the gunk.
And that’s it.
But what if your washer uses a pulsator? Well, here what you should do…
Step 1: Remove the pulsator
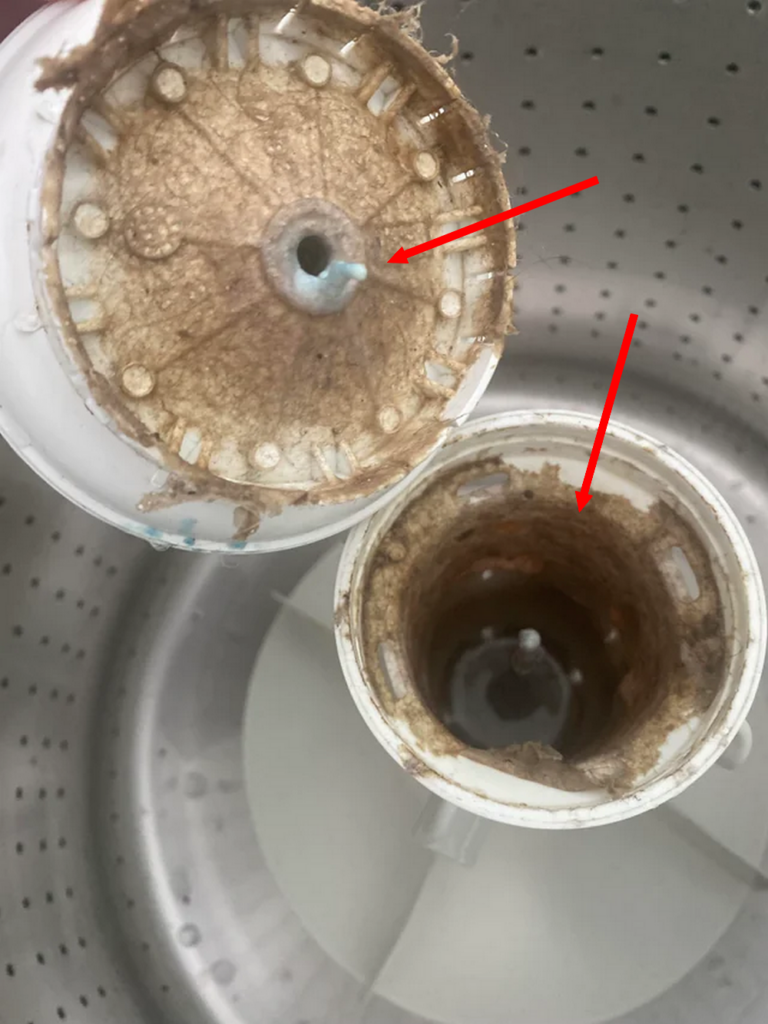
Use a screwdriver to pop the pulsator cap out. If there’s buildup beneath the cap, use a paper towel to wipe it away, revealing the screw.
Next:
Use a socket to remove the mounting screw and pull the pulsator out. Sometimes, the buildup will be around the edges of the pulsator, much like what this Reddit user discovered.
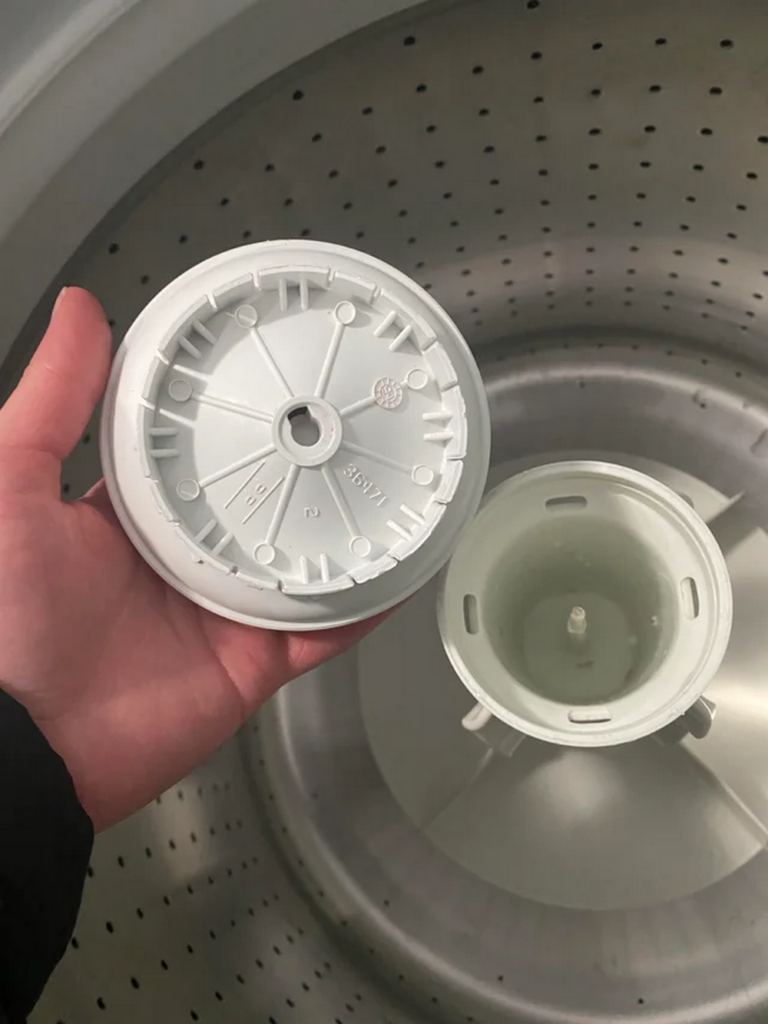
Step 2: Cleaning
Scrape all the dirt beneath the wash plate and the bottom of the washer. Finally, dip the pulsator in a bucket containing a soap solution.
Finish by cleaning the surface on which the pulsator sits.
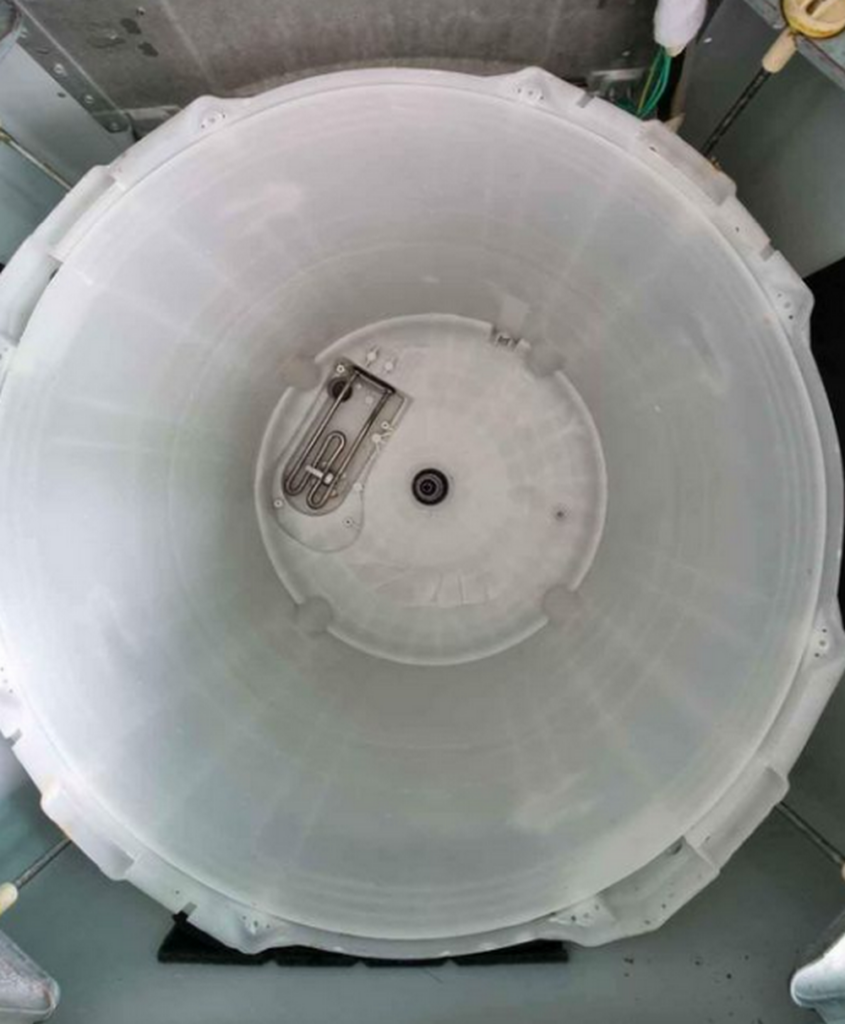
b. Between the Washer’s Inner and Outer Tubs
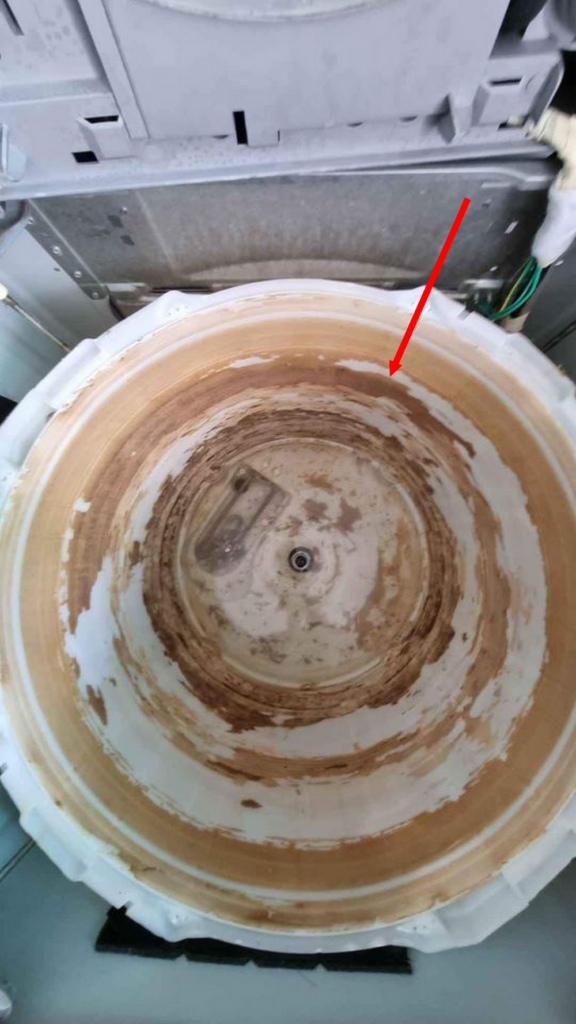
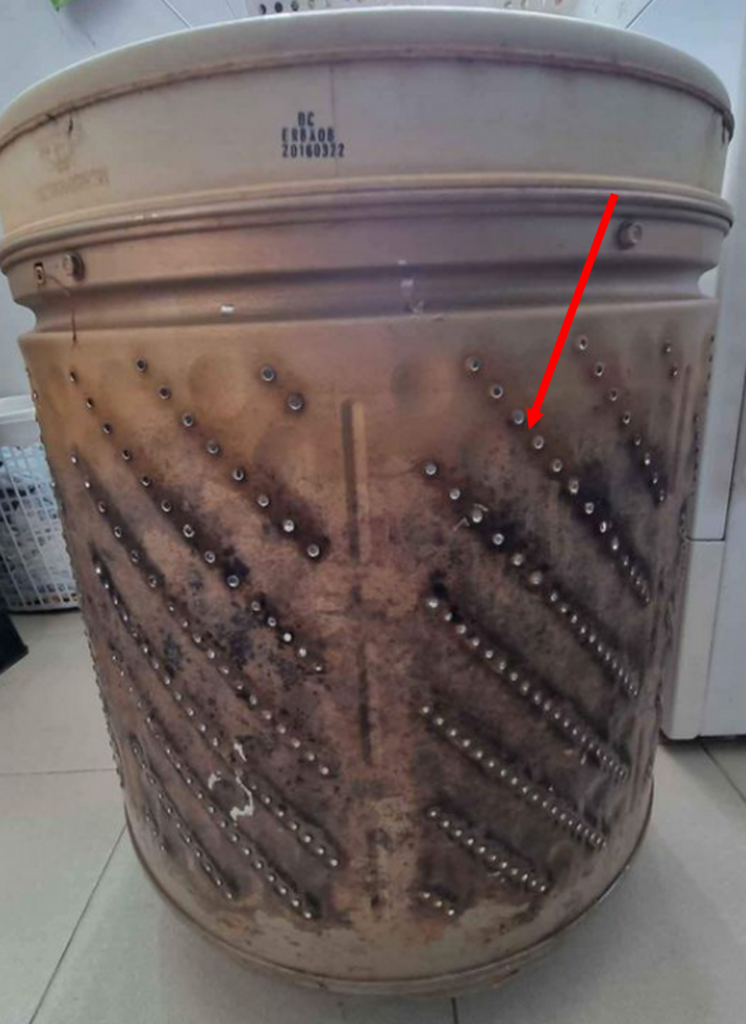
Now:
The inner tub is what you see when you open the washer, and it’s surrounded by the outer tub, which holds the water.
Because of the friction during washing, the inner tub is usually immaculately clean.
“However, its hidden outer surface and the outer tub’s inner surface provide the best-undisturbed surfaces for buildup formation,” Ian explains.
In fact:
One repair technician in a comment on Reddit, revealed that he often discovers the majority of the buildup in this specific area.
So, how do you go about inspecting and cleaning these tubs?

According to Ian,
“To inspect and clean the tubs, you’ll need to disassemble the whole washer. Luckily, for most washers, the tub removal process is quite similar.”
For instance:
All Whirlpool, Maytag, Kenmore, and KitchenAid washers with a raised control panel follow the same process.
Below are the steps to follow for most vertical modular washers.
- Step 1: Detach the control panel.
- Step 2: Unscrew and carefully lift and remove the entire body from the washer.
- Step 3: Depending on your washer’s design, remove either the agitator base or pulsator.
- Step 4: Unscrew the spanner nut that holds the wash plate.
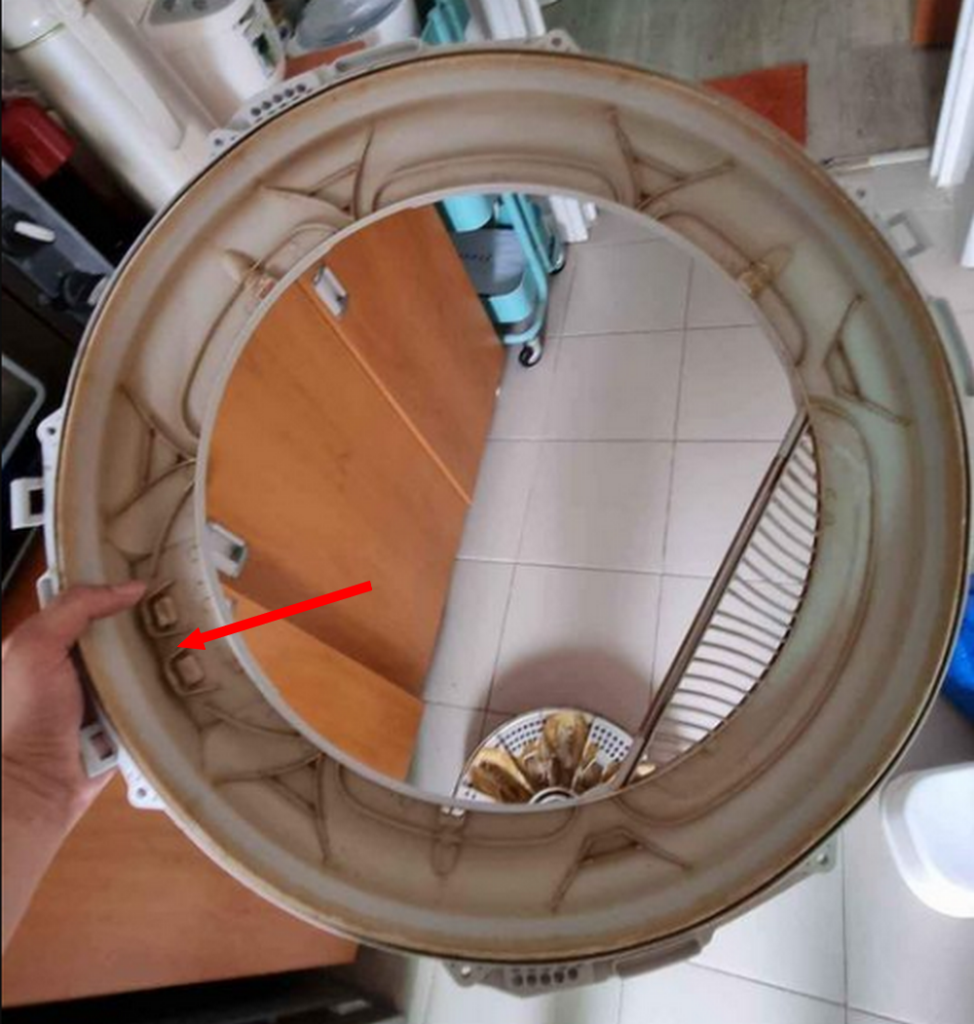
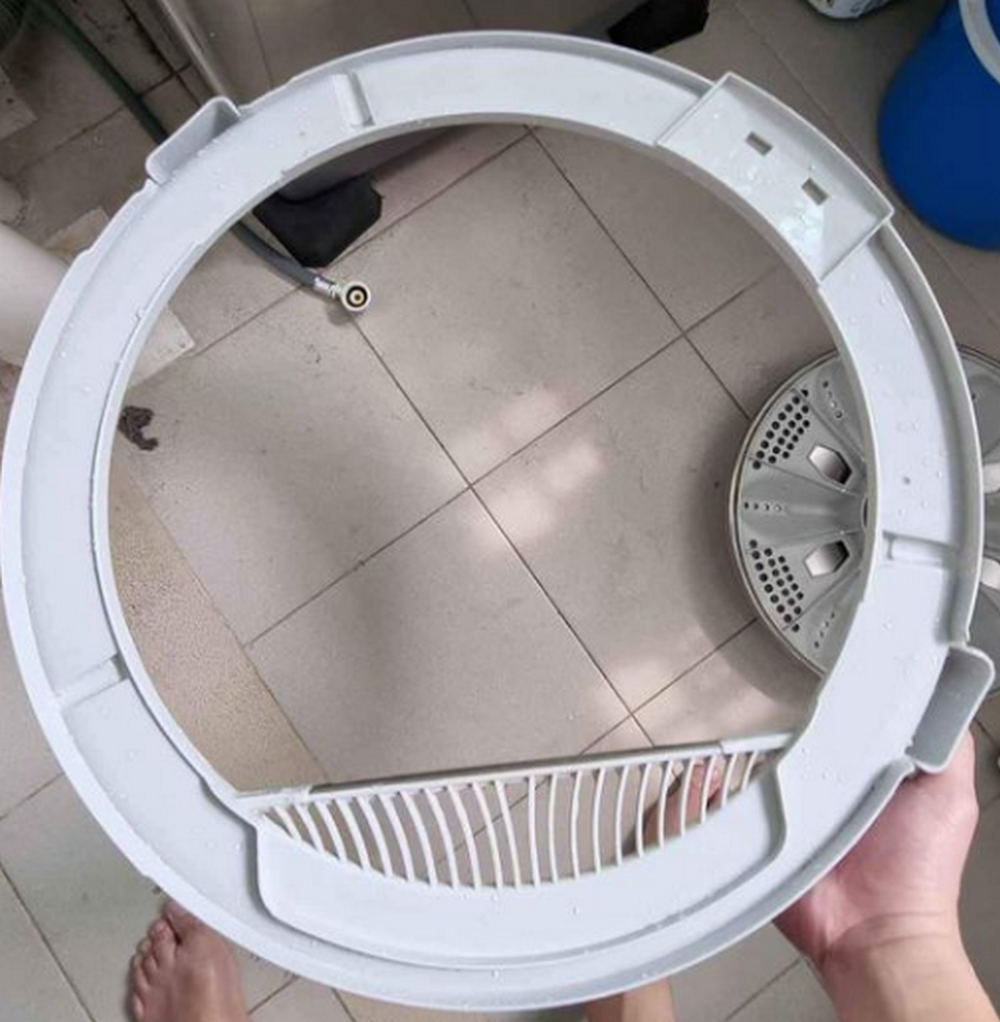
- Step 5: Remove the tub cover
- Step 6: Gently lift and remove the tub cover.
- Step 7: Detach the outer tub. Make sure to disconnect the pressure hose, springs, and drain hose.
Straightforward, right?
Well, this is the exact process that one user followed; successfully eliminating the black flakes from his Samsung WA90H4400SS washer.
Next:
It’s time to clean the tubs.
Here, the cleaning process will depend on how dirty the surfaces are.
“If the buildup is tough, use a soft brush and a hydrogen peroxide cleaning solution to scrape it out,” Ian advises.
For me:
I find taking the tubs out to the yard and using a pressure washer to dislodge the tough buildup quite effective.
Now, here’s something many don’t know…
The amount of buildup in these areas will tell you whether you’re using too much detergent and fabric softener.
A quick tip from Ian:
“The tub cover’s underside might also be a safe haven for detergent residue so don’t forget to clean it.”
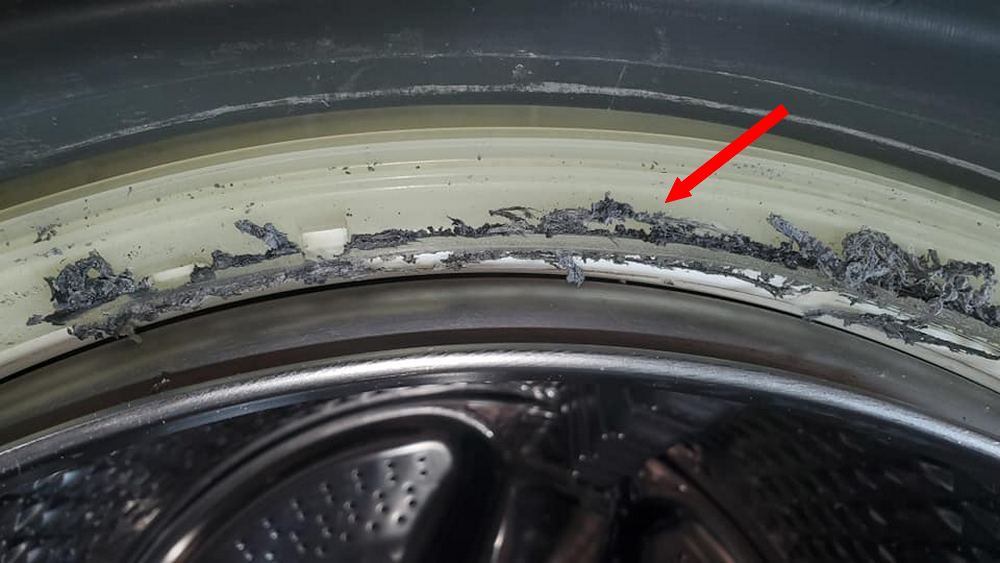
c. Around the Door Seal
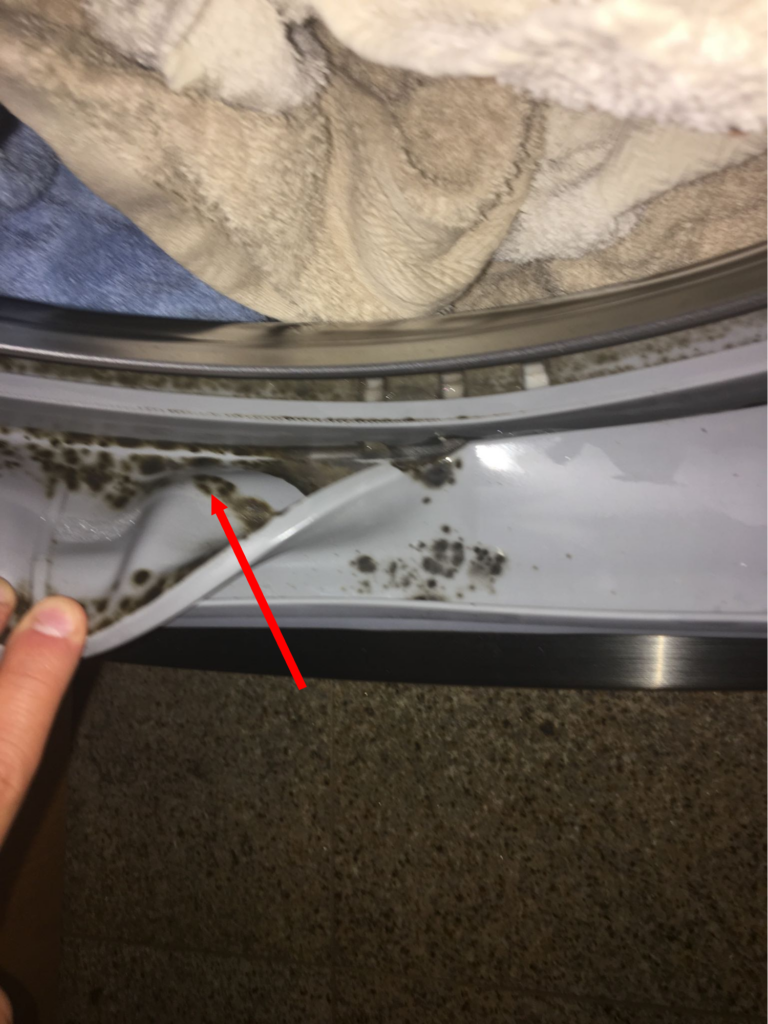
The next culprit is the door seal of a front-loading machine.
Why?
As Ian explains, “This area provides the perfect crevices and nooks for buildup to accumulate. On top of that, the door seal doesn’t receive much water, making it harder to rinse away the buildup,”
Are you wondering – how do I inspect and clean the door seal?
It’s simple.
“Pull back the folds of the seal and inspect every hidden corner for buildup. If you find any, use a soft brush or cloth to scrape all the dirt and grime out,” Ian explains.
Finally:
Spray a cleaning solution all around the seal and wipe it clean.
d. Below the Detergent Drawer
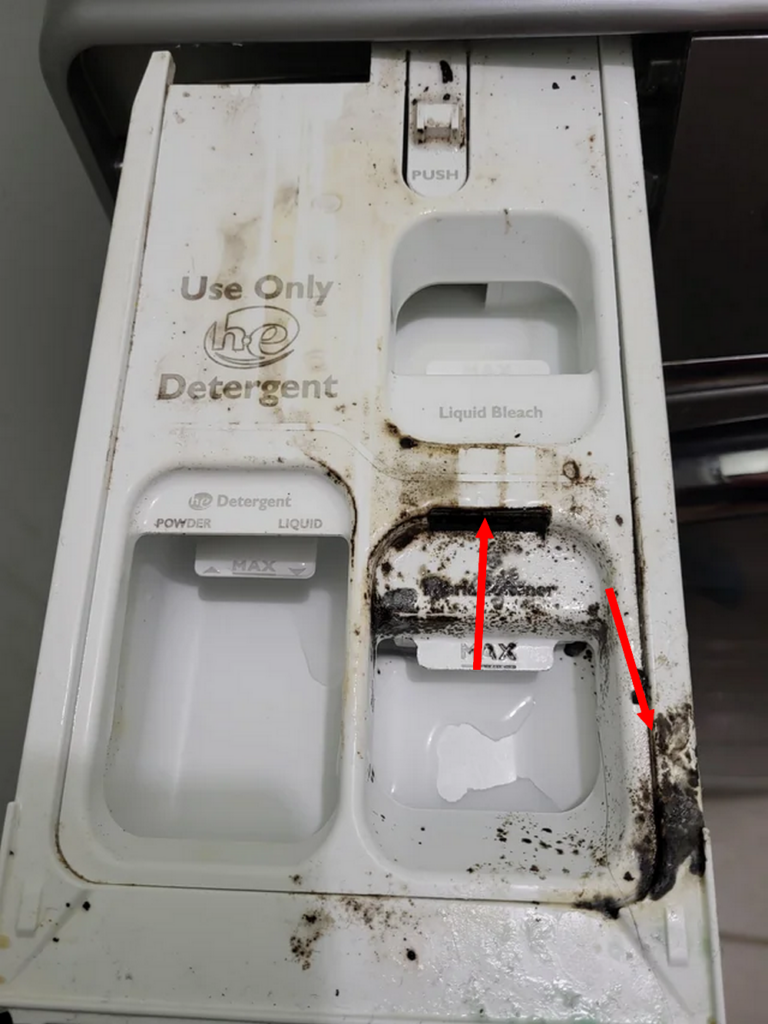
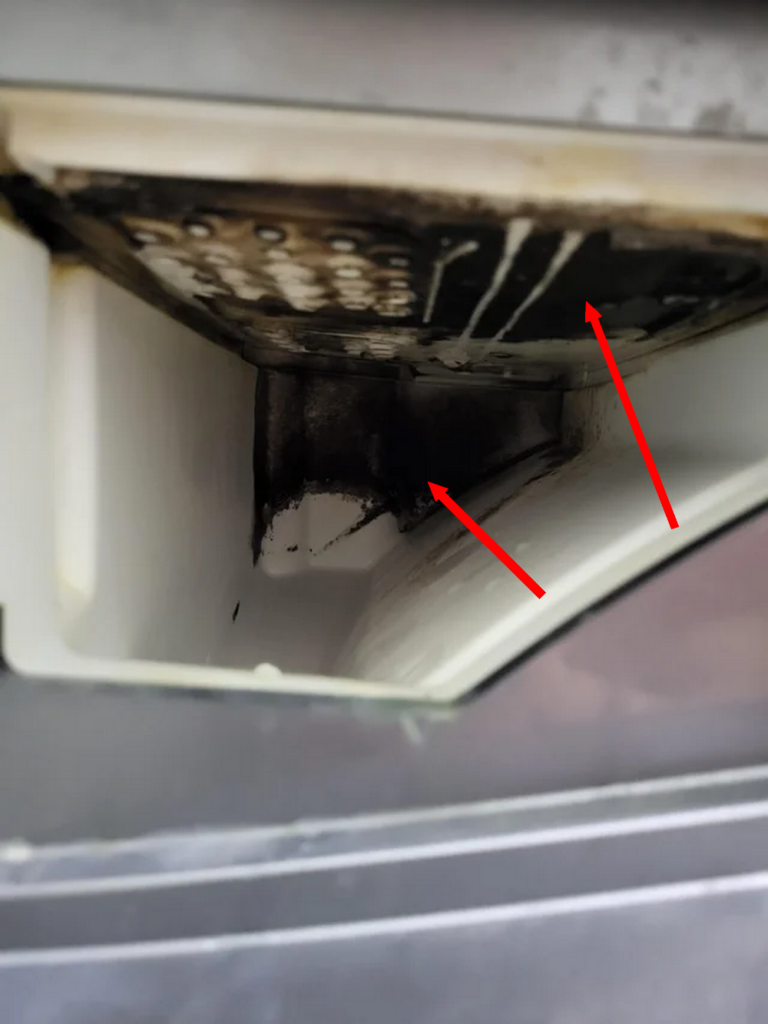
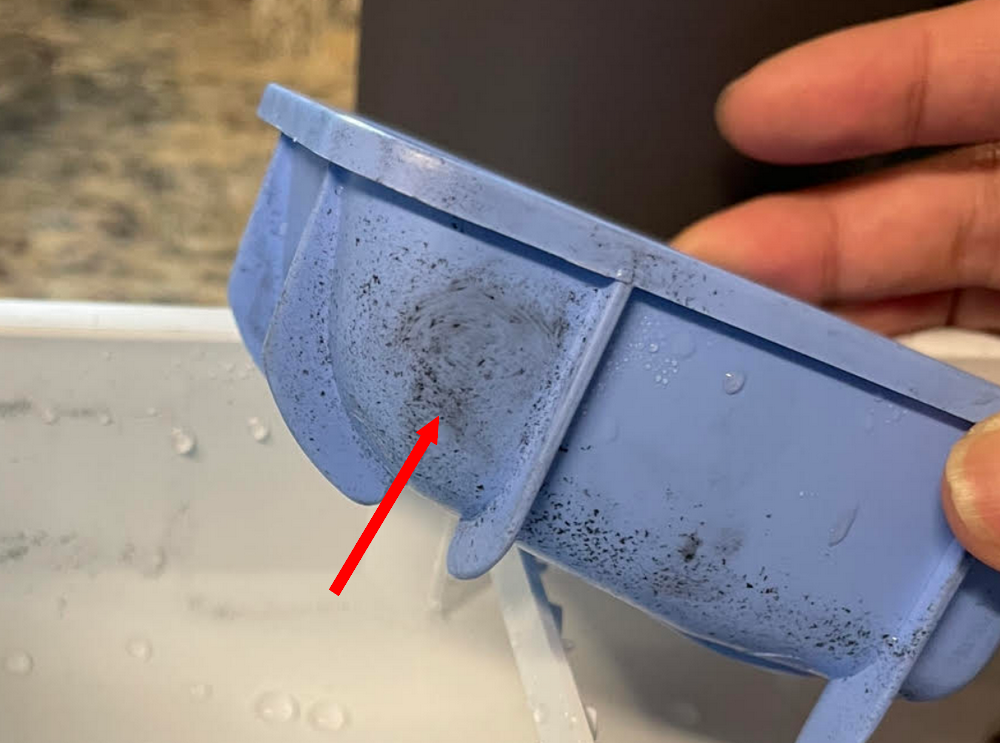
According to Ian…
“Residues of detergent and fabric softener can stick on the sides and below the drawer. Sometimes,even on the surface of the compartment.”
Why?
These areas are hidden and frequently overlooked during regular cleaning. Thus, making them an ideal breeding ground for mildew and buildup.
Luckily:
Most detergent drawers are removable, allowing for easier access to both the drawer and the compartment beneath it.
How to inspect and clean the detergent dispenser drawer?
You can start by removing it.
Brands like LG, Whirlpool, Maytag, and Samsung typically have a release button you can press. Or simply give the drawer a gentle pull.
Next:
Use a soft brush or an old toothbrush. You also want to remove any buildup from the sides of the drawer and any other noticeable areas.
“For the compartment itself, a cloth or sponge dipped in warm soapy water works wonders,” Ian explains.
Safety tip:
If you spot mold or mildew, use water and white vinegar solution – it’s a natural disinfectant. And always remember to wear gloves and a facemask for protection.
One last thing:
Ensure everything is dry before you put it all back together to mitigate recurrence.
2. Part of The Washer Is Disintegrating
Now:
These pesky black flakes could be coming from a part of the washer is gradually breaking down.
“Here, there first culprit is the rubber door seal or gasket,” Ian says.
“Over time, seals tend to wear down. This results in degradation that causes solid rubber flakes to break off from the seal,” he adds.
Now:
If your washer has an agitator, it could also be its base or the bottom that’s wearing out. This is mostly due to normal wear and tear.
On the other hand:
For washers with a pulsator, the cap might be peeling or the edges of the pulsator might be breaking down.
Identification and solution:
“To determine if the flakes are originating from a deteriorating component, carefully examine them for size, color, and texture,” Ian says.
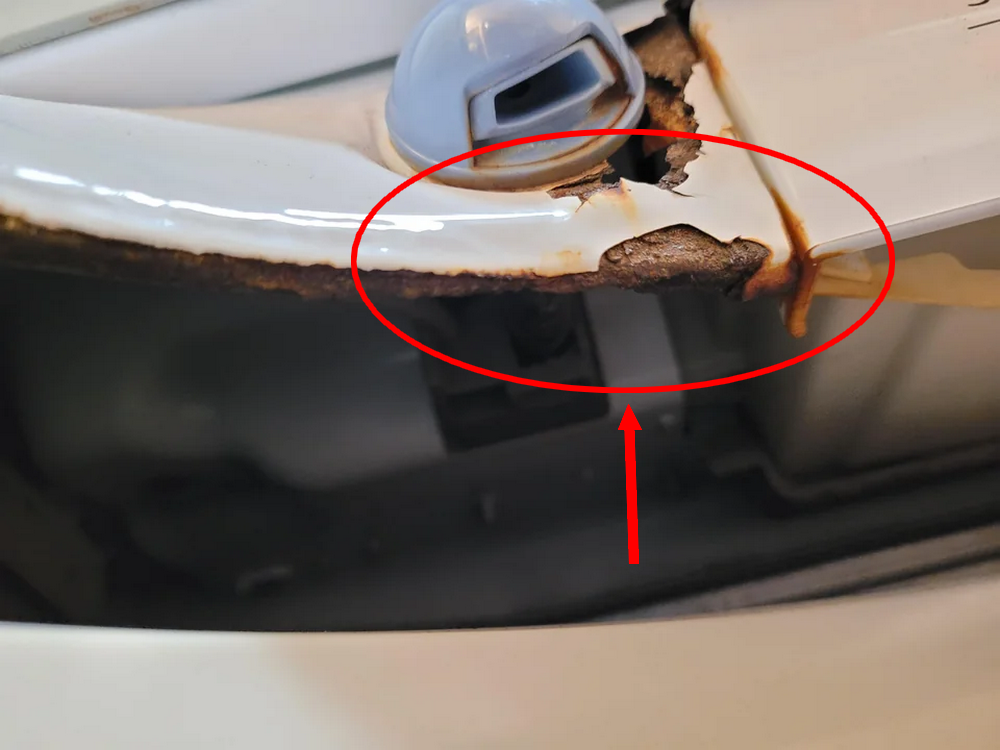
Next:
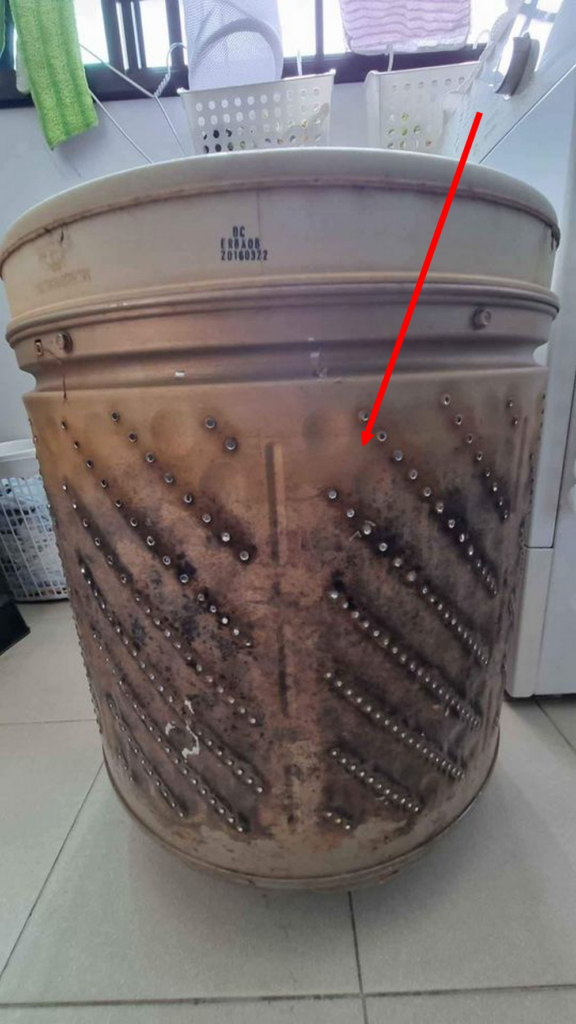
Investigate the sides and bottom of the tub, focusing on any rubber parts and if there is rust. For instance, this Redditor’s Samsung WA45M7050AW/A4 washer had rust around the water inlet.
Also:
Be sure to check the rubber hose washers, the tub seal, and the hot water line. And finally, inspect the drum’s coating, as it can also begin to wear down and flake off.
In the end…
If your investigation confirms that the flakes are coming from a worn component, replace it.
3. Something Was Left in The Washer
Here’s the thing:
The cause of black flakes might not always be due to buildup or mechanical failure.
Sometimes:
The culprit could be the very garments or items you’ve just washed.
Take, for instance, faux leather jackets or raincoats. These items often have coatings or treatments that can break down, leaving behind those mysterious specks.
According to Ian…
“Black or dark-colored fabrics can also be culprits, particularly when they are new or of lower quality. The same goes for synthetic rubber materials like shoes with rubber soles or mats.”
Other items that can leave flakes include
- Graphic t-shirts
- Tote bags
- Garments with metal embellishments like zippers or buttons coated with paint
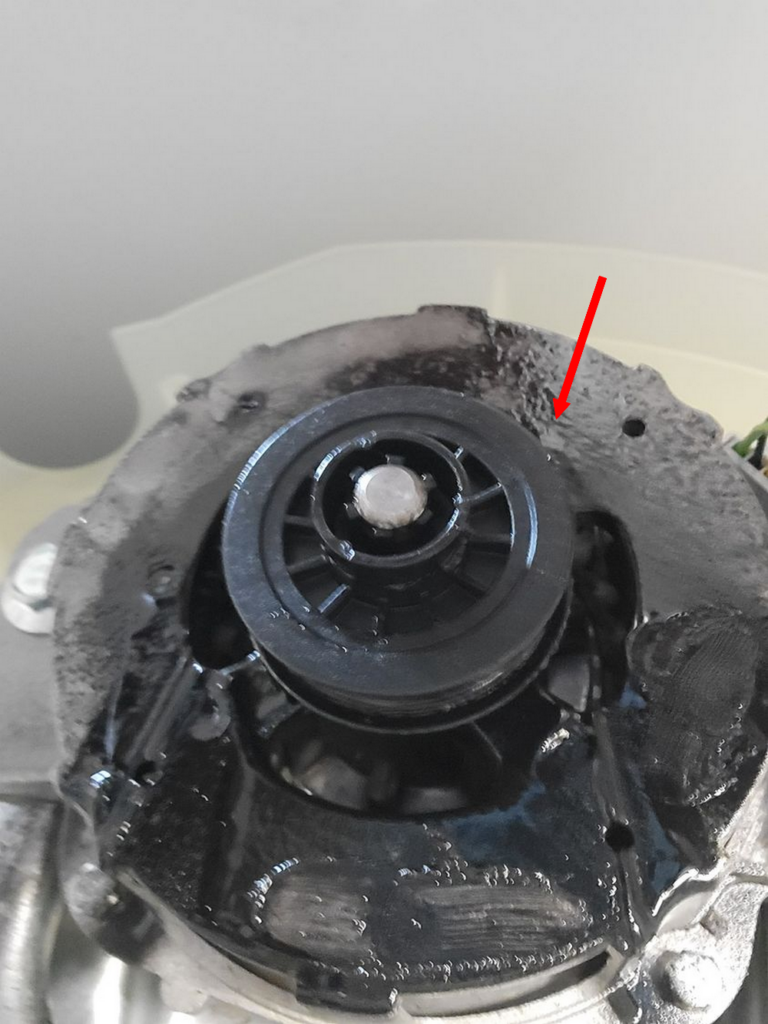
4. Oil Flakes from The Transmission
Next:
Another rare source of black flakes and stains in your washing machine is an oil leak from the transmission getting into the tub of the washer.
Ideally:
You’d expect a transmission leak to end up on the floor and on the components under the washer. However, sometimes the leak is pushed into the washer.
How does this happen?
The force of the spinning and agitation can cause some of the leaking grease to get into the washer. This usually occurs when the tub seal is damaged, providing the oil with an entryway into the washer.
For instance:
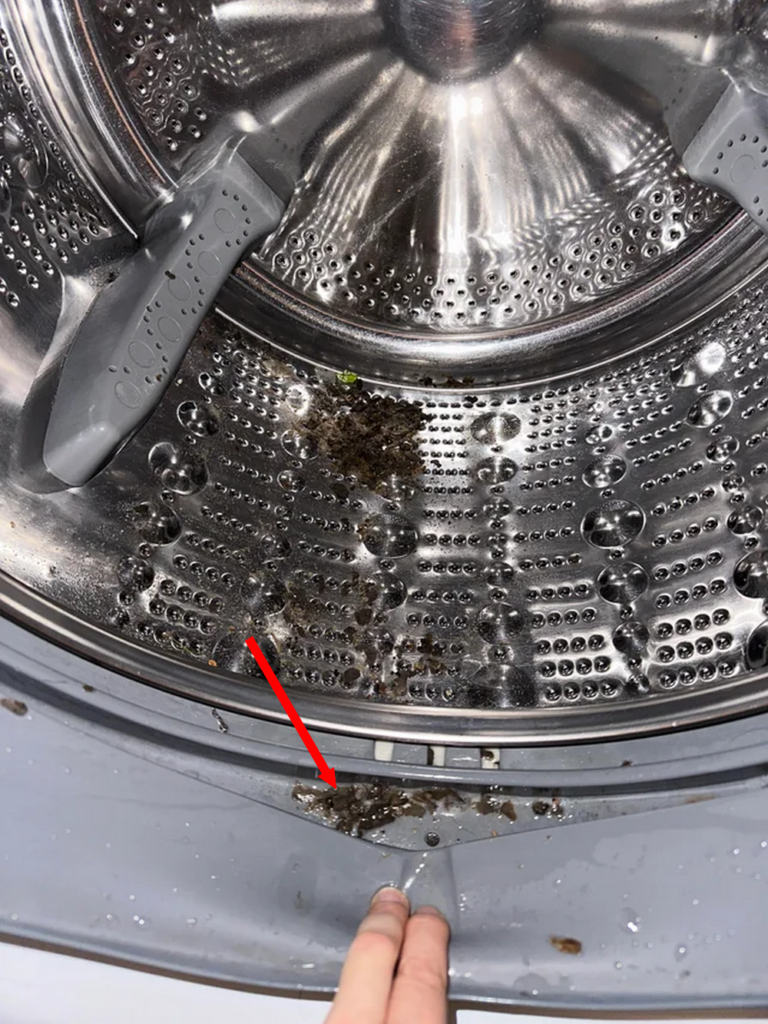
This Redditor described seeing what appeared to be mud in her GE WBSR3140D0WW washer.
However, the issue turned out to be a leak from the transmission.
Identification and solution:
To figure out if those flakes are dried oil particles from the transmission, start by checking the underside of your washer.
According to Ian,
“If there’s a leak on the floor or on some of the components located at the bottom, the leak could be pushing upward.”
What’s next?
Take a close look at those flakes. Do they feel greasy? Is there grime?
Sometimes, as the oil pushes upward, it will push some of the grime from the bottom, creating a mix of dirt and oil.
“If there is indeed a leak, consult a repair technician to advise on what needs to be replaced,” Ian adds.
How To Eliminate Black Flakes Without Disassembling the Washer
Now:
While I can’t guarantee 100% success, some of the buildup can often be removed without having to disassemble the washer.
Here are a few tricks you can use to flush out some of the buildup.
- Run several rounds of tub cleaning cycles and see if the black flakes disappear.
For example, this Redditor managed to solve the problem by running 10 vinegar cycles. Another user ran 12 cycles, each lasting over 2 hours at 90°C, alternating between vinegar and bleach.
- Fill the washer with water and let it soak.
For instance, this Redditor ran 4 cycles using Affresh tablets, followed by a vinegar soak. After a couple more cycles with Affresh tablets, their issue was resolved.
- Run a couple of steam cycles.
According to Ian, “The trick is to select the highest temperature and the highest spinning speed.”
How To Prevent Accumulation of Buildup In Your Washer
Here are a few tried and tested tips to prevent or minimize buildup inside your washer
- Use the right amount of detergent.
- Make it a routine to run at least one tub clean cycle every month.
- Use very little or no fabric softener.
- Regularly run a hot cycle.
- Consider soaking the washer once in a while.
- Regularly clean the door seal and detergent dispenser.
- Leave the door open after a wash cycle.
Conclusion
Evidently:
Black flakes in your washing machine are majorly the result of buildup from soap scum and fabric softener residues.
Prime hotspots for this buildup include the space between the inner and outer tub, beneath the agitator or pulsator, and around the detergent dispenser.
However:
It’s not always just about buildup. Sometimes, the flakes come from deteriorating washer components like seals. Or peelings from something you’ve washed recently.
Bottom line?
Be keen, inspect the flakes, identify the source, clean/replace, and then put in place measures to prevent recurrence.
Want more help with your household appliances?
Join our Facebook Group, where our team of experts stands ready to assist with troubleshooting and repair advice.