
It’s a fact:
Washing machines can leak, and GE washers are no exception. Leaks can damage not only the machine but also other electronics nearby.
That’s why:
Addressing a leak as soon as you notice it is crucial. But how do you tackle this issue?
Look no further!
I’ve compiled a list of possible causes and solutions to help you out. Akai Fowler, a seasoned appliance repairer from Houston, TX, shares his advice based on personal experiences and users’ stories.
So:
Sit back and take notes as I, and Akai explore five common issues that could cause a GE washer to leak.
Table of Contents
5 Reasons Your GE Washer Is Leaking From the Bottom
Ideally, water should flow smoothly within your GE washer, not out of the bottom during a wash cycle. If you encounter a leak, Akai Fowler, an experienced appliance repairer, advises focusing on specific washer components. These include the drain hose, tub seal, water inlet valve, and drain pump, as any issues with these parts could lead to leakage.
Keep reading, as we’re about to dive into each reason separately, providing you with practical insights and expert advice from Akai.
1. Faulty External Drain Hose
First up:
A faulty external drain hose is a common culprit behind leakage. The hose plays a critical role in draining water after a wash cycle, regardless of whether it drains directly into an outlet or your tub.
Here’s the thing:
As Akai Fowler once told me, “If the hose is damaged or installed incorrectly, water will inevitably leak onto the floor.”
Interestingly:
A Reddit user with a similar problem shared their experience, saying, “I own a top-loading GE washing machine (Model #S2100E4WW) which seems to leak from the bottom right side, as far as I can tell. What struck me as odd was that the leak wasn’t accumulating inside the washing machine, but rather, it was pooling on the outside.”
I asked Akai about this situation, and he told me it’s hard to guess where the problem might be if you can’t at least see pictures, but if there’s no water visible inside the machine, he’d look at the drain hose.
He suggested filling the washer with some water, then putting it on the spin cycle and watching the drain hose while the washer is draining the water.
From my experience:
The external hose is the easiest part to troubleshoot, and it’s not uncommon for a washer to leak from the bottom due to hose issues.
You might ask:
How does the external hose get damaged? Well, as Akai Fowler pointed out: “Placing your GE washer too close to the wall can cause vibrations that may split the hose during a wash cycle.”
But don’t worry:
You can troubleshoot this issue by following these simple steps.
- Step 1: Carefully pull the washer forward to access the drain hose.
- Step 2: Run a wash cycle and observe if the hose leaks while draining.
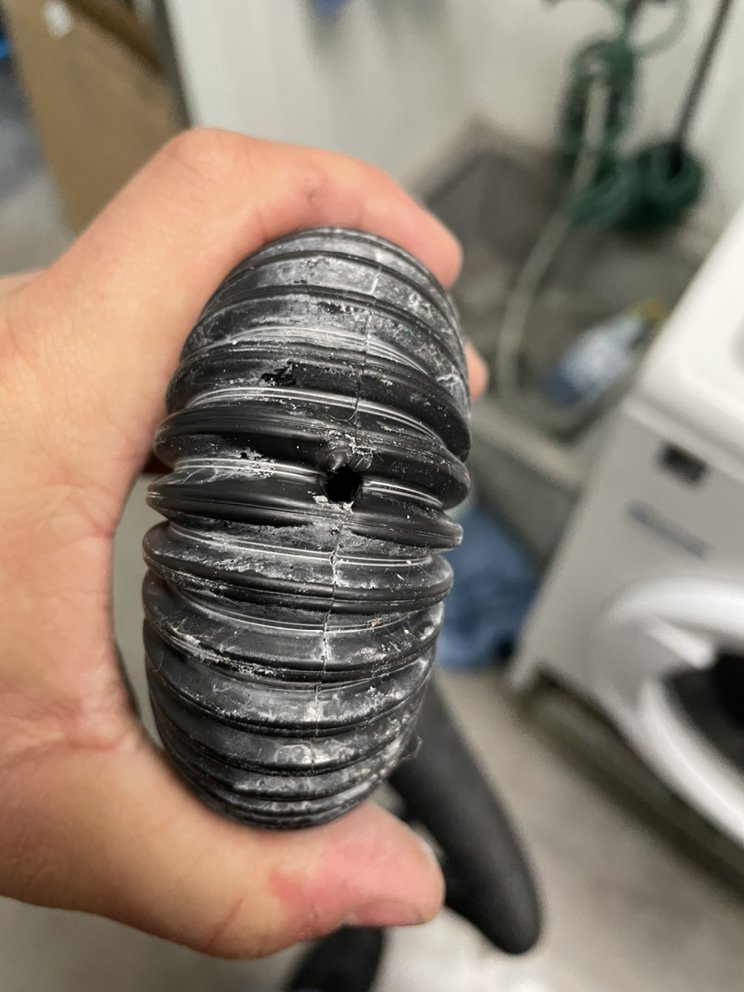
- Step 3: Gently inspect the hose for breaks or holes.
- Step 4: Double-check the connection to the washing machine.
- Step 5: Replace the hose if necessary.
Remember:
Different GE washer models have distinct safety mechanisms to secure the hose in place. Be gentle and avoid pulling it too hard.
By following these steps:
You should be able to resolve the leaking problem by either replacing the hose or tightening its connection to your GE washer.
2. Faulty Tub-to-Pump Drain Hose
Remember:
The external drain hose isn’t the only one you should be concerned about. The pump is in charge of circulating water in and out of the tub.
Naturally:
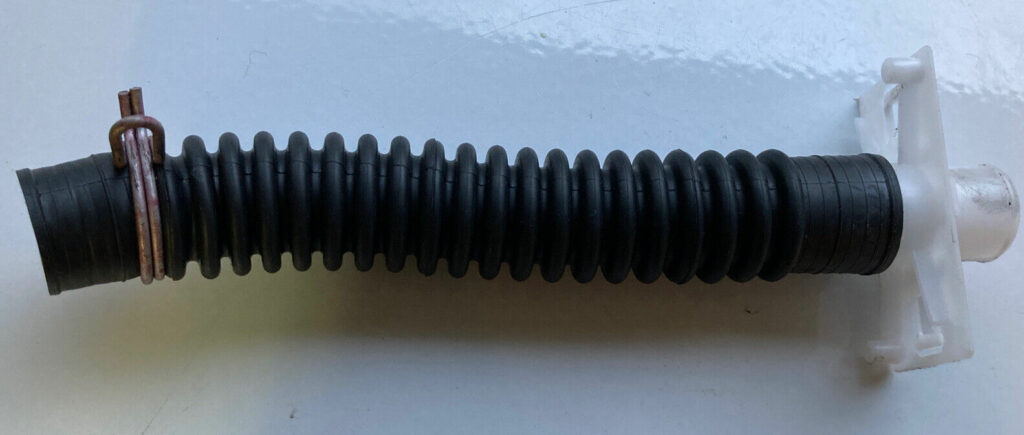
The tub connects to the pump through a smaller drain hose before the water flows out via the larger drain hose.
Regrettably:
The tub-to-pump drain hose might also spring a leak.
Akai Fowler, a seasoned appliance repairer, explains, “It’s typically made of the same material as the external drain hose and wears faster due to its proximity to the vibrating tub.”
Sadly:
Troubleshooting the internal drain hose isn’t as simple as its larger counterpart. You’ll need to dismantle your GE washer to access the pump.
Additionally:
A faulty internal drain hose could cause issues like the washer not filling correctly during a wash cycle.
Be aware:
Attempting to open your GE washer yourself may void your warranty. Moreover, you could cause irreversible damage to some components if handled improperly.
In the end:
Contacting GE customer service for all your troubleshooting and repair needs might be more cost-effective in the long run.
However:
If you choose to address this issue yourself, follow these steps.
- Step 1: Disconnect your GE washer from the wall and pull it forward. Make sure to unfasten any other connections securing it to your bathroom wall.
- Step 2: Insert a putty knife into the gap between the top and front panel.
- Step 3: Use the putty knife to release the spring clips holding the front panel in place.
- Step 4: Gently pull the front panel forward and lift it off. Store it in a safe location.
- Step 5: The hose connecting the tub to the drain pump should now be visible. Use the appropriate screwdriver and pliers to remove the safety clips.
- Step 6: Detach the old hose and inspect it for leaks or cuts.
- Step 7: Replace the hose if you find any damage, and reassemble your GE washer.
- Keep in mind:
If you’re not mechanically inclined, this troubleshooting method may be challenging. Don’t hesitate to call a professional technician to assist you with the necessary repairs.
3. Leaky Drain Pump
It’s clear:
A drain pump plays a crucial role in expelling water from your washer.
Therefore:
If there’s a leak, the drain pump might be the cause. It connects to the washer tub via a hose and is protected by a drain filter.
However:
A small item slipping past the filter can lead to internal problems. The drain pump may crack or its connections could loosen.
Akai Fowler, an appliance repairer with 10 years of experience, says, “When this occurs, water will leak from the bottom of your GE washer.”
Accessing the pump in some washer models is as simple as removing the front panel.
But:
In other models, it may be more complicated. To troubleshoot this issue, you’ll need to reach the pump.
Akai Fowler suggests: “You might want to seek expert help.”
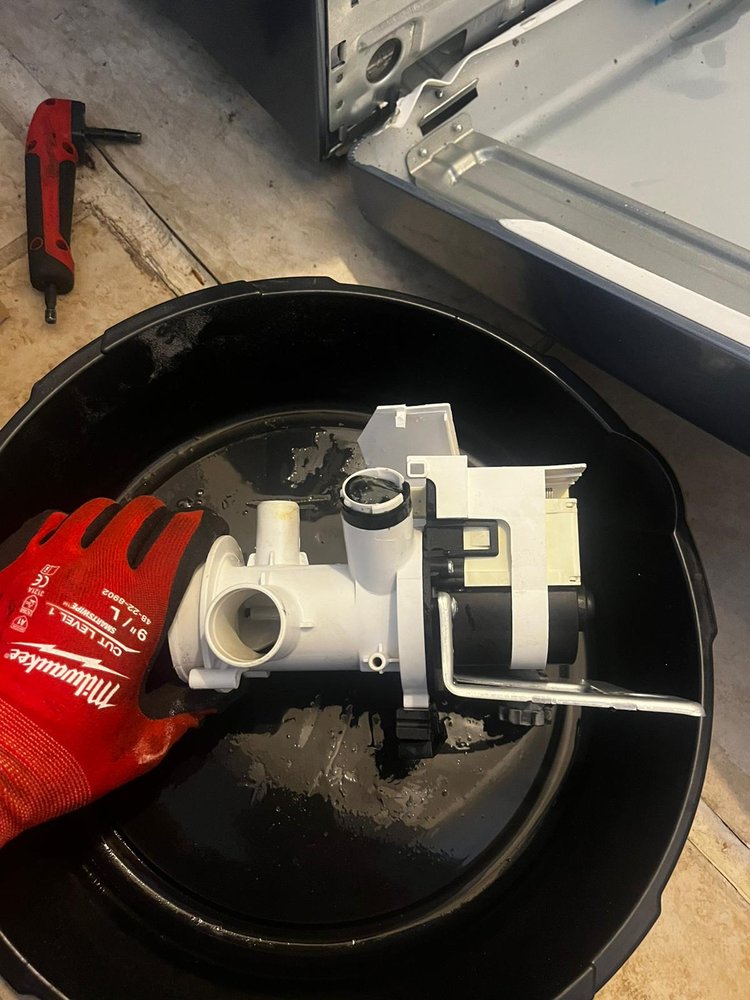
But if you decide to handle this task yourself, follow these steps to check the pump for issues.
- Step 1: Refer to the previous section for instructions on opening your washer’s front panel.
- Step 2: After removing the hose, disconnect the wire harness from the drain pump.
- Step 3: Use pliers to release the clamp holding the outlet hose and disconnect it. Keep a small bowl nearby to catch any water that spills from the hoses.
- Step 4: Unscrew the mounting screws holding the pump down with a hex head screwdriver.
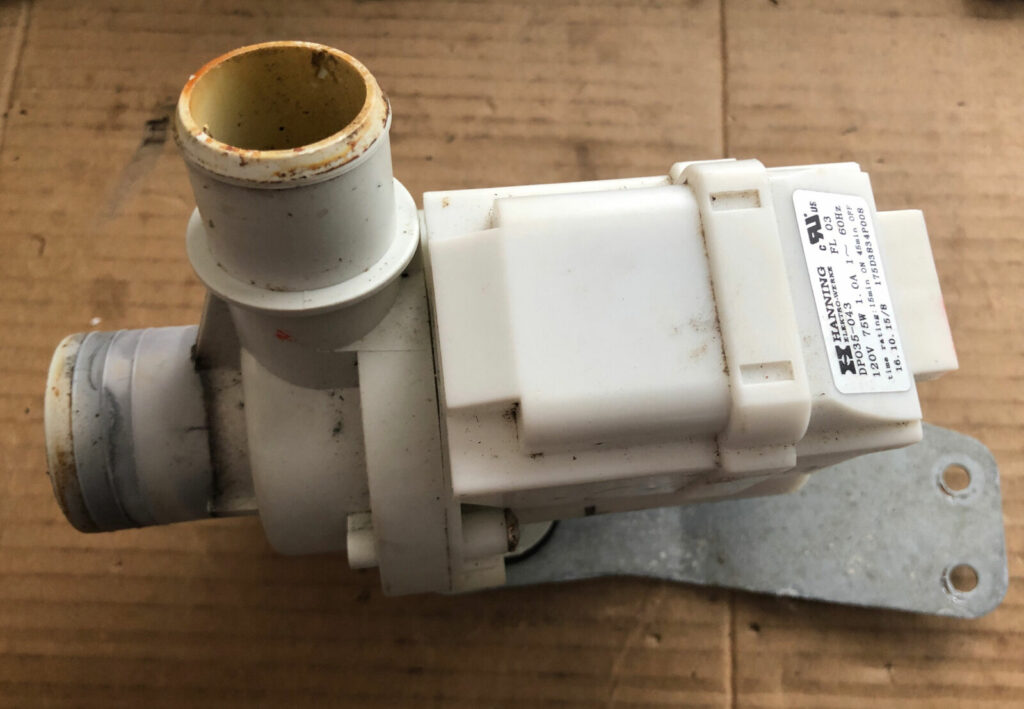
Akai adds, “Inspect the pump under good lighting for any visible damage. Pay special attention to the inlet and outlet hose connectors for signs of breakage.”
With the old pump removed, you can easily install a replacement.
Take care when reconnecting the hoses, and ensure all parts are securely fastened. As Akai Fowler recommends, “Always double-check your work to prevent future leaks.”
4. Worn Tub Seal
The tub is an impressive piece of engineering. Its parts are securely held together, with features like the tub seal preventing leaks.
Unfortunately:
Over time, the tub seal can wear out, and a damaged seal may cause leakage during washing.
Keep in mind:
Replacing the tub seal can be complex and technical.
Why?
It involves disassembling the machine to an extent that could be overwhelming for a beginner.
As a result:
You might want to seek help from a service engineer to replace the part.
But:
If you’re up for a challenge, here’s how to dismantle your GE top loader to replace the tub seal, with guidance from Akai Fowler, a Houston-based appliance repairer with 10 years of experience.
Akai notes, “Replacing the tub seal is not a simple task, especially for those who are not familiar with the inner workings of a washing machine.”
- Step 1: Turn off the hot and cold water faucets and disconnect the water supply hoses from the back of your washer.
- Step 2: Use the appropriate driver to remove the screws from the back of the control panel.
- Step 3: Slide the panel aside and disconnect the wires to detach it from the washer.
- Step 4: Employ a putty knife to undo the front panel’s spring clips.
- Step 5: Tilt the panel forward, lift it to remove it, and store both the front panel and the control panel safely.
- Step 6: Remove the two screws securing the main top, lift it gently, and use pliers to squeeze and release the lid switch wire retainer.
- Step 7: Lift the lid to access the lid switch, squeeze the tab to release it, and push it through the opening.
- Step 8: Lift the main top and set it aside.
- Step 9: Loosen the screws securing the rear and control panels. Remove the rear panel and set it aside.
- Step 10: Use pliers to disconnect the pressure tube from the switch. Then, remove the control panel and set it somewhere safe and dry.
With the top and front panels removed, we can focus on opening the tub and accessing the tub seal.
Akai advises, “Be extra careful when working with the tub, as it contains crucial components that can be damaged if not handled properly.”
- Step 11: Loosen the screws securing the shock-dampening straps to the tub and remove the straps.
- Step 12: Undo the safety clips securing the tub cover and gently lift it out of place.
- Step 13: Lift the dispenser cover and rotate it counterclockwise to remove it.
- Step 14: Use a 7/16-inch socket to remove the agitator bolt and lift it out of the tub.
- Step 15: Remove the drive block and the washer.
- Step 16: Use a 1/11-inch tub nut wrench to remove the tub nut. You might need a hammer to loosen it.
After loosening the tub nut and setting it aside, you should be able to lift out the tub.
Step 17: Use a flathead screwdriver to loosen the split ring and remove the washer underneath.
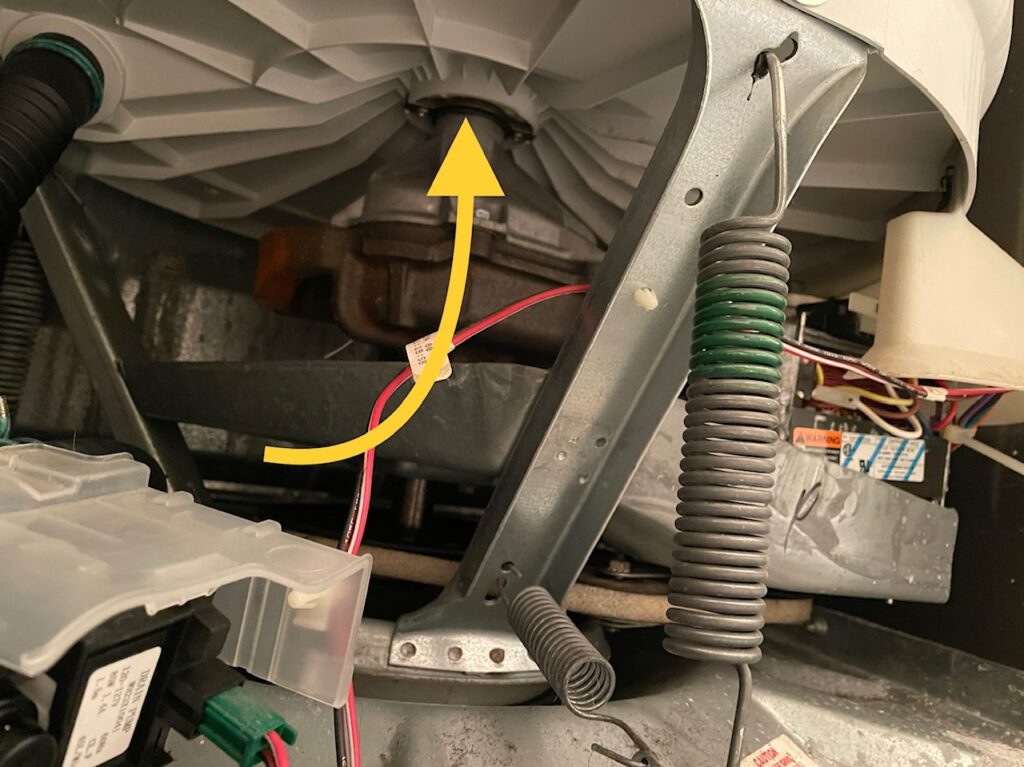
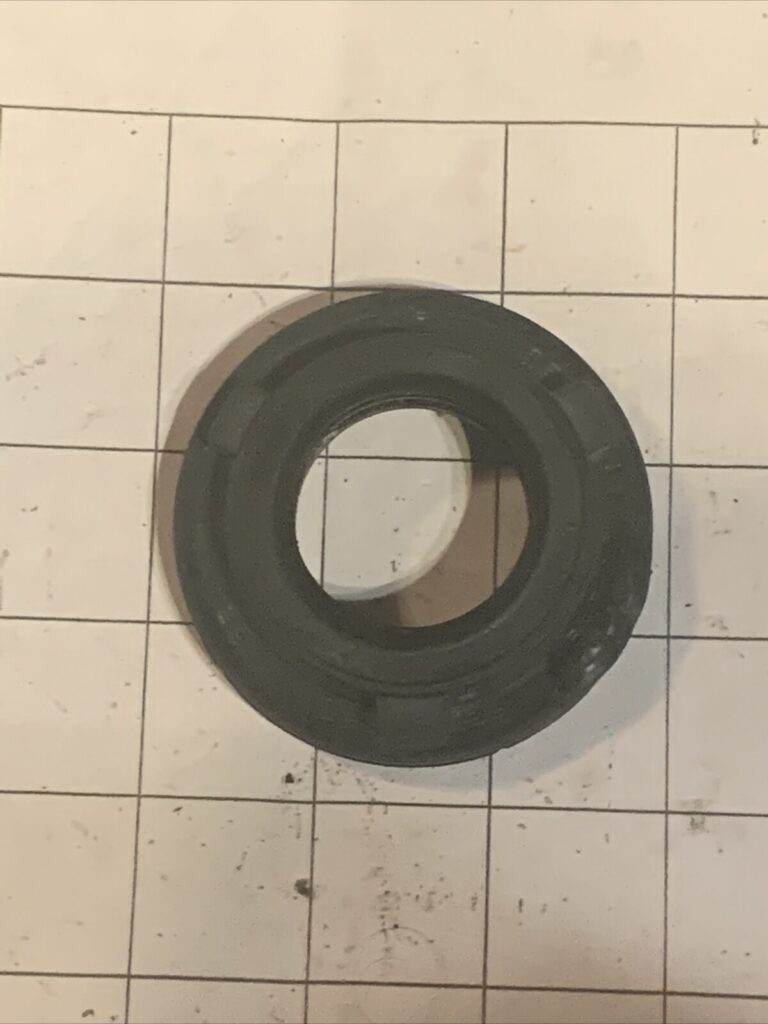
At this point:
You should see the black tub seal. If it’s intact, it should slide right off.
However:
It could be worn and may fall apart while you remove it. If so, make sure to clear all debris.
A Reddit user who is also an appliance technician shared their thoughts on a similar issue. I reached out to Akai to get his take on the situation, and he agreed with the technician’s response.
Reddit user’s issue:
The user’s GE Spacesaver (WSM2700WBWCC) was leaking from the bottom of the washer tub. They initially thought it was a leaking pump, but after replacing it, the leak persisted.
Appliance technician’s response:
The technician mentioned that the unit appears to be a Frigidaire-built model and that a leaking seal could indicate a compromised tub bearing. They also advised checking if the tub turns in one direction only and listening for a roaring sound while spinning. The technician explained that fixing the issue involves pulling the tubs, replacing the inner and outer bearings, belt, idler, tub seal, trunnion, and reassembling the unit.
Akai Fowler advises: “Apply some washing liquid on the new tub seal before slipping it in. Remember the order of items you need to reassemble and put your machine back together.”
Final Caution:
“Do not attempt this procedure if you aren’t confident in your technical skills,” warns Akai. “If you’re unsure, it’s best to consult a professional.”
5. Damaged Water Inlet Valve

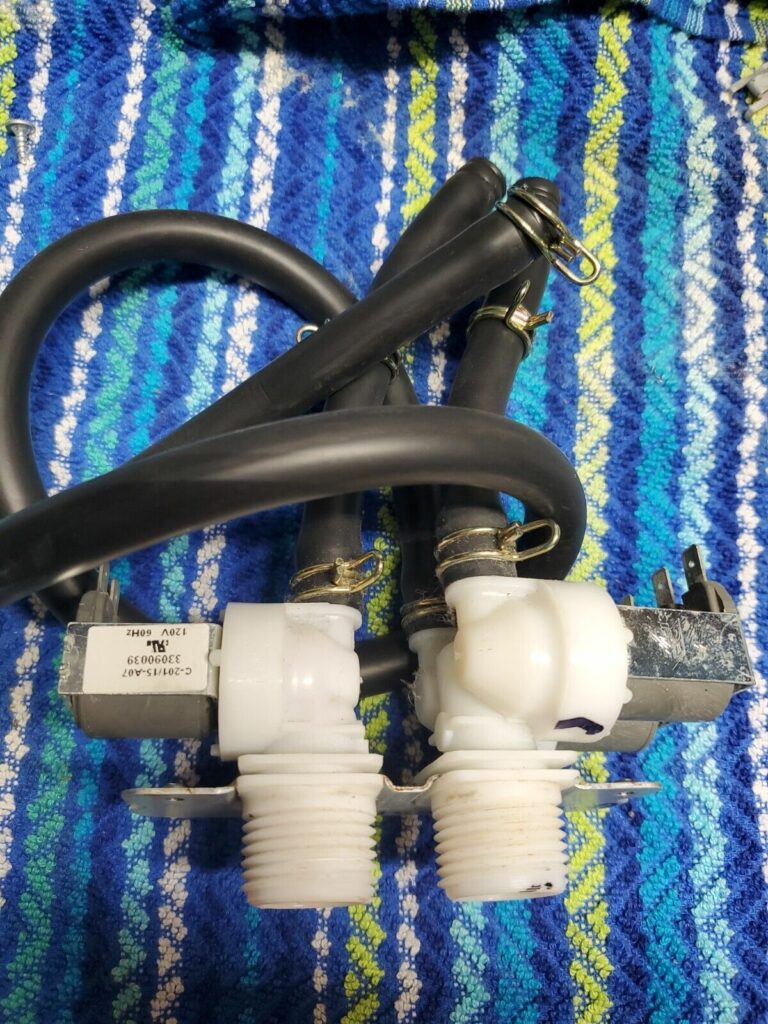
Note:
The water inlet valve controls the flow of hot and cold water into your GE washer.
Regrettably:
Leaks may occur if one or both solenoids fail, the washer tub is cracked, or water isn’t flowing properly.
The good news:
Installing a new water inlet valve isn’t overly complex, but it does require removing the top panel of your GE washer.
Akai Fowler, a Houston-based appliance repairer with 10 years of experience, shares his advice on replacing a faulty inlet valve in a GE front loader washer:
- Step 1: Unplug your machine.
- Step 2: Turn off the hot and cold water taps. Use a wrench to disconnect the hoses from your washer.
- Step 3: Using a Phillips screwdriver, remove the screws securing the top of your washer to the machine.
- Step 4: Slide the top back slightly and remove the plastic trim before setting the lid aside.
Akai advises, “Always take extra caution when working with the water inlet valve, as improper handling may cause further issues.”
- Step 5: Disconnect the old water inlet valve from the washer.
- Step 6: Use a pair of pliers to disconnect the inlet hose from the valve.
- Step 7: Use a Phillips screwdriver to undo the screws securing the water inlet valve to the washer.
- Step 8: Remove the old valve and check for breaks or obstructions before replacing it.
Lastly:
After reassembling your washer, try running a normal wash cycle. Akai explains, “Changing the valve should resolve the leak. However, if the problem persists, consider reaching out to a professional for assistance.”
Models Most Affected
Sadly:
Leaking is a common problem associated with washers of all types. You could run into this issue with any GE washer model.
However:
Here are specific models known to develop this problem over time.
1. GE Top Load Washer
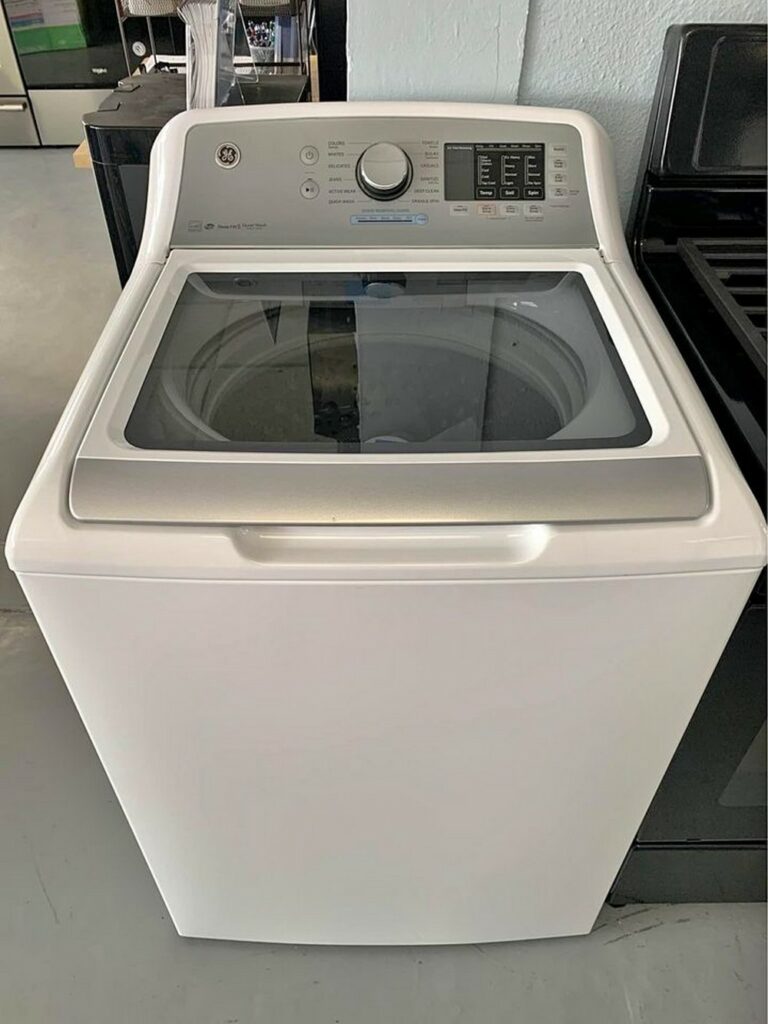
Now:
The top load washer’s tub seal sits at the bottom of the machine.
Agitation over time could wear it out, causing your GE washer to leak from the bottom.
Optimistically:
You can deal with the leak by checking on and replacing your tub seal at least once a year.
2. GE Front Load Washer
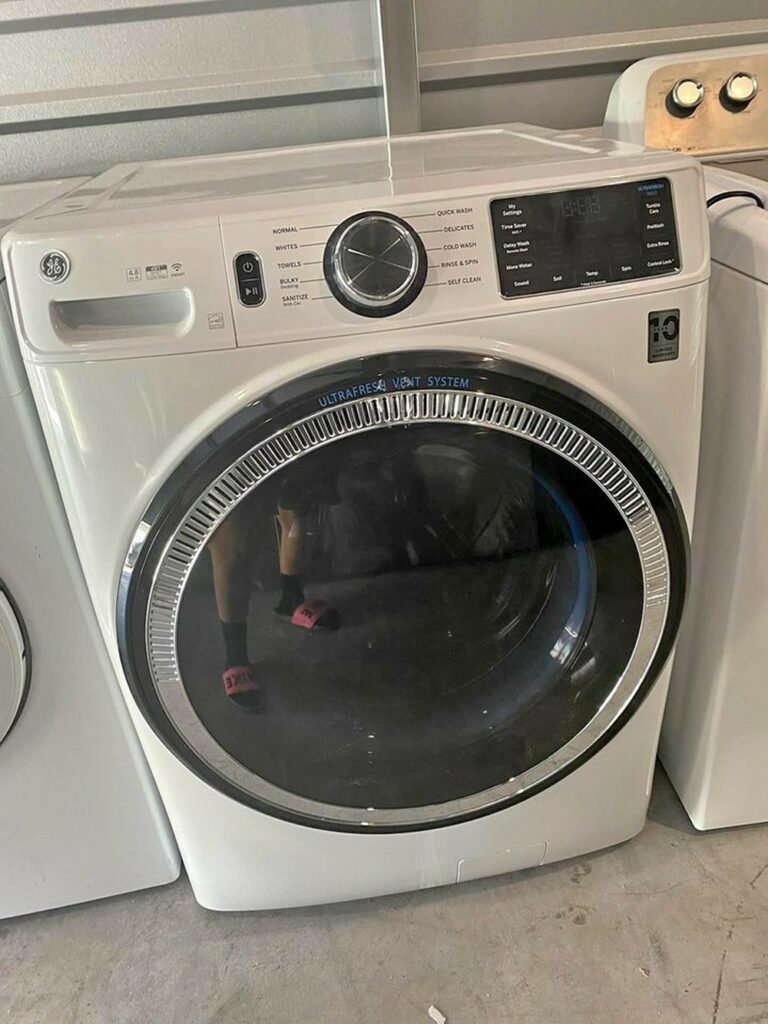
The water inlet valve in your GE front loader could crack and leak if you move the machine around a lot.
As such:
Be sure to disconnect the inlet water hoses before you move your washer to avoid unnecessary problems.
Conclusion
Remember:
The key is to remain calm when you notice your GE washer is leaking from the bottom. Your machine works with water, so such a problem is bound to happen.
Now:
Take a deep breath and work through the troubleshooting list we have provided. Your washer may be suffering from one of these issues.
- Faulty external drain hose
- Faulty internal drain hose
- Leaky drain pump
- Worn tub seal
- Damaged water inlet valve
Be careful when performing these repairs, and your washer should work without leaking once you are done.
Finally:
Did this guide come in handy? Did you notice a possible fault or fix that we may have missed?
Well:
Let us know in the comment section below!
Frequently Asked Questions
The tub seal in your GE washer may be worn or broken if it leaks during agitation. Consult an engineer to replace the part, or follow the guide above.
You may need to replace either the external drain pipe or the tub-to-pump drain pipe. One of these parts could be damaged and leaking.
Depending on the part requiring replacement and the overall repair cost, your GE washer might be worth fixing.
In any case, it should be less than half the cost of the washer to be considered worth it.