
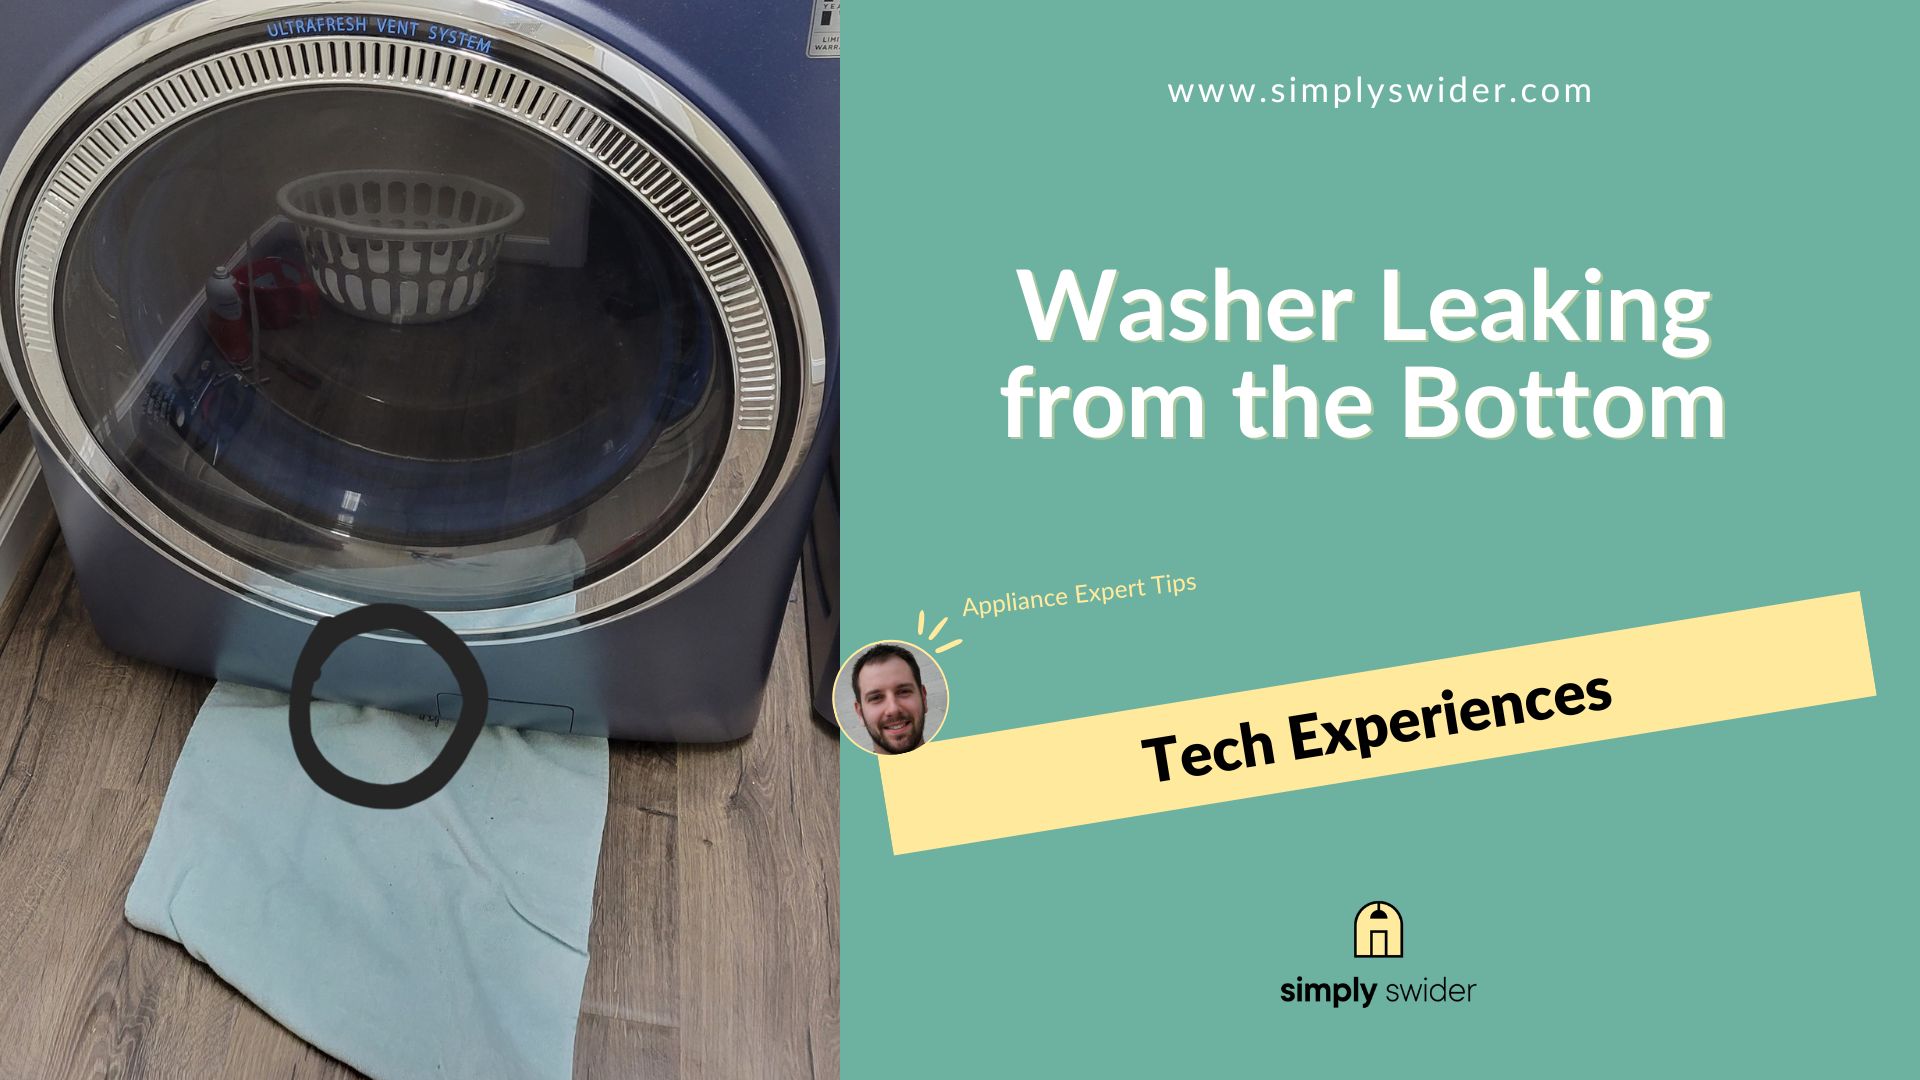
Ah, the all-too-familiar sight:
You enter your laundry room, only to discover your washer leaking from the bottom. Trust me, as an appliance technician, I’ve come across this issue more times than I can remember. It’s a common hassle, but thankfully, one that’s often within your power to fix.
You’re in the right hands:
I’m here to walk you through pinpointing and remedying this leaky predicament. Tools at the ready? Let’s tackle this head-on and restore order to your laundry room!

Table of Contents
Why Is Your Washer Leaking from the Bottom?
Typically, when faced with a leaky washing machine, the first thing that comes to mind is a damaged internal or external hose. However, several other factors can also cause this issue. Problems with the tub seal, door boot seal, or drain pump can lead to leaks in your washer.
Nevertheless:
A leaky washing machine is a problem that should not be taken lightly. For this reason, I’ve decided to create this guide.
Thankfully:
Having helped numerous clients fix their leaky washers, I’ve uncovered some excellent handyman secrets. To further aid our troubleshooting, I reached out to Jacob Davis, a Bristol-licensed appliance technician, for his expert advice.
So, unplug your washer, and let’s get to fixing it!
7 Frequent Culprits and DIY Solutions to Prevent Washer Leaks
| Commonly Affected Parts | Estimated Cost |
|---|---|
| Internal drain hose | $15 – $30 |
| External drain hose | $15 – $40 |
| Dispenser hose | $25 – $30 |
| Tub-to-pump | $18 – $35 |
| Tub seal | $5 – $30 |
| Door boot seal | $35 – $60 |
| Drain pump | $20 – $100 |
1. Internal Drain Hose Issues

| Part | Internal drain hose |
| Location | It is located underneath the washer, connected to the drain pump |
| Ease of troubleshooting | Easy |
| Cost | $15 – $30 |
| Repairable | No – once damaged, the internal hose must be replaced |
Problem:
Based on my experience, the internal drain hose is often a major cause of leaking in washers.
Typically:
This issue arises when the internal drain hose, which is connected to the drain pump, becomes damaged. Once the hose is compromised, water tends to leak from the washer. Additionally, a damaged drain hose can also impede the washer’s draining process.
Identification:
For example, a Reddit user noticed their washer started leaking and making loud noises after moving it to a new home. It turned out the drain hose had been damaged during the move. Therefore, it’s advisable to inspect your washer’s internal drain hose for any signs of damage. You can do this by gently flexing the hose and looking for any cracks or tears.
Solution:
If you find that the internal drain hose is damaged, the only way to stop the leak is to replace it. Start by unplugging your washer and turning off the hot and cold water supplies. Then, follow these steps to replace the internal drain hose:
- Step 1: Remove the external drain hose from the drain opening.
- Step 2: Disconnect the hot and cold water lines from their respective inlet valves.
- Step 3: Place a towel and pan under the external drain hose to catch any spills.
- Step 4: Detach the external drain hose.
- Step 5: Unscrew the screws near the drain opening.
- Step 6: Push the drain outlet inward.
- Step 7: Tilt the washer back to access the internal drain hose.
- Step 8: Slide down the clamps securing the old drain hose and remove the hose.
- Step 9: Transfer the clamps from the old hose to the new one.
- Step 10: Install the new hose into the washer and reassemble the machine.
Finally:
After reassembly, turn on your washer and run a cycle to ensure the hose is properly installed and functioning.
2. Broken External Drain Hose
| Part | External drain hose |
| Location | It is connected to the back of the washer and leads to the drain |
| Ease of troubleshooting | Easy |
| Cost | $15 – $40 |
| Repairable | No – once torn or damaged, the external drain hose must be replaced |
Problem:
Like the internal drain hose, a broken external drain hose can cause your washer to leak.
If the drain hose that leads to the drain is broken or torn, water will leak from it and soak your laundry room floor.
Identification:
A common mistake users make, which can damage the drain hose, is placing the washer too close to the wall. This can cause the hose to crack and leak.
Recently:
A member of our Facebook community faced this issue with his LG WM2688HWM Tromm Front Load Washer.
When I visited his house, I found that the back of his washer was almost touching the wall. This caused the external drain hose to puncture when the washer vibrated during a wash cycle.
Now:
Inspecting the external drain hose follows a procedure very similar to that for the internal hose.
Simply gently bend the drain hose and check for any cracks or tears.
Solution:
If you find that the external hose is broken, it must be replaced with a new one. First, unplug your washer and pull the drain hose out of the wall. Then, follow these steps:
- Step 1: Remove the screws that secure the drain hose to the back of the machine.
- Step 2: Remove the clamp that secures the hose to the fitting.
- Step 3: Detach the drain hose from the machine.
- Step 4: Fit the clamp onto the new drain hose.
- Step 5: Attach the new drain hose to the back of the machine.
- Step 6: Reinsert the other end of the hose into the drain.
Jacob adds: “To prevent this problem in the future, always ensure there’s enough space between the back of your washer and the laundry room walls.”
3. Leaky Dispenser Hose
| Part | Dispenser hose |
| Location | It is underneath the access cover of the washer, connected to the water inlet valve and dispenser nozzle |
| Ease of troubleshooting | Easy |
| Cost | $25 – $30 |
| Repairable | No – once it begins to leak, the hose must be replaced |
Problem:
In addition to the drain hoses, the dispenser hose is another common suspect when a washer begins leaking from the bottom.
Typically:
The dispenser hose is a short hose connecting the water inlet valve to the dispenser nozzle. If this hose gets punctured or damaged, it will leak water, potentially creating a large pool underneath your washer.
Identification:
A member of our Facebook community contacted Jacob when her Samsung WF45T6000A Front Load Washer started leaking. After inspecting both the dispenser and drain hoses, he decided to check the dispenser hose.
To do this:
Jacob removed the back access cover, located the dispenser hose, and inspected it. He eventually discovered that the hose was damaged, causing the washer to leak water and nearly ruin the client’s hardwood floor.
Solution:
If you find that the dispenser hose is damaged, it must be replaced to fix your washer.
Before attempting the replacement, I recommend turning off your washer to avoid electrocution. Follow these steps to replace the dispenser hose:
- Step 1: Remove the access cover at the back of your washer.
- Step 2: Unhook the wire connector attached to the water inlet valve.
- Step 3: Gently ease the clamp on the dispenser hose downwards.
- Step 4: Remove the dispenser valve from the water inlet valve.
- Step 5: Go to the front of the washer, near the dispenser.
- Step 6: Locate the dispenser nozzle.
- Step 7: Reach underneath the washer to remove the dispenser nozzle.
- Step 8: Pull out the dispenser hose assembly, nozzle, and clamps.
- Step 9: Remove the clamps and nozzle from the old hose.
- Step 10: Cut the new dispenser hose to the same length as the old one.
- Step 11: Attach the dispenser nozzle and clamps to the new hose.
Finally:
Reinstall the dispenser hose into the washer and turn it back on. Then, run a test cycle to ensure that the new dispenser hose is secure and prevents any further leaking.
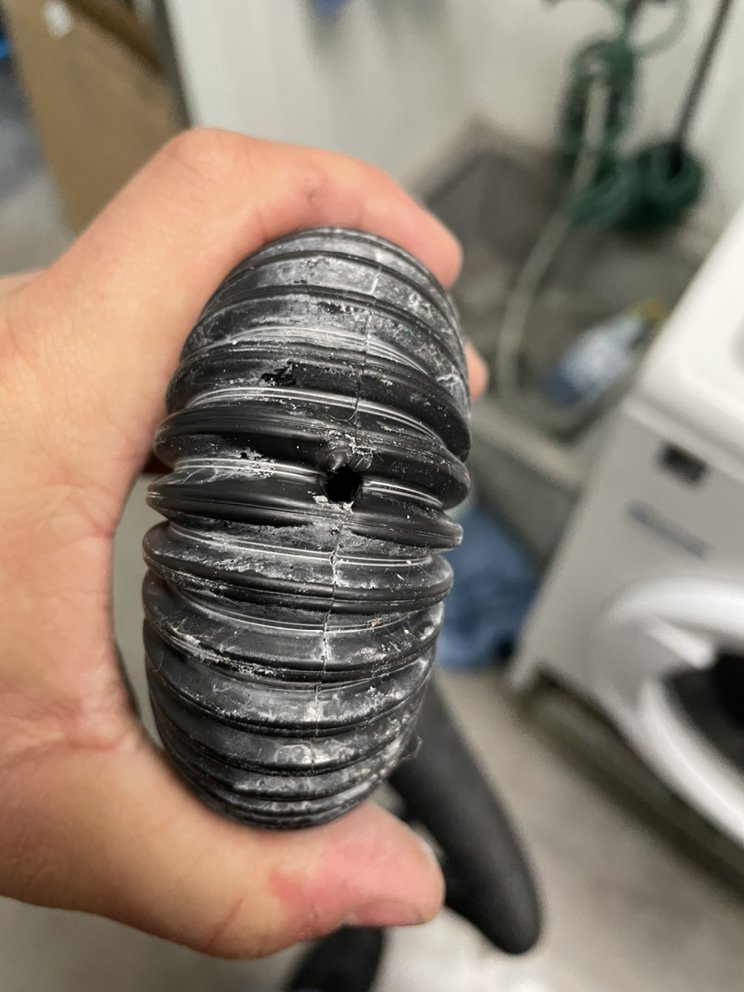
4. Broken Tub-To-Pump Hose
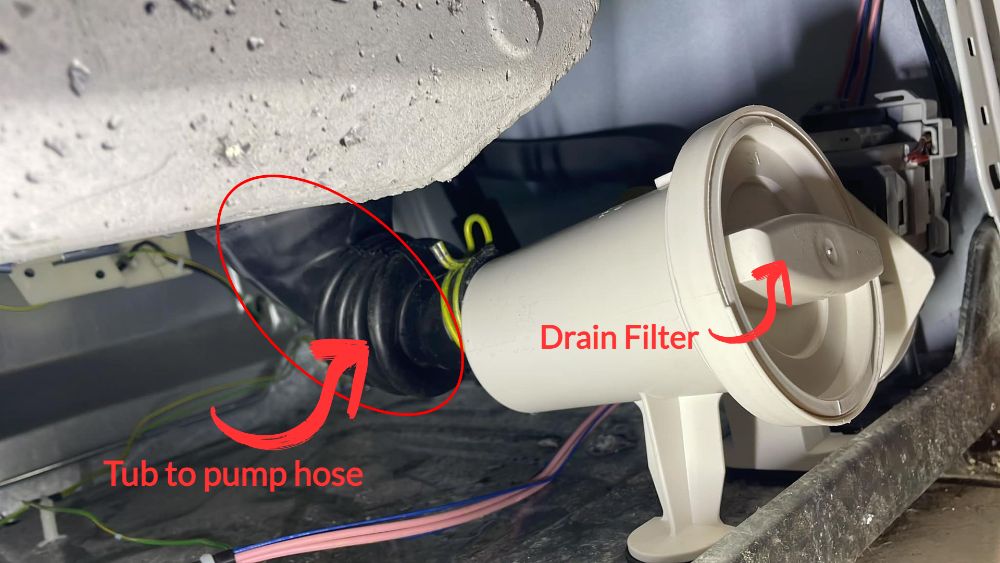
| Part | Tub-to-pump hose |
| Location | It is located underneath the washer, connected to the washer’s outer tub and drain pump |
| Ease of troubleshooting | Easy |
| Cost | $18 – $35 |
| Repairable | No – once torn, the hose must be replaced |
Problem:
As the name implies, the tub-to-pump hose connects your washer’s outer tub to the drain pump beneath the machine. This short but thick internal hose can cause your washer to leak from the bottom if it becomes torn or damaged.
Here’s how it happens:
Over time, the hose weakens until it fractures, creating a passage for water to escape from your washer.
Identification:
Last week’s discovery:
I came across a post on Reddit where a user discussed how his LG WT1501CW Top Loading Washer was leaking from the bottom. He observed that the leaks occurred whenever the washer was draining. After reading this, I suspected the tub-to-pump hose was the culprit, and Jacob concurred.
In Jacob’s words: “The first thing to suspect when your washer starts leaking during the drain cycle is the tub-to-pump hose. This usually means the hose is worn out or damaged.”
Solution:
Given that the Reddit post mentioned an LG washer, I’ll demonstrate how to replace the tub-to-pump hose using an LG washer as an example.
Before you start:
Ensure the washer is unplugged and put on protective gloves.
Then, follow these steps:
- Step 1: Carefully remove the washer’s rear access panel.
- Step 2: Place a towel on a sturdy stool and gently tilt the washer forward until it rests on the stool.
- Step 3: Locate the tub-to-pump hose inside the washer.
- Step 4: Place a towel under the drain pump and release the hose by sliding its clamp down.
- Step 5: Slide the clamp securing the hose to the outer tub.
- Step 6: Remove the hose from the washer.
- Step 7: Install the new hose and secure it with its clamps.
After completion:
Carefully raise the washer back to its upright position and reinstall the rear access panel.
5. Torn Tub Seal
| Part | Tub seal |
| Location | For top-load washers, the tub seal is located underneath the outer tub For front-load washers, there are two tub seals. One is located inside the outer tub, while the other one holds the two halves of the outer tub. |
| Ease of troubleshooting | Difficult |
| Cost | $5 – $30 |
| Repairable | No – the seal must be replaced once damaged |
Problem:
Seals, especially tub seals, are integral to washers to prevent water from leaking. The tub seal is a common factor in washing machine leaks.
Here’s why:
The tub seal is designed to keep water from leaking out of the tub when filled. A torn or damaged seal will cause leaks once the tub is full.
Identification:
Before checking if the washer’s tub seal is torn, you should know its location, which varies by model.
Typically:
Top-load washers have their tub seals under the tub, while front-load washers have the seals inside the outer tub at the rear. Front-load washers also have an additional seal that holds the two halves of the outer tub together.
Get this:
Puddles of water under your washer when the tub is full indicate a broken tub seal.
Solution:
A Reddit user posted a video of his leaking Whirlpool WTW6200VWD Top Load Washer. After viewing the video, it seems the tub seal was torn, causing the leak.
Now:
If your washer’s tub seal is damaged, troubleshooting the leak becomes more complicated than the steps previously explained. Jacob adds:
“If you’re inexperienced with DIY projects, I wouldn’t recommend attempting to replace the tub seal yourself, as it requires disassembling the washer. However, if you’re confident in your skills, you may proceed with the repair.”
For the referenced Whirlpool Top Load Washer, follow these steps to replace the tub seal:
- Unplug the washer and turn off the water supply.
- Disconnect the water supply hoses.
Then:
- Step 1: Secure the washer lid with tape.
- Step 2: Remove the hinge from the rear panel.
- Step 3: Take off the tube cover at the back of the washer.
- Step 4: Lift and support the main top.
- Step 5: Release the tabs holding the tub ring and remove it.
- Step 6: Remove the fabric dispenser and agitator cap.
- Step 7: Detach the agitator bolt and agitator from the drive shaft.
- Step 8: Unscrew the tub nut and lift out the inner tub.
- Step 9: Take off the drive block and close the main top.
- Step 10: Tip the washer forward onto a towel or cloth.
- Step 11: Remove the belt cover and belt.
- Step 12: Detach the motor from the transmission housing.
- Step 13: Remove the actuator and capacitor.
- Step 14: Take off the drive pulley and splutch housing.
- Step 15: Remove the transmission housing from the outer tub and pull out the assembly.
- Step 16: Extract the old tub seal from the outer tub.
- Step 17: Grease the new tub seal and slide it onto the transmission shaft.
- Step 18: Insert the transmission shaft back into the outer tub.
Finally:
Reassemble the washer and turn it back on. Replacing the tub seal should stop the leaking.
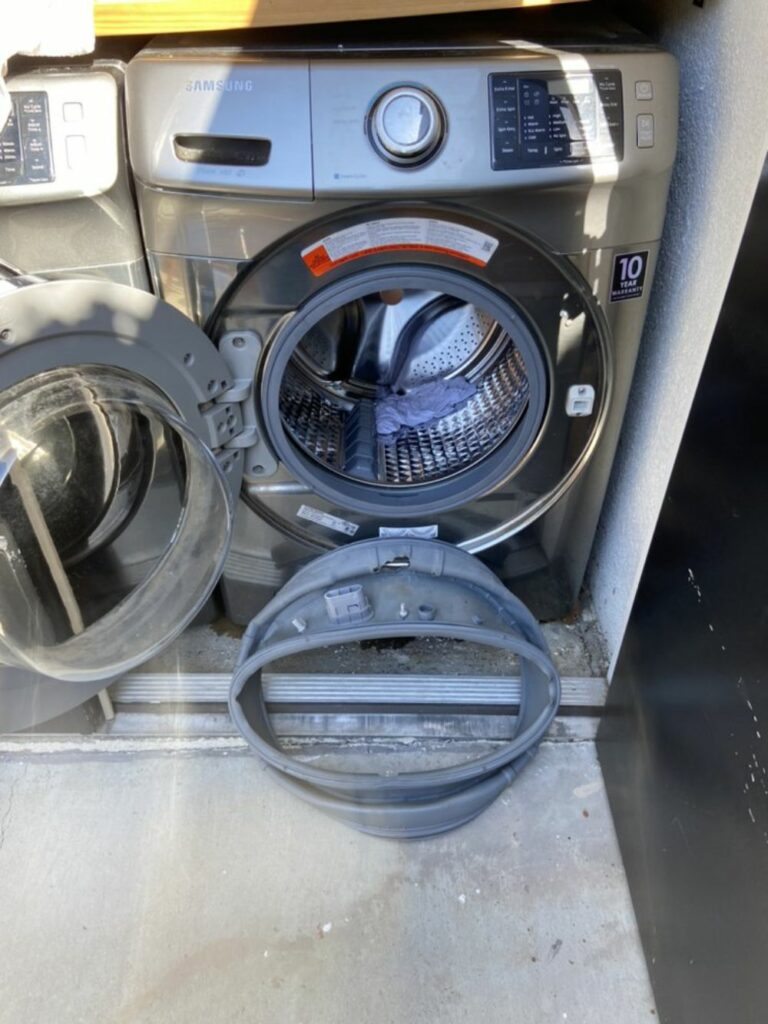
6. Broken Door Boot Seal
| Part | Door boot seal |
| Location | It is located between the washer’s front panel and outer tub |
| Ease of troubleshooting | Medium |
| Cost | $35 – $60 |
| Repairable | No – it must be replaced once punctured or damaged |
Problem:
Aside from the tub seal, the door boot seal is another component that can cause leaks in your washer.
The door boot seal, located between the outer tub and the front panel, is designed to prevent water from leaking out of the tub. If sharp objects puncture this seal, water will leak through the holes and end up on your laundry room floor.
Identification:
To check if the door boot seal is damaged, open the washer door. Before inspecting the seal, wear protective gloves to avoid injury from any sharp objects that might be lodged in the seal. Gently flex the seal and inspect it for damage. If you find punctures, the seal will need replacement.
Last week:
A member of our Facebook community had an issue with her LG WM3500CW Washer leaking. I discovered a key wedged in the door boot seal, which had punctured and damaged it.
Solution:
If the seal is damaged, don’t worry. Replacing the door boot seal is much easier than replacing the tub seal.
Just follow these instructions from Jacob:
First:
Unplug your washer and use a flat-head screwdriver to remove the clamp from the door boot seal. Then proceed with the following steps to replace the seal:
- Step 1: Peel the seal away from the front panel.
- Step 2: Reach inside and disconnect the wire connection attached to the door latch.
- Step 3: Open the pump filter cover and unclip the drain tube.
- Step 4: Remove the filter housing.
- Step 5: Unthread the screws securing the main top and remove it.
- Step 6: Take out the dispenser drawer and the mounting screws that secure the front control panel.
- Step 7: Remove the washer’s upper front panel.
- Step 8: Detach the hoses connected to the upper part of the door boot seal and remove the seal from the drain tube.
- Step 9: Take off the clamp around the door boot seal and peel the seal out of the tub.
- Step 10: Transfer the nozzle from the old seal to the new one.
- Step 11: Lubricate the new seal with dish soap and position it in the tub.
- Step 12: Reattach the hoses to the door boot and secure the drain tube.
Finally:
Reassemble the washer and attach the door boot seal to the front panel.
7. Drain Pump Issues
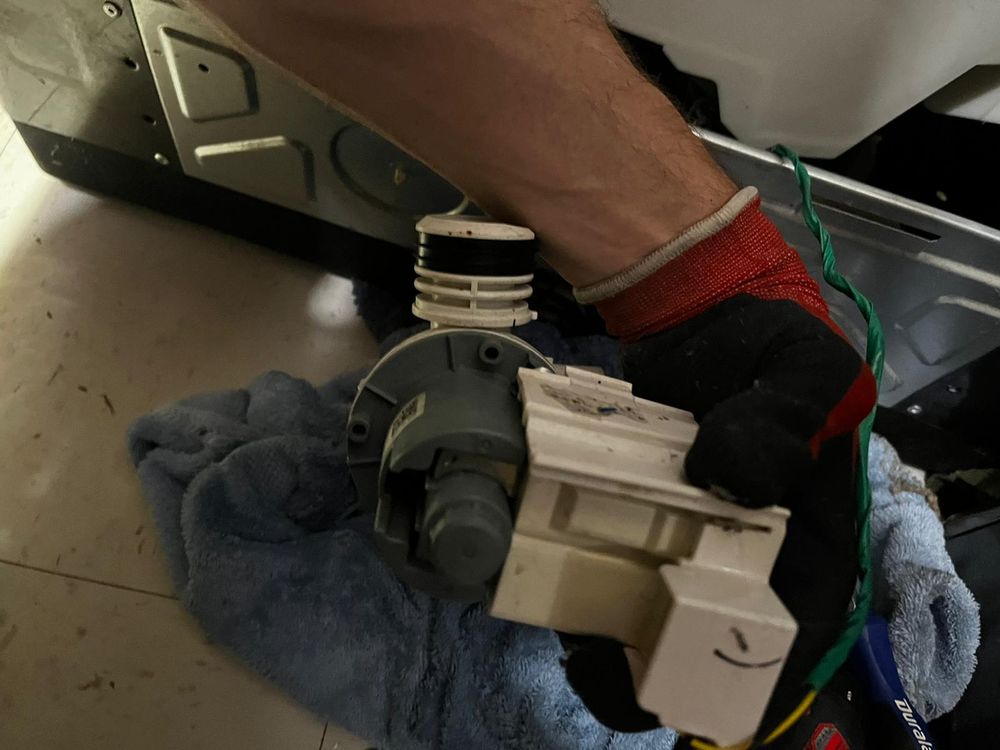
| Part | Drain pump |
| Location | It is located underneath the washer, connected to the tub-to-pump and internal drain hose |
| Ease of troubleshooting | Easy |
| Cost | $15 – $50 |
| Repairable | No – once cracked, it must be replaced |
Problem:
The drain pump is a key factor to consider when your washer starts leaking water.
As its name suggests, the drain pump is tasked with draining wastewater from your tub at the end of a cycle.
Hence:
If the drain pump begins to crack or develops a fault, it could lead to your washer leaking. Additionally, a clogged drain pump can prevent your washer from spinning properly.
Identification:
To check if the drain pump is cracked or damaged, inspect the areas around it.
The drain pump is typically located underneath the washer, connected to the drain and tub-to-pump hoses.
Of course:
If you find a puddle of water on the floor beneath the pump, and the attached hoses are intact, the drain pump is likely faulty.
Also, the presence of white residue on the pump indicates that soapy water is leaking from it.
Solution:
Last month:
I came across a Reddit post about a user’s leaky Whirlpool WTW6600SW2 Washer. He discovered that the issue was a faulty drain pump and resolved it by replacing the pump.
Jacob adds: “Once the drain pump is cracked or damaged, replacing it is the only way to stop your washer from leaking. Also, ensure that the hoses connected to the pump are tight.”
Now:
After unplugging the washer and turning off the water supply, follow these steps to replace the drain pump:
- Step 1: Detach the external drain hose.
- Step 2: Place a dry towel on the floor near the washer.
- Step 3: Gently tilt the washer onto its rear panel so it rests on the towel.
- Step 4: Unthread the screws securing the drain pump to the washer.
- Step 5: Disconnect the wires from the old drain pump.
- Step 6: Remove the internal drain hose and tub-to-pump hoses from the drain pump.
- Step 7: Install the new drain pump by attaching the hoses to it.
- Step 8: Place the heat shield behind the new drain pump and secure the pump with its mounting screws.
- Step 9: Connect the wires to the new drain pump.
Once done:
Stand the washer up and reconnect the drain hose.
All in All…
A leaking washer can be a headache. While damaged hoses or drain pumps are often the usual suspects, don’t overlook problematic seals.
Now:
You can stop those leaks by replacing internal or external drain hoses, dispenser hoses, or tub-to-pump hoses. You might even need to change out tub and door boot seals.
Still puzzled? Our “Ask the Expert” feature is here to guide you.
Before you go, feel free to share any troubleshooting stories or handy tips in the comments. Your insights could be invaluable to someone else!