

Let me guess:
You’re here because your washer didn’t drain after the wash cycle. Or, you may have backed-up water from the drain pipe standing in your wash drum.
Whichever way:
This guide is exactly what you need. By following the directions of Brad Edwards, an experienced appliance technician from Bethlehem, GA, I will show you how to identify, fix, and prevent drainage issues.
So:
Stick around for the juicy details.
Table of Contents
5 Common Causes and Troubleshooting Guidelines for a Washer that Won’t Drain
To begin with:
Though tedious, you’d have to bail out the water in your tub. So, grab your rubber gloves, bucket, and a cup and carefully scoop out the water from the tub.
Once empty:
It is time to combat the draining issue. Brad insists on employing safety precautions when repairing your washer for any faults.
He asserts:
“Before troubleshooting your washer, you must shut off the power and water supply. Also, wear safety gear and ensure the environment is hazard-free.”
“It is better to be safe than sorry,” he adds.
That said:
Your washer could suffer these drainage issues for specific reasons. Let’s explore the most common causes of a washer that won’t drain.
| Commonly Affected Parts | Estimated Costs |
|---|---|
| Drain pump | $30 – $350 |
| Drain hose | $10 – $80 |
| Lid switch | $20 – $100 |
| Door lock latch | $20 – $200 |
| Drain pump filter | $15 – $70 |
| Pump belt | $5 – $50 |
1. Faulty or Clogged Drain Pump
| Part | Drain pump |
| Location | It is located at the bottom of the washer behind the front access panel. |
| Ease of troubleshooting | Moderate |
| Cost | $30 – $350, depending on the model |
| Repairable | Yes – If it is clogged No – If it is damaged |
Get this:
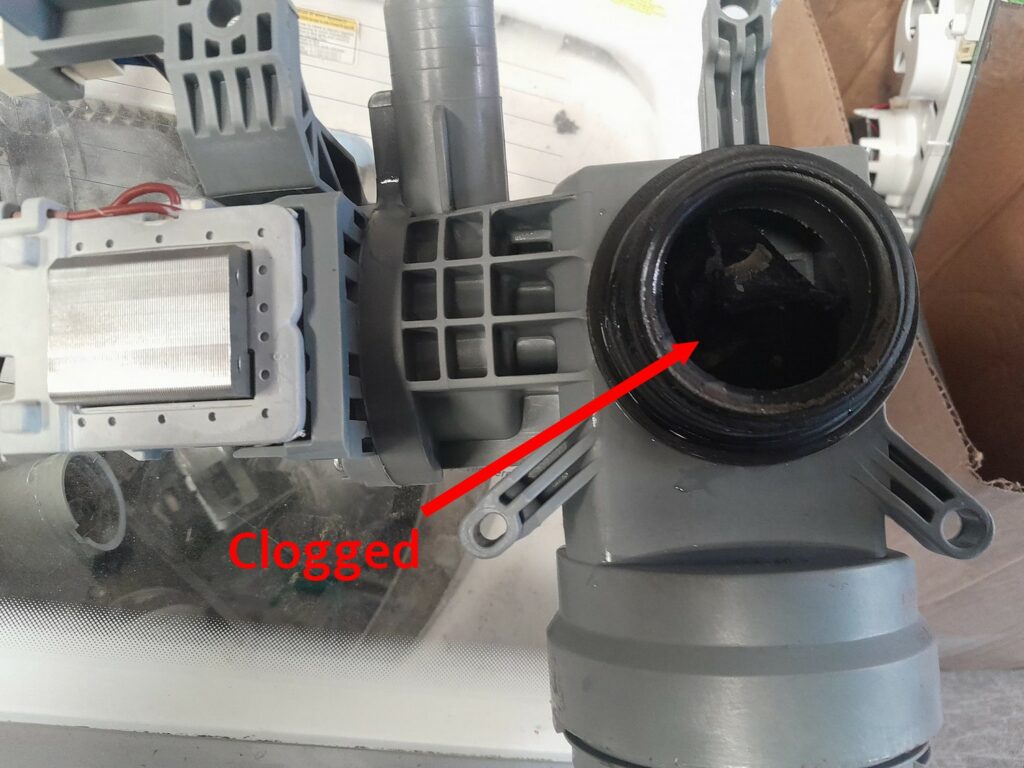
The drain pump is the core component that extracts water from the washer after a wash cycle. As such, a faulty or clogged drain pump will lead to serious draining problems that could get further complicated.
Now:
Brad points out that you must listen for certain sounds during the drain cycle to diagnose this fault. If you hear a humming sound, it likely indicates a faulty pump, while a gurgling sound hints at a clog.
You see:
In our Simply Swider Appliance Repair Community, a group member, recently posted about his drainage issues with his Maytag washer. They said, “Maytag front load washer; no drain, one face mask, and some change later… it worked again.”
So, how did he troubleshoot it?
Brad directs, “Access the drain pump, detach it, check for clear signs of damage, and dislodge accumulated debris. If that doesn’t do the trick, grab a multimeter and test the pump for electrical continuity.”
The thing is:
If it lacks electrical continuity, you must replace it. Your local appliance store should have authentic replacements; otherwise, check your washer’s part store or an online store like eBay.
2. Clogged or Damaged Drain Hose
| Part | Drain hose |
| Location | It is attached to the drain pipe and pump at the back of the washer. |
| Ease of troubleshooting | Easy |
| Cost | $10 – $80, depending on the model |
| Repairable | Yes – If it is clogged or kinked No – If it is damaged |
Now:
The drain pump works with the drain hose to siphon water from the wash drum during the drain cycle. It is a core component whose fault could also lead to drainage complications.
Furthermore:
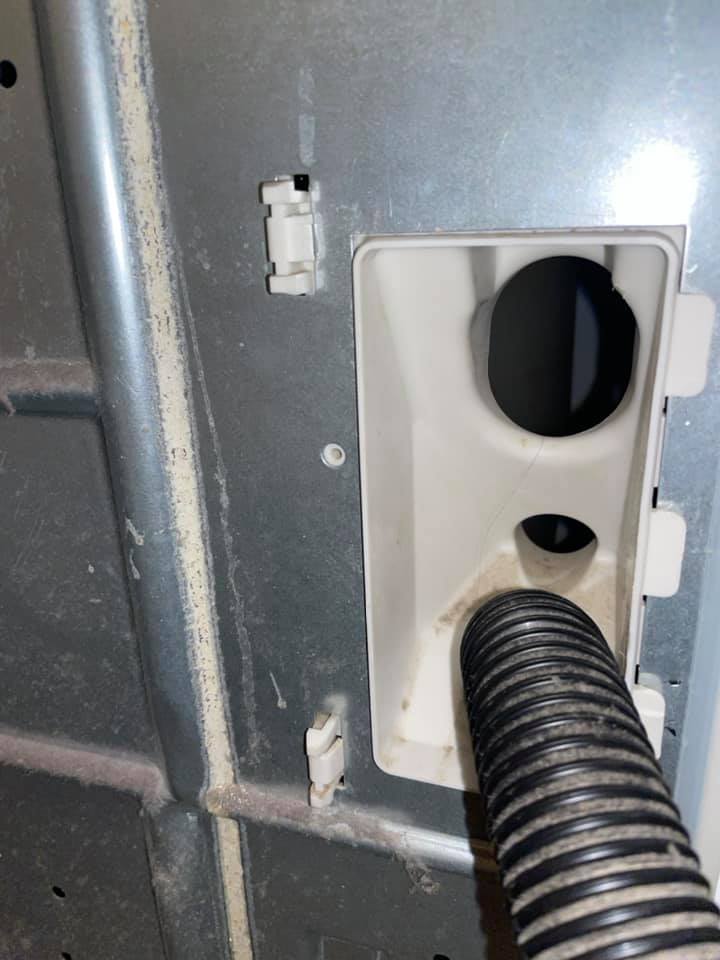
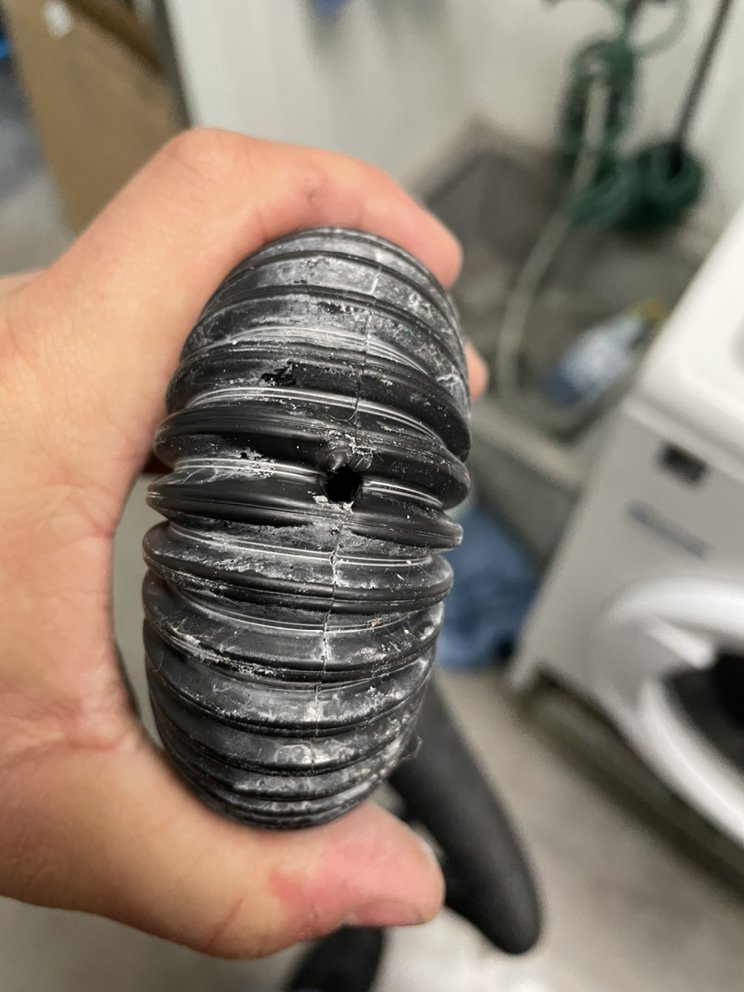
Brad claims that a kinked or clogged drain hose is one of the primary causes of a washer that won’t drain. He adds, “If the hose is cracked or improperly installed into the drain pipe, it could also pose a challenge for proper draining.”
In any case:
Nick Harris, a Simply Swider reader whose Kenmore washer was not draining, reached out for help with identifying an issue with his drain hose.
To this:
Brad asserts that you can identify a fault in the drain hose by looking out for backed-up water standing in the wash tub. He also says you may notice leakage, a pungent smell, or a strange gurgling noise from the hose.
Here’s what to do after diagnosing the problem:
Straighten the hose to remove kinks, then examine for visible damage or blockage. Finally, clear out the build-up and replace the hose if worn or damaged.
3. Defective Lid Switch or Door Lock Latch
| Part | Lid switch (Top Load) Door lock latch (Front Load) |
| Location | Both parts can be found close to the door opening inside the top or front access panel. |
| Ease of troubleshooting | Moderate |
| Cost | $20 – $200, depending on the model |
| Repairable | Yes – If it is misaligned No – If it is defective |
Know this:
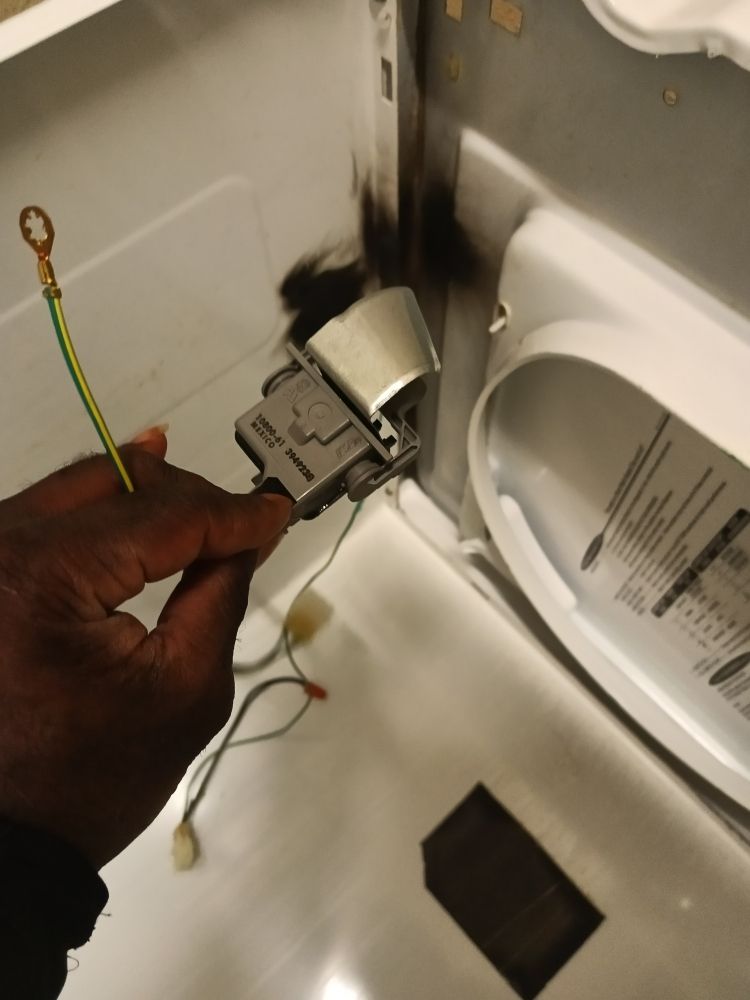
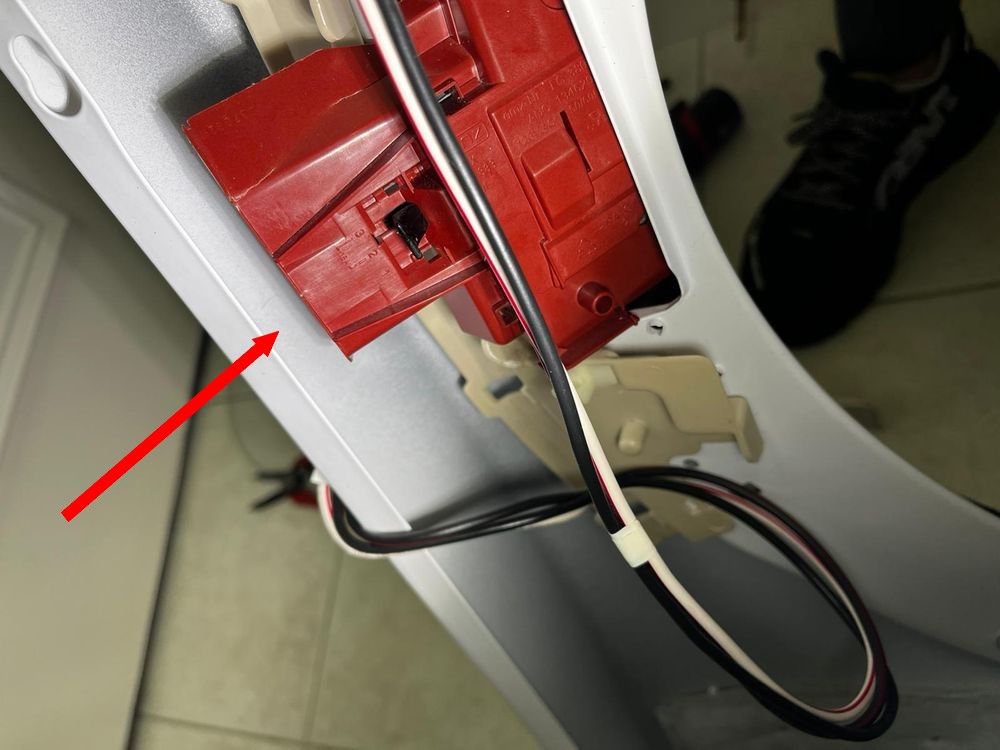
The lid switch is the door locking mechanism in a top-load washer, while the door lock latch is operative in a front-load washer.
If your washer’s door or lid is not firmly closed, the door lock mechanism is designed to prevent it from starting any cycle.
So:
Your washer will not start the drain and spin cycle if the lid switch or door lock latch is defective. It is also possible for the part to have a misalignment.
To diagnose this issue:
Brad suggests listening for a clicking sound when closing your washer lid or door. You must test the part for electrical continuity if you don’t hear the sound.
Here’s how to troubleshoot your door-locking mechanism:
“If the part lacks electrical continuity, replace it. However, if it got nudged out of place, simply realign it. Be very cautious when handling the wiring to avoid hazards,” Brad asserts.
Note that:
If your Whirlpool washer is not draining and the warranty covers your appliance, you can demand a free replacement part from Whirlpool Customer Support.
4. Clogged Drain Pump Filter
| Part | Drain pump filter |
| Location | It is located at the bottom of the front access panel of the washer, close to the drain pump. |
| Ease of troubleshooting | Easy |
| Cost | $15 – $70, depending on the model |
| Repairable | Yes |
Understand this:
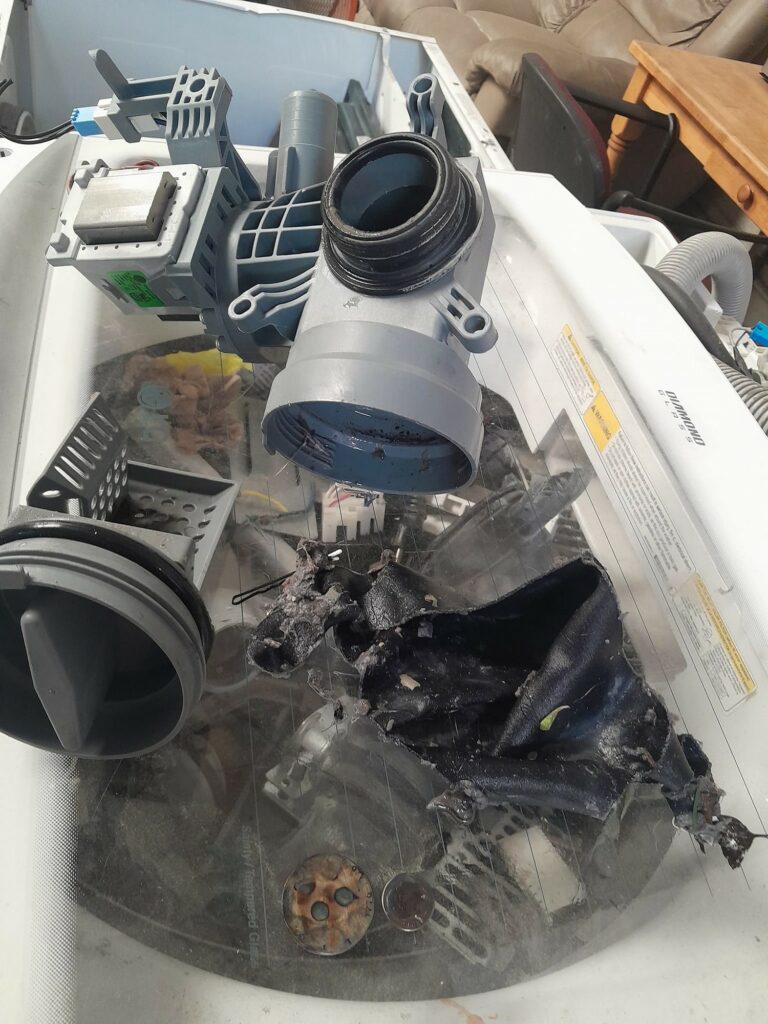
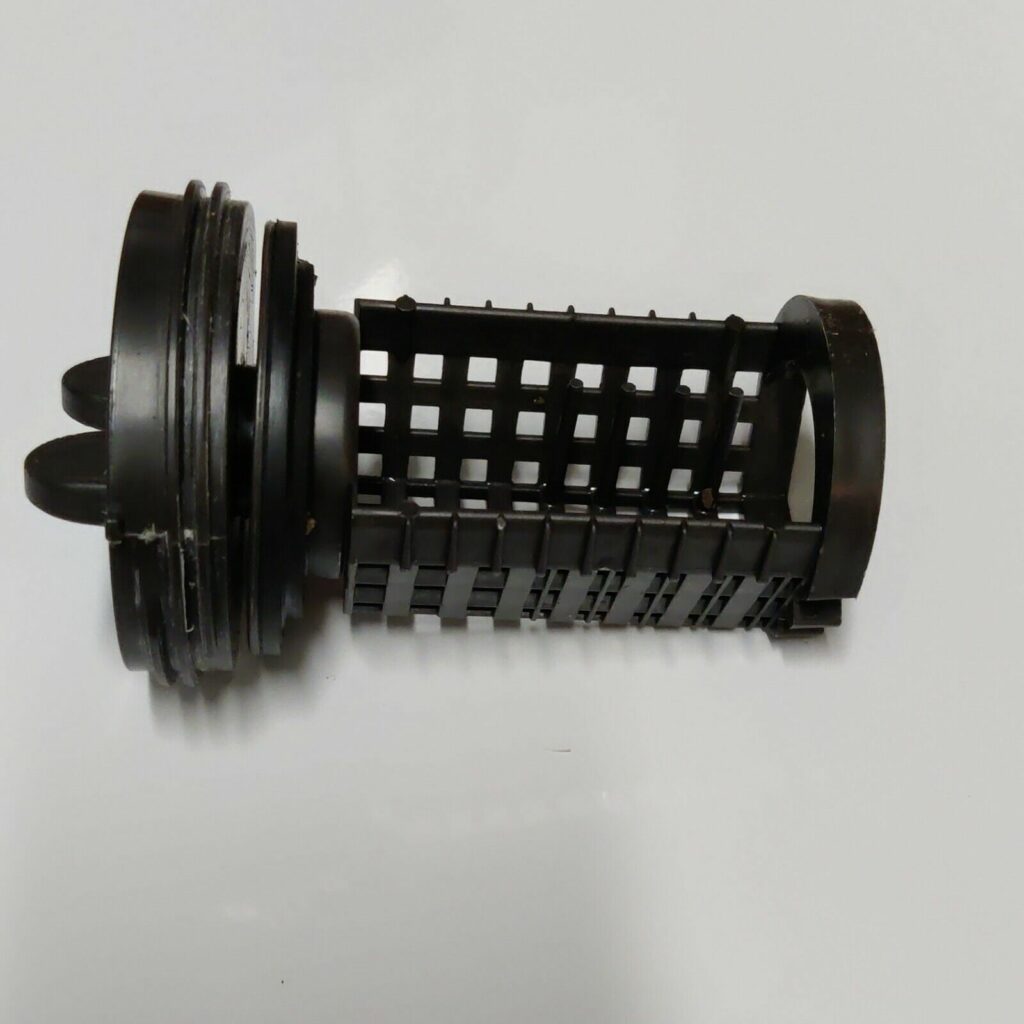
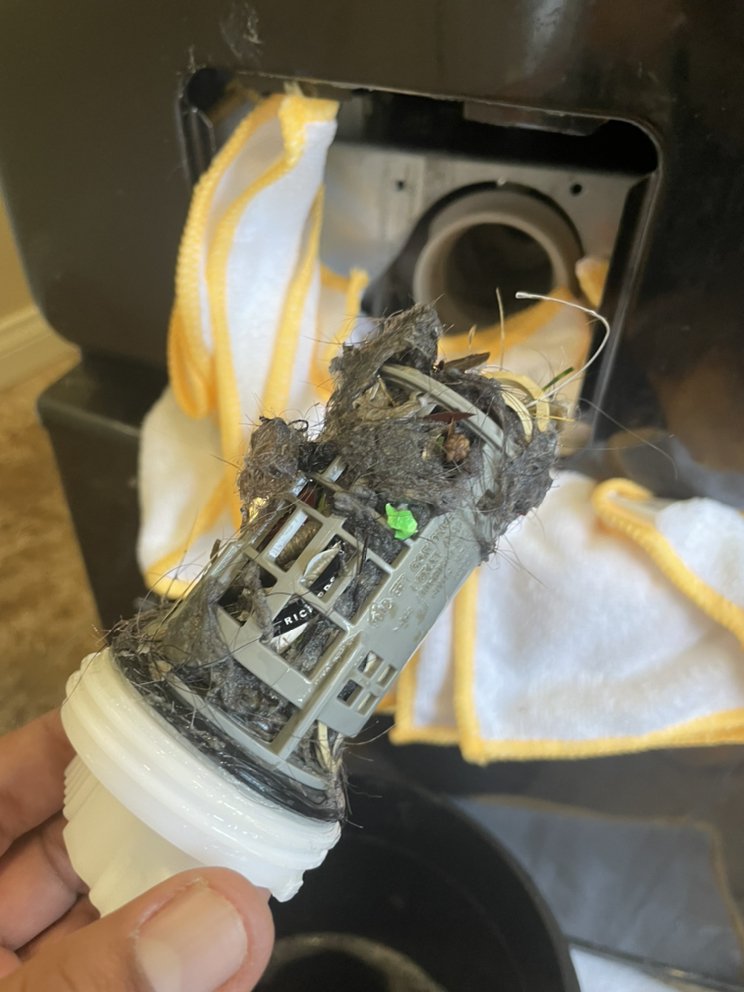
The drain pump filter (coin trap) collects debris before they get into the drain pump. These include cloth fibers, coins, jewelry, and other small objects.
However:
Over time, the filter accumulates this debris and gets clogged. Unfortunately, this could hinder draining.
So:
If you discover your washer isn’t draining, Brad suggests you locate the drain pump filter and check for lodged debris.
Intuitively:
Upon discovering a blockage, you must clear it out. Brad adds, “Don’t forget to check the drain pump for clogs because it is likely some of that debris got into the pump as well.”
5. Loose or Broken Pump Belt
| Part | Pump belt |
| Location | It is located at the bottom of the washer. It is connected to the drain pump and motor. |
| Ease of troubleshooting | Easy |
| Cost | $5 – $50, depending on the model |
| Repairable | Yes – If it is misaligned. No – If worn-out or broken |
Now:
The pump belt is a part of the washer’s drive pulley. It powers the pump’s rotation, enabling it to drain water from the wash drum.
Of course:
If this belt is damaged or loose, the pump will not function, and your washer won’t drain. So, you must inspect the pump belt for signs of damage, such as cracking or fraying.
You see:
This Reddit user has a Samsung front-loading washer that won’t drain.
He said, “I opened and cleaned out the drain pump, and all the water leaked out, but it didn’t drain again when run. What else can I do?”
In response:
Other users suggested a faulty drain pump or clogged drain pump filter. However, Brad had a dissenting opinion.
In his words:
“Sometimes it is hard to diagnose this issue as its symptoms might lead you to believe the drain pump itself is faulty. However, the pump belt is more likely the cause of the drainage issues.”
Here’s how Brad advises you to troubleshoot this fault:
“Use a putty knife to detach the front access panel of the washer. Then, readjust the misaligned belt. If worn out, slide off the damaged pump belt on the pulley connecting the motor and the drain pump and replace it with a new one.“
4 Preventive Measures from Simply Swider to Avoid Washer Drainage Issues
1. Routinely Clean and Maintain the Drainage System
Here’s the thing:
Brad correctly asserts that your washer’s drainage system accumulates a buildup of limescale and debris over time.
Therefore, regularly cleaning the drainage system will save you from all the issues commonly associated with clogged drainage.
He says:
“Clear out debris from the drain pump, its filter, and the drain hose from time to time as this helps water to flow out conveniently and prevents drainage issues.”
2. Always Use the Recommended Detergent Type and Amount
Now:
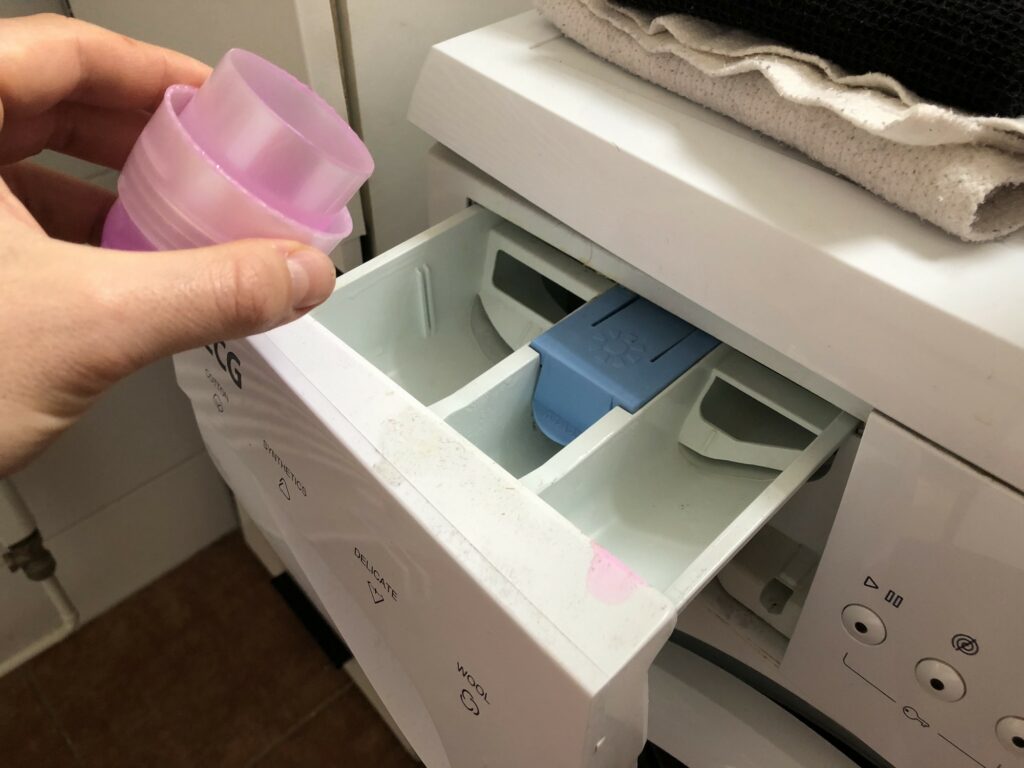
Guess what happens when you use too much detergent for a wash load?
The detergent creates excess suds, leading to clogs and the build-up of mineral compounds in the drainage system.
Ghastly!
That is why most washer brands have recommendations on the type and amount of detergent to be used with their washers. GE Appliances is one such brand, and they recommend using only HE detergent with their brand.
As such:
If you ignore their detergent guidelines, you must be prepared to tackle drainage issues with your GE washer.
However, following the detergent guidelines in your washer’s user manual will help you avoid drainage issues.
3. Load the Washer Properly
Listen:
Simple usage adjustments make a huge difference in preserving your washer’s drainage system.
According to Brad, “You must pay attention to how you load your washer to avoid drainage issues.”
He says lightheartedly:
“Many people make the rookie mistake of overloading their washer and then wonder why it’s having trouble draining. You have to understand that a stuffed washer won’t drain.”
So:
Take your time and go through your laundry batch after batch. Ensure you only load the necessary amount at a time and distribute the clothes evenly across the wash drum.
4. Empty Pockets Before Loading Your Washer
You already know:
Small objects like coins could clog your washer’s drainage system. And although most washers have a coin trap, these items could bypass this filter and cause drainage complications.
As such:
Brad suggests you check the pockets of your clothes thoroughly. Moreover, small clothing pieces like socks or underwear often get stuck in the drain pump.
Here’s an example:
This LG washer user was having drainage issues. According to him, “… the drain pump makes noise when the water should be draining… I don’t hear water draining when the pump is running.”
In response:
An appliance technician suggested it was likely caused by something jammed in the drain pump impeller. True to that assumption, an item was stuck in the drain pump.
Brad comments:
“Using a mesh laundry bag to secure your smaller laundry items during the wash cycle would prevent such an incident.”
Conclusion
All in all:
A washer that won’t drain will probably introduce several other complications, including spinning issues and foul odors. As such, troubleshooting this issue should be your priority.
Here’s what to do when your washer isn’t draining:
- Replace or clean the defective drain pump.
- Unclog or replace the drain hose.
- Replace the door locking mechanism.
- Clear out the drain pump filter.
- Realign or replace the loose or broken pump belt.
Bear in mind that:
While most of these troubleshooting steps are easy to DIY, some can be tricky and require expertise.
So, if a step is too difficult, don’t hesitate to contact your washer brand’s customer support or a professional for assistance.
In addition:
Brad emphasizes the relevance of regular maintenance as well as preventive steps to keep your washer’s drainage system optimal.
Finally:
I’ll watch for your questions and contributions in the comment section below. Good luck!
Frequently Asked Questions
The drain pump, with its ensemble, is the first place to check if your washer won’t drain. Furthermore, you should unclog the hose and pump filter to solve the problem. Also, don’t forget to replace a faulty door lock mechanism.
There are two ways to drain your washing machine manually. You can either bail the water out with a bowl or pass the water out through the drain hose into a shallow bucket.