
I am so excited to share this Restoration Hardware Knock-off with you! If you remember back to my mood board for our Industrial Chic foyer than you’ll remember that an industrial-style console table was at the heart of the design. I love the Dutch Industrial Console Table from Restoration Hardware. I don’t love the $695 price tag so much. Luckily, I came across this knock-off industrial side table from the Golden Sycamore which inspired me to try our hand at making our own table.
Part 1: Building the table
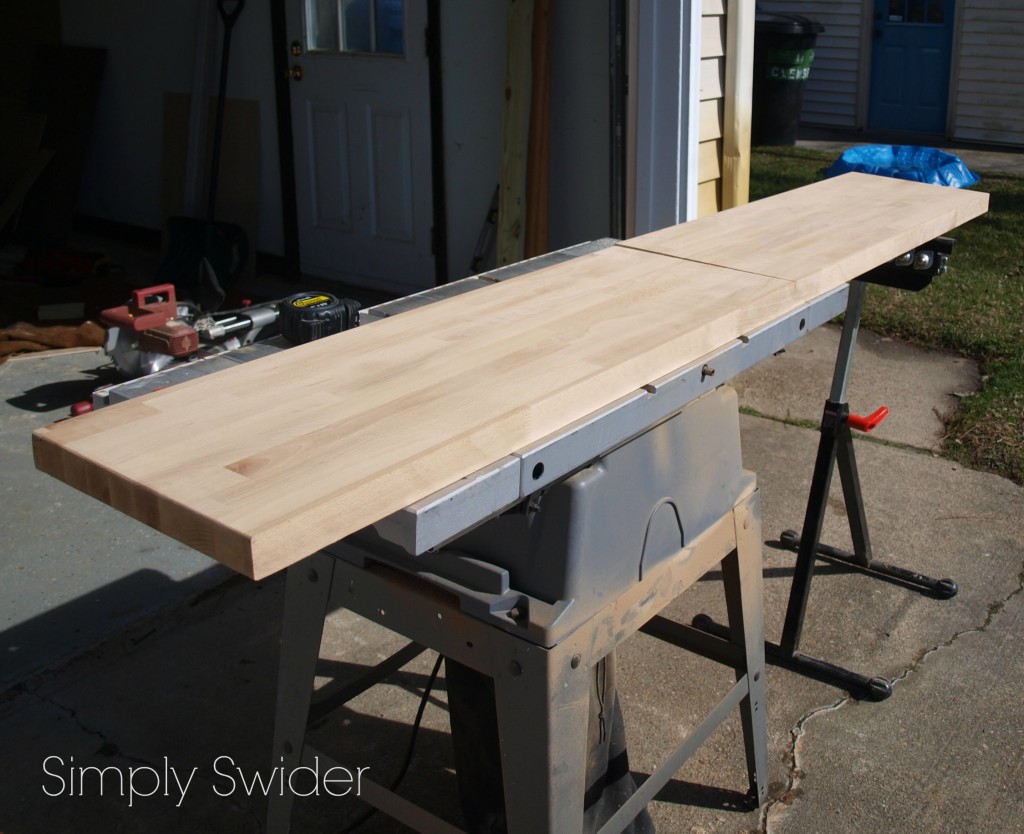
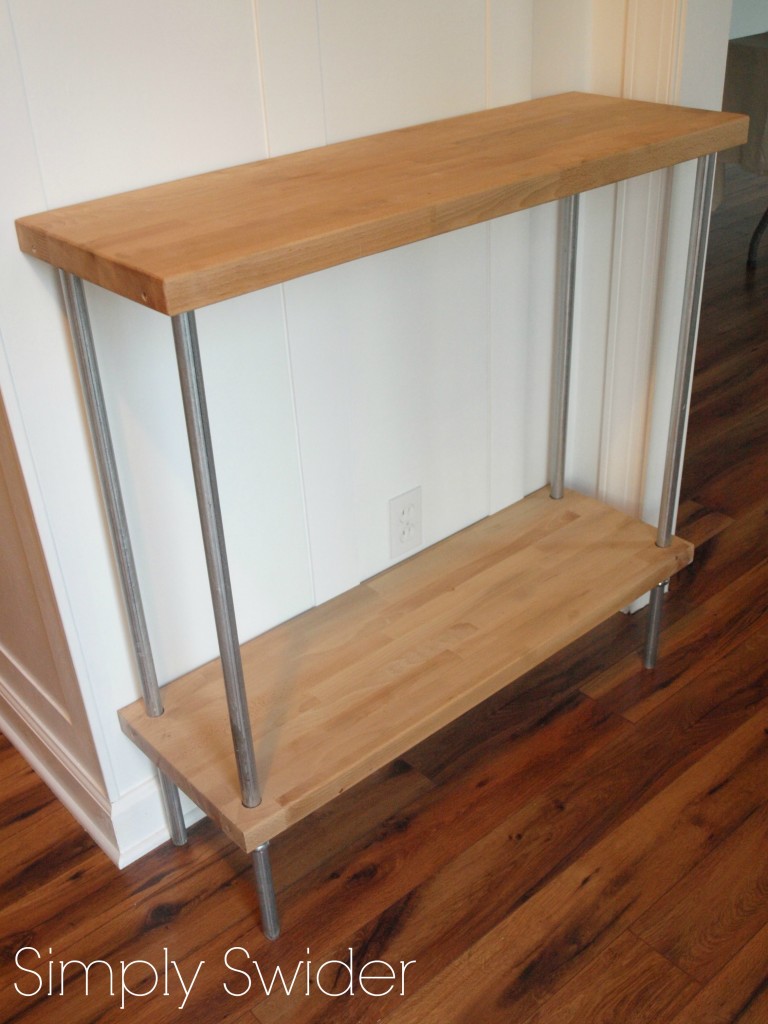
We started off with a slab of Ikea butcher block that we had left over (yay for free) from the kitchen counter tops. It was already the correct depth, so we just had to cut it to length to fit our space.
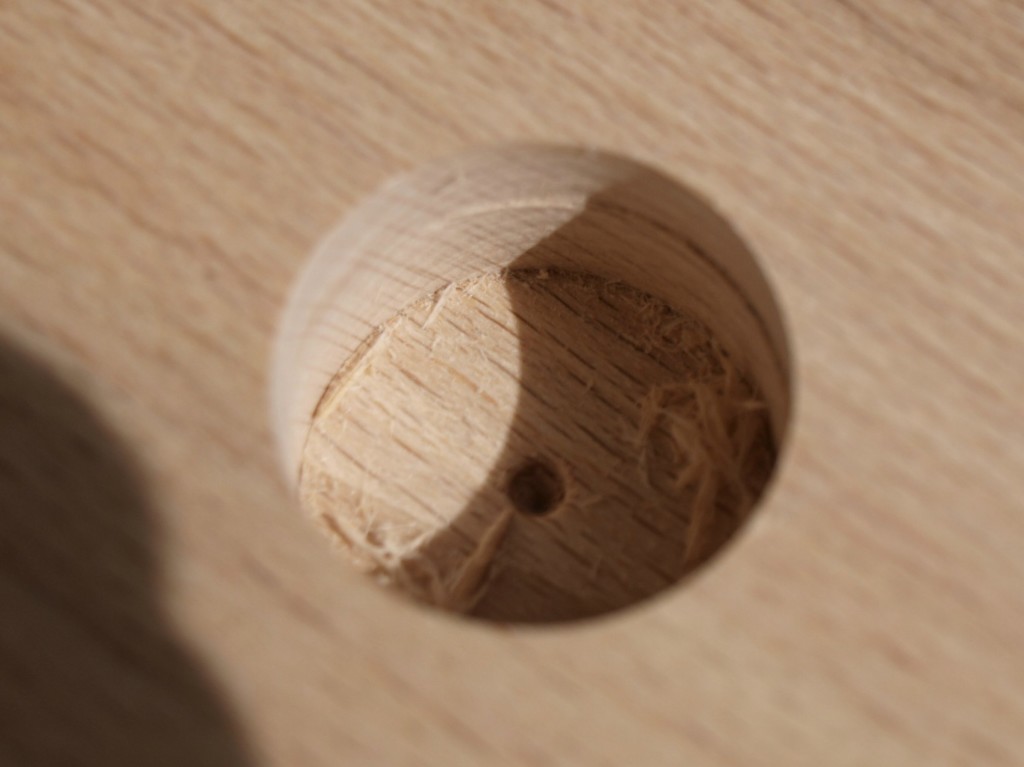
Next we had to drill the holes for the table legs (aka 3/4″ EMT conduit tubing). Cody used a 1 in forstner bit attached to a drill to bore the holes.
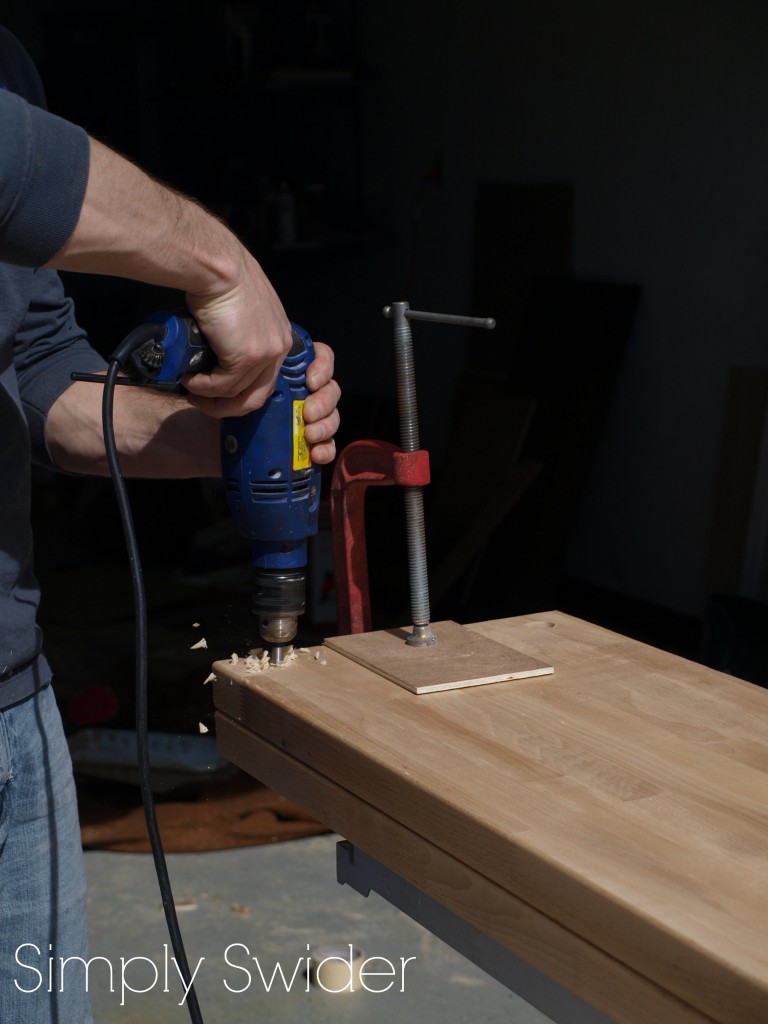
For the bottom shelf, he drilled a hole straight through, but for the table top he only drilled half way as seen below.
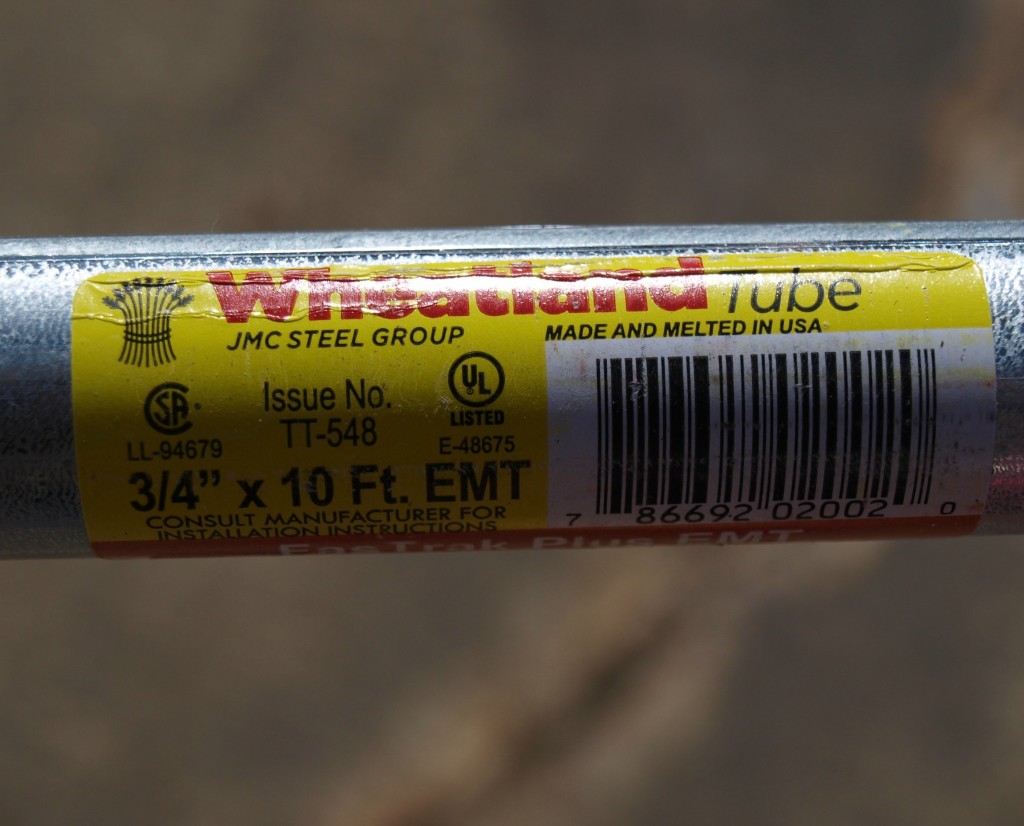
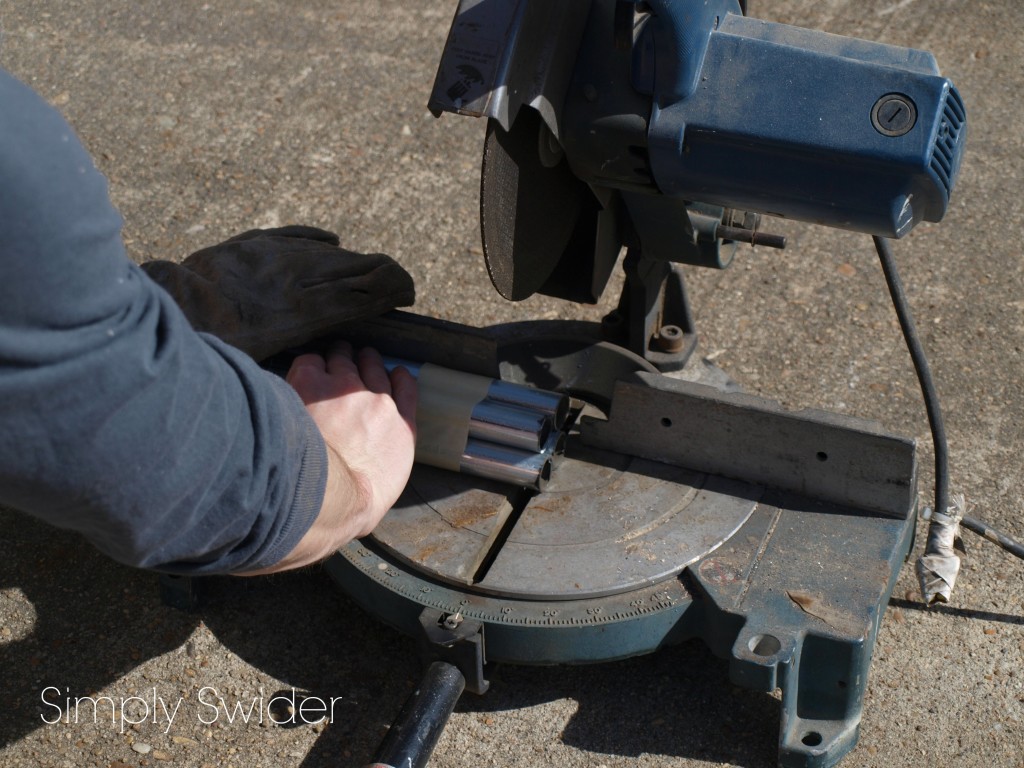
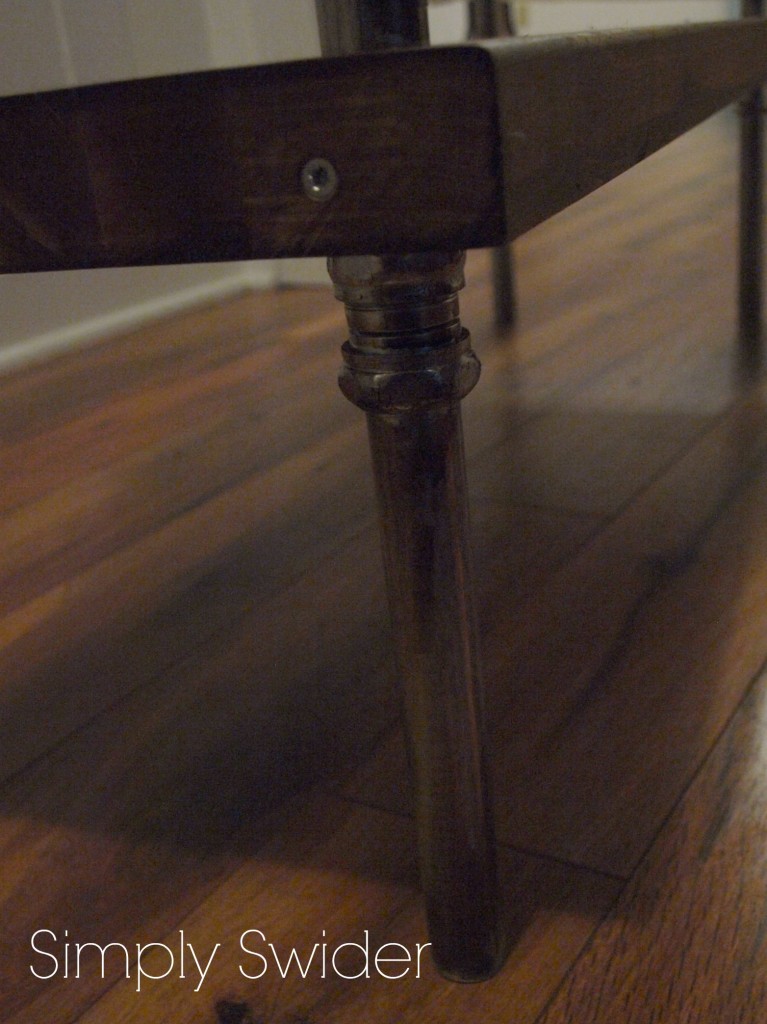
The legs are made of 3/4″ galvanized electrical metallic tubing (EMT).
Cody cut them to length using a metal chop saw.
To keep the bottom shelf in place and level on the pipes, Cody attached them using compression couplings.
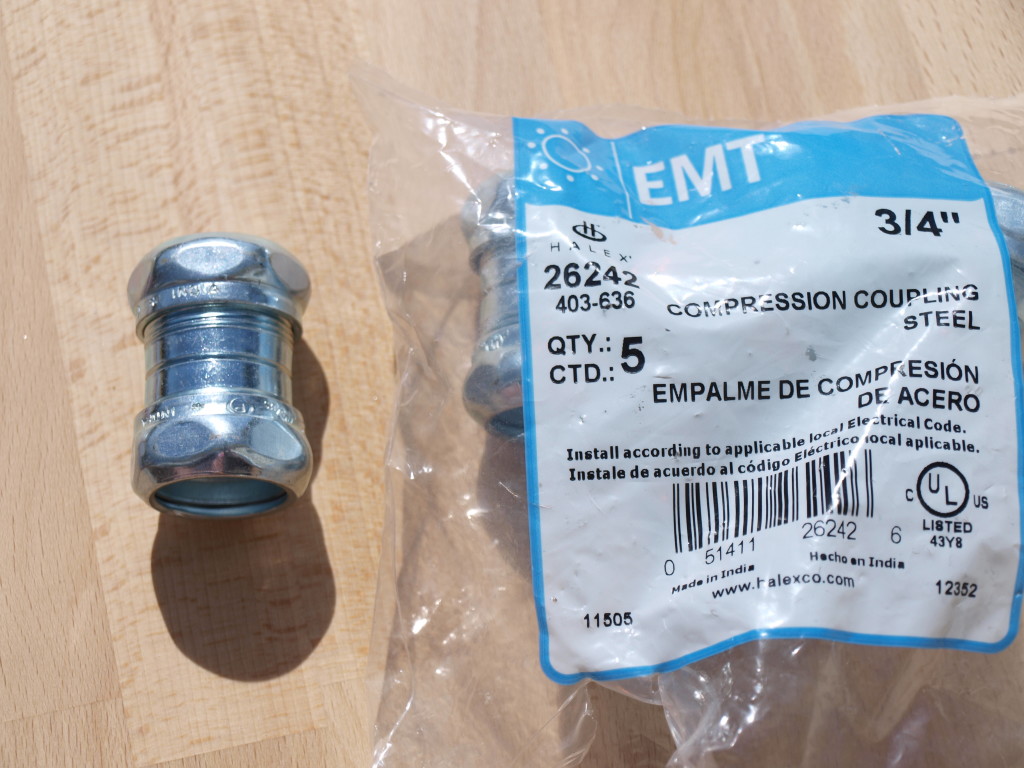
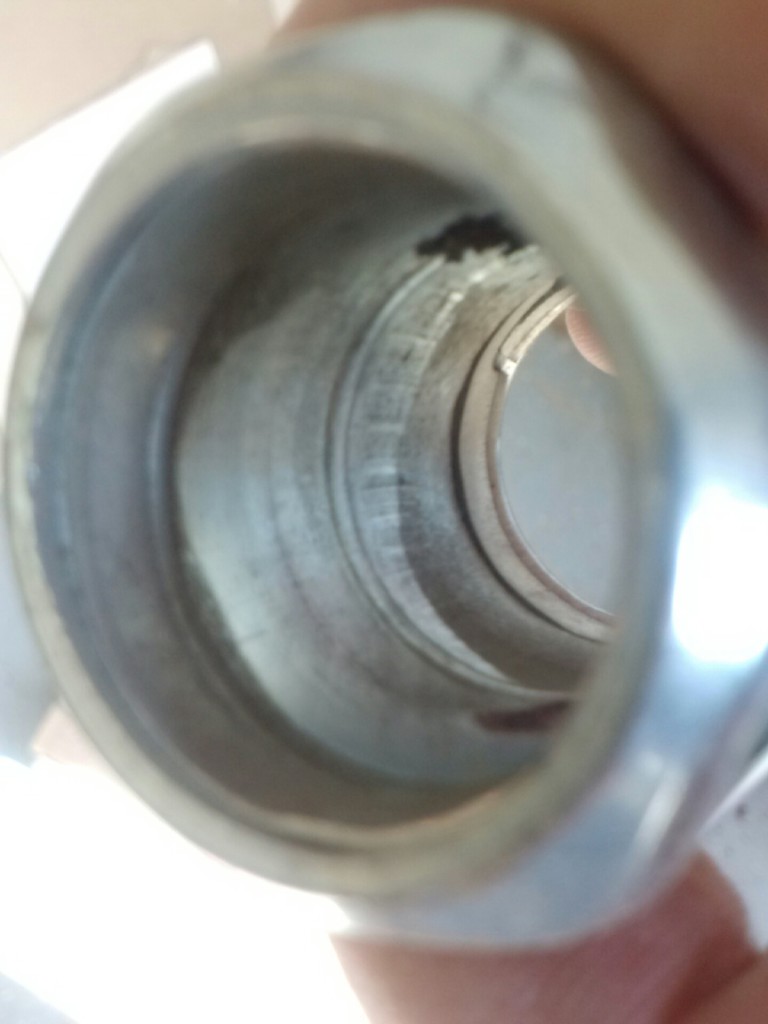
This part wasn’t easy. Each coupling had to be ground out because they have a stop collar in the middle of the fitting. For that, he used a high speed rotary tool with a small grinding wheel so the couplings would slip completely over the tubing.
Last, each piece of tubing was set in place with a countersunk set screw, visible from the sides of each counter-top slab in the picture about and a few below. To achieve this, he pre-drilled slightly smaller hole than the standard silver wood screws used.
Part 2: Finishing the table
The table was now built, but it looked rather modern with its blonde wood and shiny metal. I decided to use stain to give it an aged and industrial look.
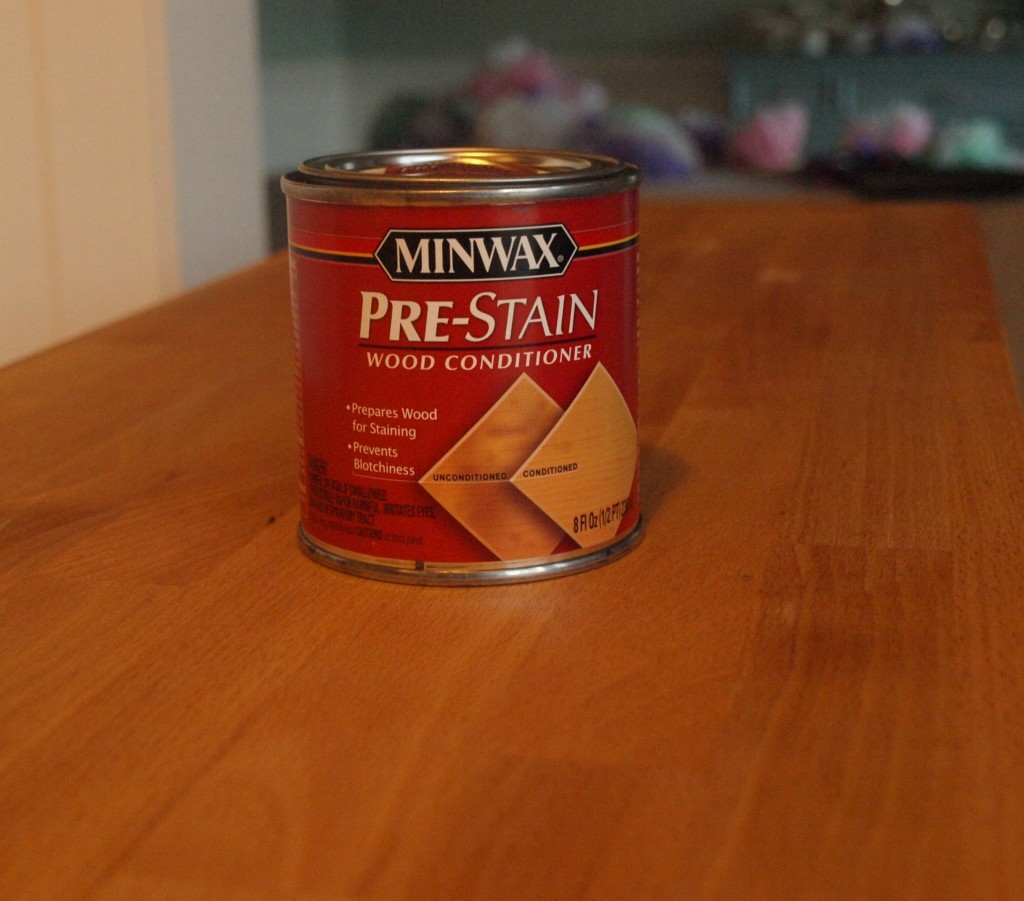
First, I sanded the wood down then used a pre-stain wood conditioner to insure that the stain penetrated the wood evenly. This is an important step when staining soft woods.
I wanted the edges of the table to be slightly darker than the rest of the table to add an aged or burnt look to it. This step made me really nervous as I didn’t know if the treatment would work or if I would wind up with a funky dark straight line around the edges. Using an old sock and minwax dark walnut stain I had left over from the kitchen countertops, I applied the stain to all the edges of the table.
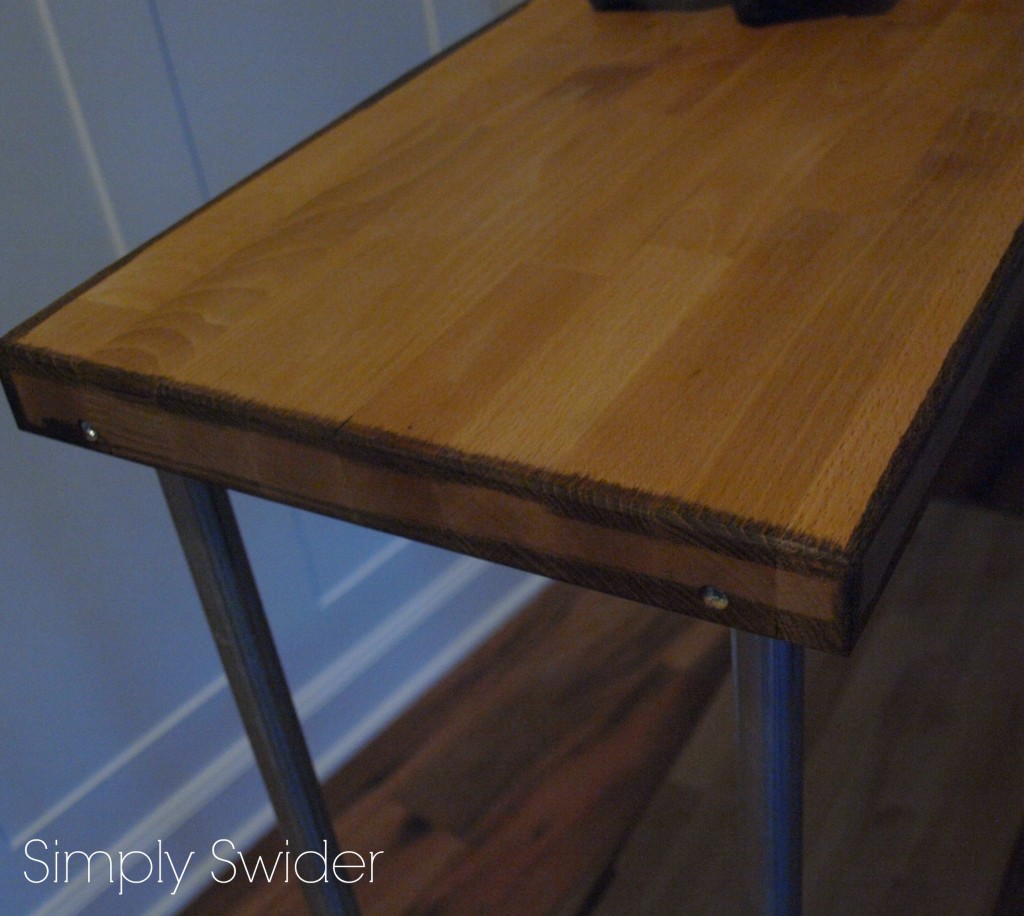
Honestly, I was a little nervous at this point, but I carried on. After applying the stain to the edges I immediately gave them a light sanding with a fine sanding block then followed with a coat of Minwax mission oak polyshades (the same we used on the engineering print frames). And miraculously it came out exactly as I envisioned! The dark walnut around the edges gradually absorbed into the wood and looked less harsh. I wouldn’t have chosen the polyshades because it already had polyurethane in it, but it was what I had on hand and didn’t dry shiny at all.
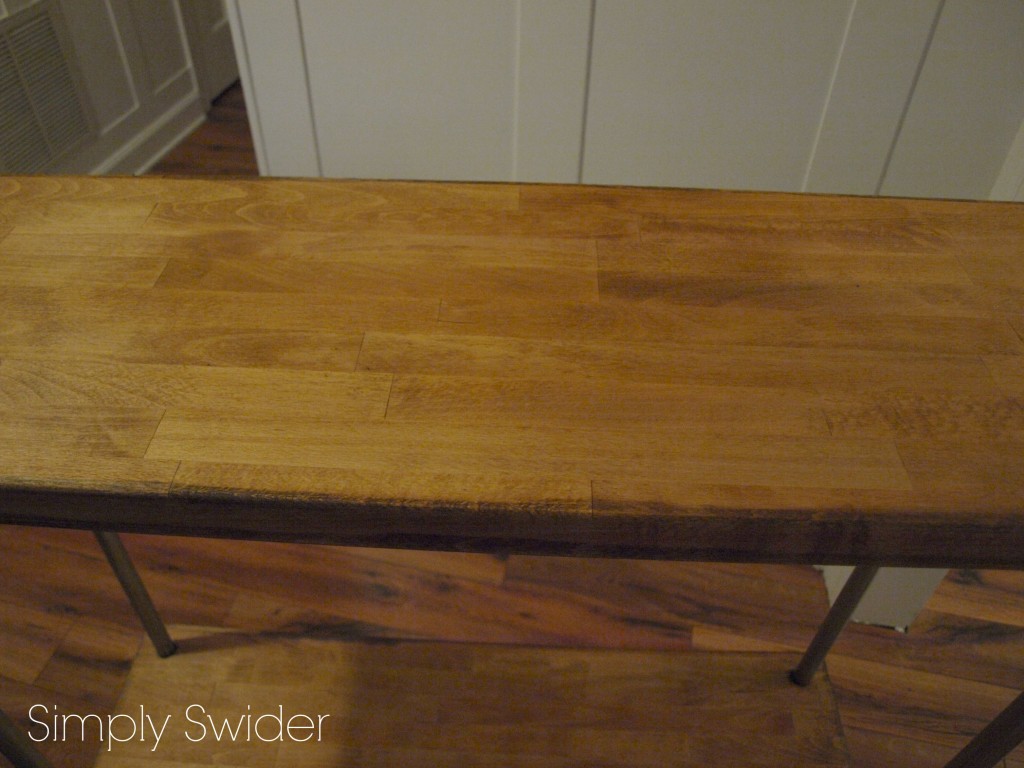
I also went back and rubbed the dark walnut stain onto the pipes making sure to rub extra in the couplings. It took two coats of stain to get the look I was really going for, but this was a much easier process than some of the chemical treatments I have seen to age metal.
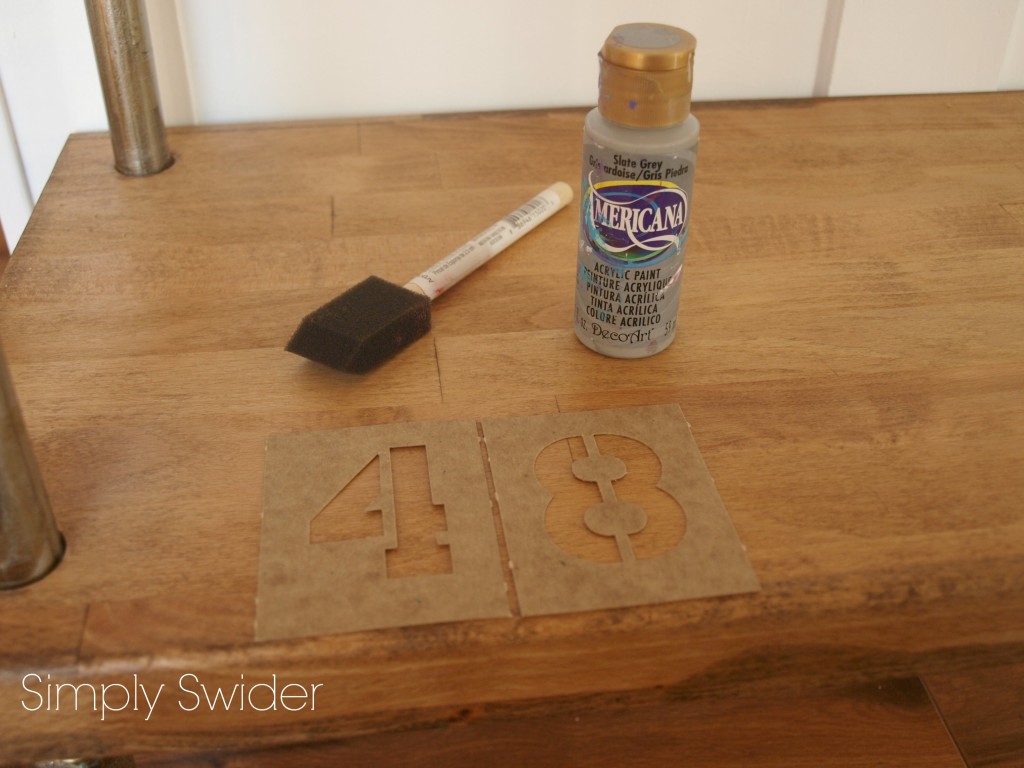
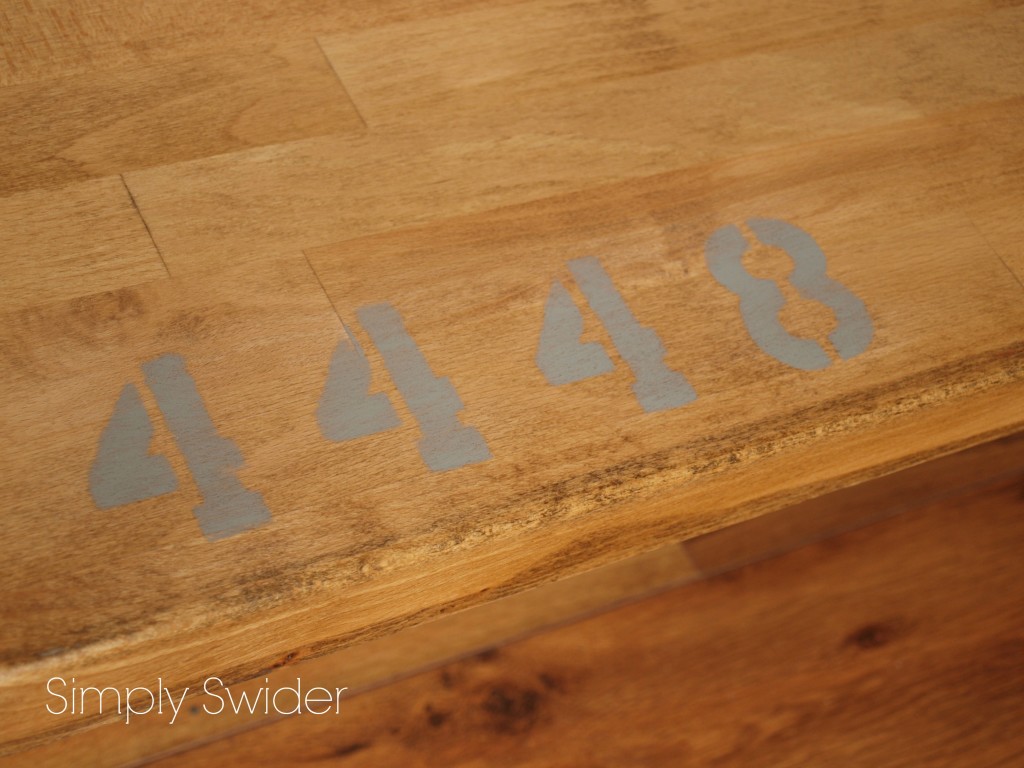
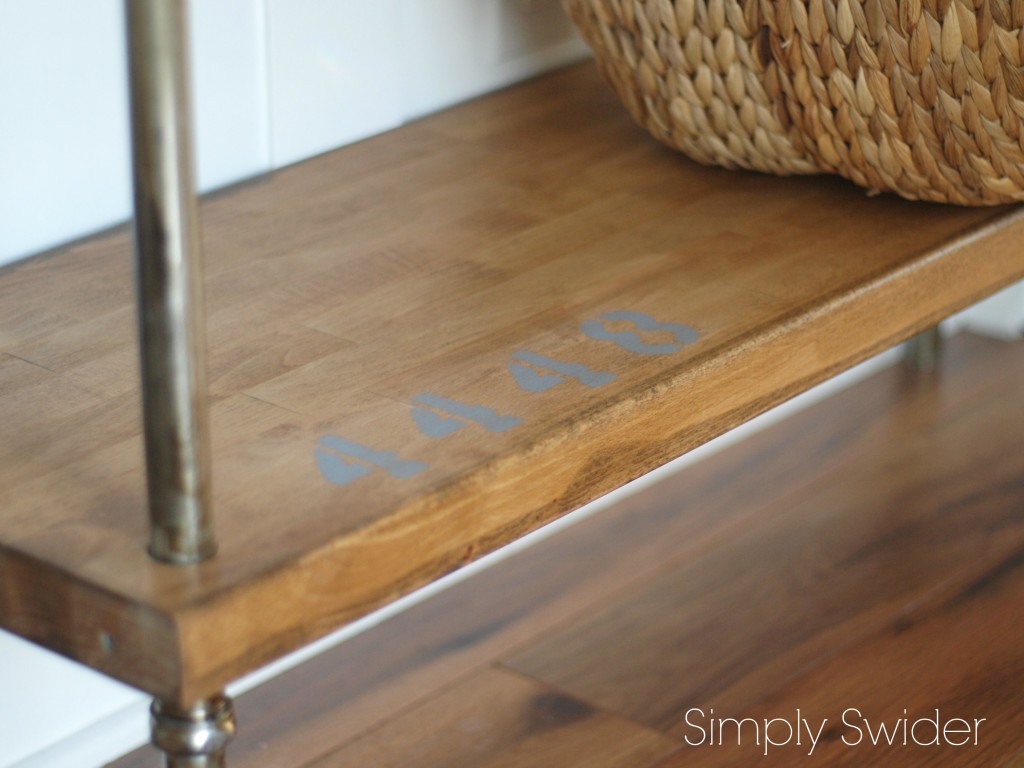
Like my inspiration piece I wanted to add some numbers to the table. Industrial pieces always seem to have numericals on them. Using cardboard stencils and leftover Slate Grey acrylic paint I added our house number to the bottom left of the table.
Once the numbers dried I sanded over them with a sanding block to give them more of a distressed look. In retrospect I wished I had sanded them a little bit more.
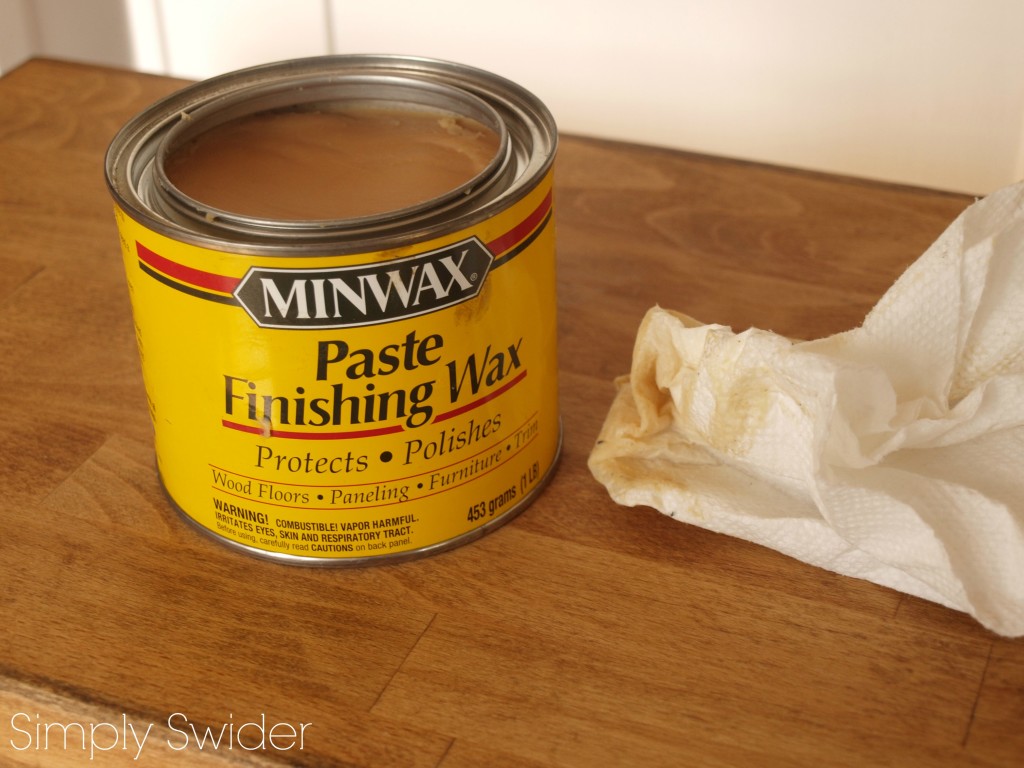
Finally, I finished the table off with a coat of Minwax Paste Finishing Wax. I promise this post was not sponsored by Minwax. Totally a coincidence that I used all their products. I was so excited to finally have a project to used wax on. It gave me that perfect hand rubbed look I was going for.
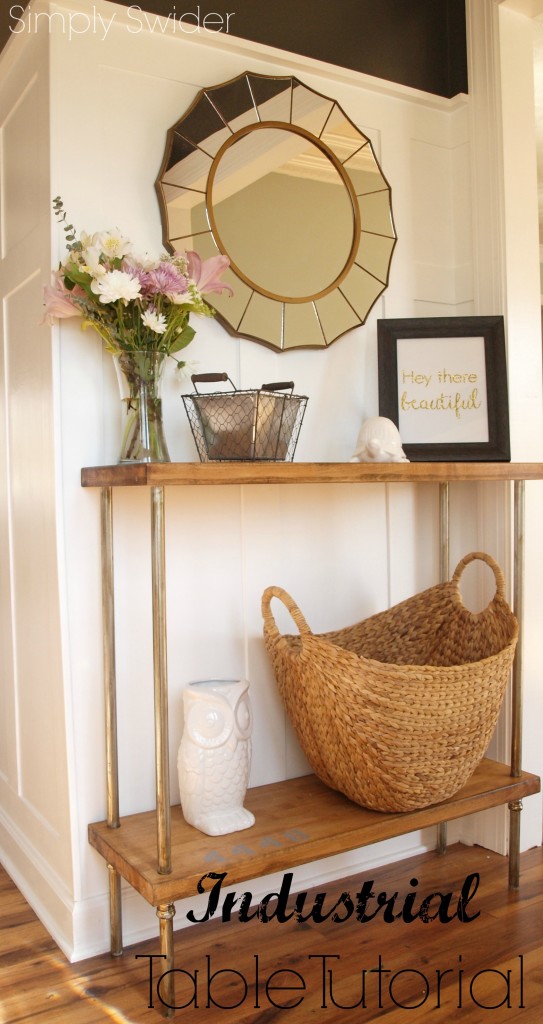
I can’t tell you how exciting it is to have a project turn out exactly how you envisioned it! These pictures do not do the table justice and I just love the way the rusticness of the table plays off the formalness of the wainscoting.
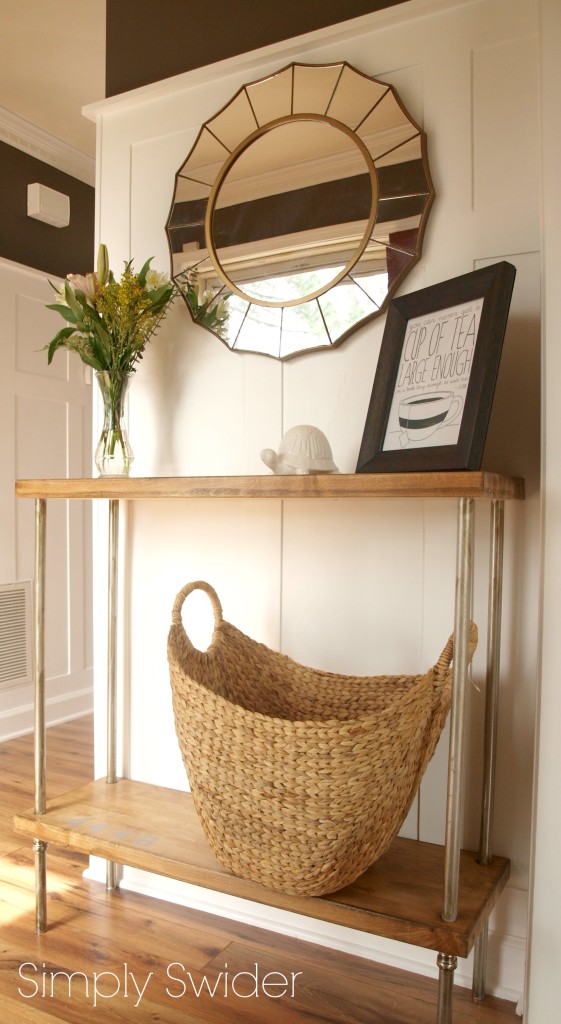
The mirror, frame, and turtle are from Target while the large basket I picked up for 50% off at A.C. Moore.
Cost:
Butcher block already had
Stain already had
pre-stain 4.98
Sanding block 2.97
Conduit 7.74
stencils 2.39
forstner bit 11.97
couplings 3.10
wax 9.97
total 43.12
A console table for under $50…..can’t beat that! Obviously, the cost will vary depending on what you already have on hand. Having the butcher block saved us a ton. Also, items like the wax, pre-stain, and bit will be used on future projects as well.
The foyer is really starting to come together now. All that is left is to hang the new light fixture, make a new piece of art for the frame, buy an industrial basket for keys, and find a statue to put next to the basket. Stay tuned for those updates and more!