
Here’s the deal:
I’ve seen my share of microwave quirks. One that gets people scratching their heads? A microwave fan that won’t turn off, even after the unit cools down. Sound familiar?
Don’t stress.
I’ve cracked this issue open more times than I can count, and it’s usually a straightforward fix. To make sure you’re getting the best advice, I’ve teamed up with Matthew Keller, a trusted appliance guru from Ohio, and some of the brightest minds from our repair-focused Facebook group.
So, are you ready to tackle that relentless microwave fan?
Let’s dive in.

Table of Contents
Why Your Microwave Fan Won’t Turn Off
Usually, it’s a cranky control panel or a motor that’s seen better days. But hang on, that’s not all. Grease filters jammed with gunk, door switches throwing a fit, relays acting up, or even a thermostat gone rogue can be your culprits.
Don’t stress. I’ve tackled these issues firsthand. You can, too. Just roll up your sleeves, pinpoint the troublemakers, and swap ’em out.
Trust me, you’ve got this.
So:
Keep reading to explore the step-by-step processes of rectifying a microwave fan that won’t turn off.
Common Reasons & Troubleshooting for a Microwave Fan That Won’t Turn Off
| Commonly Affected Parts | Estimated Cost |
|---|---|
| Grease filter | $12 – $24 |
| Control board | $18 – $280 |
| Thermostat | $11 – $44 |
| Fan motor | $18 – $28 |
| Damper assembly | $24 – $49 |
| Door switch | $10 – $18 |
| Microwave relay | $4 – $8 |
Listen up, folks:
Matthew Keller, a well-known home appliance guru, has it spot-on when he says, “The harder part of fixing a problem with your microwave fan is locating the issue itself.”
I couldn’t agree more.
In my years of working as an appliance technician, I’ve seen countless microwave fan issues. And guess what? Finding the root of the problem is always the trickiest part.
But here’s the good news:
You’re not alone in this. I’ll guide you, step by step, so you don’t wander aimlessly through the maze of microwave mechanics.
Let’s cut to the chase. Below are some of the usual suspects when your microwave fan refuses to turn off, along with troubleshooting tips.
Ready? Let’s dive in.
1. Clogged Grease Filter

| Part | Grease filter |
| Location | Under the microwave |
| Ease of troubleshooting | Easy |
| Cost | $12 – $24 |
| Repairable | No |
Listen up, folks:
You might not think your microwave’s grease filter is a big deal, but trust me—it is.
Problem:
If that grease filter gets clogged or just plain filthy, it messes with your fan. The fan could start running non-stop, and let’s face it, that’s a problem.
Personal Experience:
I’ve been on calls where this issue had customers pulling their hair out. One time, I went to fix a GE Microwave, and guess what? The fan wouldn’t stop because of a nasty grease filter. Same as this Reddit user with his JVM1631WJ01 model.
Identification:
Pull out that filter and give it a look-see. Clogged holes? It’s, well, clogged. A thin layer of dust? It’s just dirty. Either way, you’ve got a job to do.
Solution:
So here’s the drill:
- Step 1: Unplug that microwave.
- Step 2: Slide out the grease filter.
- Step 3: Fill a sink or bucket with hot water and a dash of dish soap.
- Step 4: Let the filter soak for at least 10 minutes.
- Step 5: Grab a soft sponge and scrub that thing clean.
- Step 6: Let it dry, then slide it back in.
- Step 7: Power up your microwave and check that fan.
Pro tip:
My colleague Matthew always says, “Avoid harsh chemicals like bleach on your grease filter; they do more harm than good.” Spot on, Matthew. Harsh chemicals can corrode the filter, and then you’re forking over cash for a new one.
But hey, if the gunk isn’t budging after the first soak, let it sit a little longer. It should come right off.
What if it’s beyond saving?
If your filter’s on its last legs, just replace it. Easy as that. You’ll save yourself a headache.
So, cleaning your microwave grease filter? Not rocket science. Just a bit of common sense and elbow grease. Trust me; your fan will thank you.
2. Malfunctioning Control Board

| Part | Control board |
| Location | Behind the grille, above the door |
| Ease of troubleshooting | Medium |
| Cost | $18 – $280 |
| Repairable | Yes, but highly technical |
Problem:
Alright, let’s talk about the brain of your microwave: the control board. This little gizmo communicates with all the other components, like the fan, to make sure everything runs smoothly.
But what if the fan just won’t stop running?
Well, Matthew argues it’s uncommon for a faulty control board to cause this issue. And he’s right. In my years fixing appliances, I’ve seen only a handful of cases where a malfunctioning control board is the culprit.
However, don’t rule it out just yet.
Identification:
You can spot a faulty control board easily. Look for signs of burning or darkened areas on the board. If you see any of these, it’s time for a new control board, no questions asked.
Case in Point:
Recently, Mark, a member of our Facebook community, contacted me about his Whirlpool microwave. The fan was running non-stop, and the control panel was unresponsive. I recommended he check the control board.
Guess what? That was the issue.
Solution:
Mark followed the steps I provided, and his microwave was back in action. You can fix this problem too, and it’s not rocket science. Here’s how:
- Step 1: Unplug the microwave. Safety first.
- Step 2: Unscrew and remove the grille above the microwave door.
- Step 3: Unplug the wires connected to the control board.
- Step 4: Losen the screws holding the control board and take it out.
- Step 5: Slide the new control board in place and screw it tight.
- Step 6: Reconnect the wires.
- Step 7: Put the grille back and secure it with screws.
- Step 8: Plug the microwave back in and test it out.
Pro Tip:
Snap a photo of the wire connections before you disconnect them. It’s a game-changer for remembering what goes where.
So:
If your microwave fan is acting like it’s in a marathon, don’t dismiss the control board. Check it, replace it if necessary, and enjoy your microwave’s newfound tranquility.
3. Defective Thermostat
| Part | Thermostat |
| Location | Connected to the fan, behind the grille |
| Ease of Troubleshooting | Medium |
| Cost | $11- $44 |
| Repairable | No |
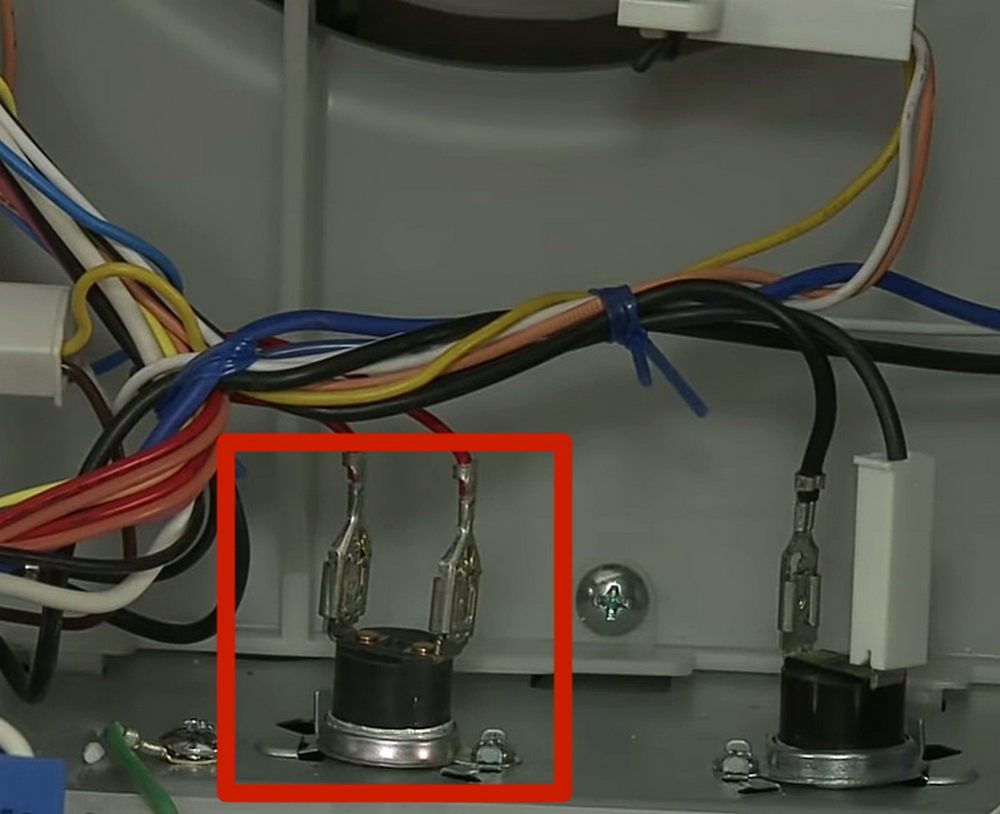
Problem:
The heart of this issue often lies with the microwave thermostat, which monitors the appliance’s internal temperature and instructs the fan accordingly.
However, just like all parts, the thermostat can falter over time. When it does, it either forgets to tell the fan when to kick in or continuously signals it to keep running. If you’re facing this challenge, chances are the thermostat’s at fault.
Identification:
From experience, here’s how to get to the root of the issue:
A multimeter has been my trusty sidekick in these situations. This little gadget helps identify whether the thermostat is the culprit by checking for continuity.
To diagnose, first, safely extract the thermostat from your microwave. With your multimeter set to its lowest ohm reading, attach its leads to the thermostat’s terminals.
A reading of roughly 01 ohms? All’s well. No reading at all? It’s time for a replacement.
Solution:
I’ve been there, done that. Replacing the microwave thermostat might seem daunting, but here’s a step-by-step rundown, refined over countless service calls:
- Step 1: Safety first. Disconnect the microwave from its power source.
- Step 2: Open the microwave and unscrew the grille.
- Step 3: With the grille out, it’s time to tackle the control panel’s screws.
- Step 4: Safely set the removed panel aside.
- Step 5: Behind the panel, you’ll discover the thermostat. Unscrew and detach.
- Step 6: Position your new thermostat and secure it with screws.
- Step 7: Reattach the control panel and position the grille back.
- Step 8: Once everything’s in place, reconnect your microwave to the power and give it a whirl.
A word of advice from my colleague Matthew: “Remember, the thermostat is the microwave’s brain when it comes to temperature. Always ensure the one you’re installing matches your microwave model.”
This isn’t just about fitting, but functionality. An incompatible thermostat? Your microwave simply won’t work right.
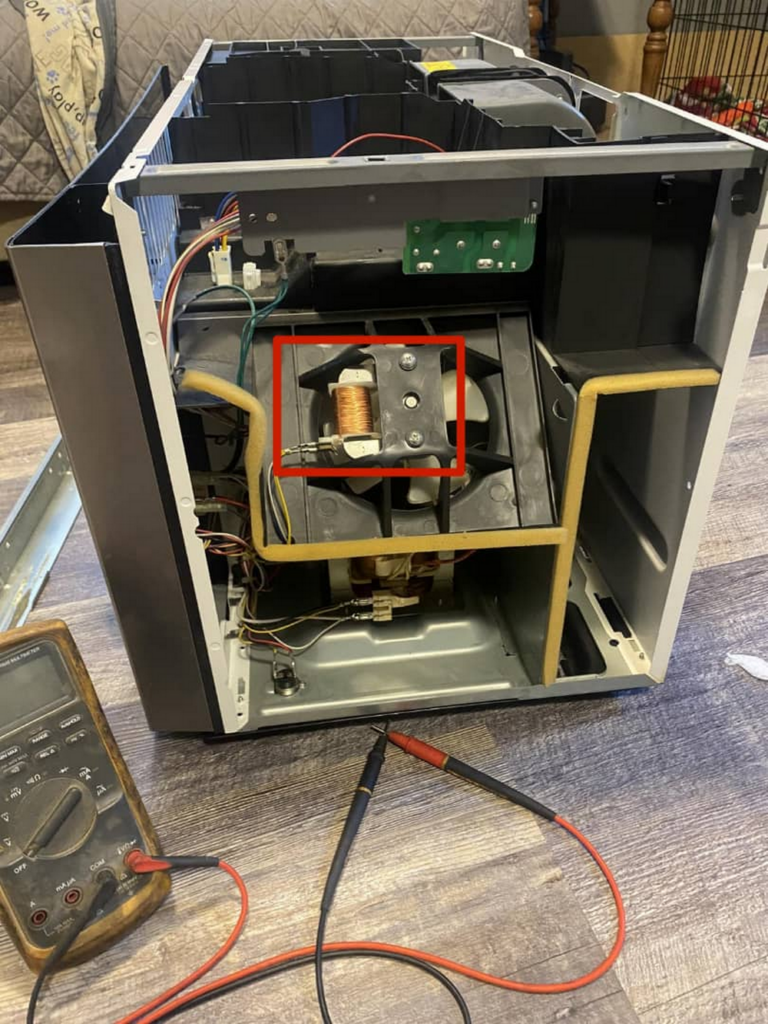
4. Faulty Fan Motor
| Part | Fan motor |
| Location | Towards the top section at the back of the fan |
| Ease of troubleshooting | Medium |
| Cost | $18 – $28 |
| Repairable | No |
Listen up:
I recently had an interaction with a Simply Swider reader whose Maytag microwave fan refused to stop running — even with the timer off and the door open. A spinning fan with the door open is like a car engine running with the keys out. Weird, right?
Problem:
After diving into the issue and having a huddle with Matthew, we pinpointed the culprit – the fan motor.
Here’s the breakdown:
The fan is the messenger between the control board and the fan motor. If that fan motor goes rogue, it won’t get the “stop” message from the control board. Worse, it might also misread the microwave’s temperature, leaving you with a fan that just won’t quit.
Identification:
Wondering if your fan motor’s gone off the rails? Check for continuity.
How to?
Unplug the microwave. Take out the fan motor. Connect a multimeter to the motor’s terminals. If the meter reads zero ohms, your motor is not the issue. But if that meter doesn’t budge, you’ve found your problem. Replace the motor.
Solution:
Matthew and I boiled down the fan motor replacement to a nitty-gritty checklist. Follow these steps:
- Step 1: Unplug the microwave.
- Step 2: Unscrew and remove the grille.
- Step 3: Remove the glass turntable and supports. We don’t want breakage.
- Step 4: Undo panel screws and lift the panels. Now you’re in the microwave’s guts.
- Step 5: Detach the control panel and ease off the fan blades.
- Step 6: Disconnect the fan motor wires. Unscrew the bracket.
- Step 7: Out with the old motor, in with the new.
- Step 8: Secure the bracket and reconnect the wires.
- Step 9: Slide the fan blades back on and reattach the control panel.
- Step 10: Get those panels and grille back in place.
- Step 11: Insert the turntable and supports, and plug that microwave back in.
There you have it, a first-hand guide to solving your phantom fan issue. Trust me, if you follow these steps, your microwave fan will know when to call it quits.
5. Defective Damper Assembly
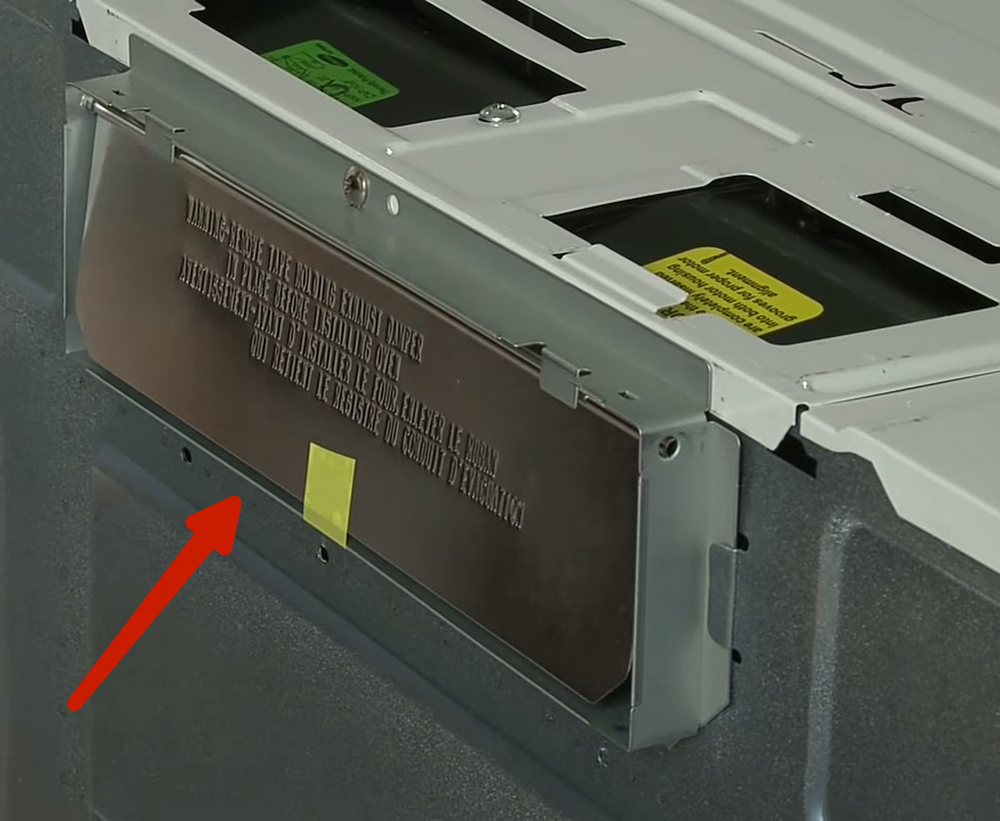
| Part | Damper assembly |
| Location | On the exhaust outlet of the microwave |
| Ease of troubleshooting | Medium |
| Cost | $24 – $49 |
| Repairable | No |
Let’s get real:
The damper assembly in your microwave is a game-changer. Think of it as a gatekeeper that keeps external air out while managing your microwave’s temperature. It’s either plastic or metal and it springs to life whenever the fan kicks in.
Problem:
Here’s where things get tricky. If the damper assembly goes rogue, you’re looking at a potential disaster. Not only will hot air be trapped inside, causing your fan to work overtime, but external air can also sneak in. That messes with your microwave’s internal mojo.
Trust me:
I’ve been an appliance technician for years, and let me tell you, I’ve seen this issue more times than I can count. An ineffective damper can wreak havoc on your microwave’s performance.
Identification:
So, how do you know if your damper assembly is the culprit? Easy. Here are the steps to test it out:
- Step 1: Unplug your microwave.
- Step 2: Open up the exhaust outlet panel. You’ll find the damper assembly there.
- Step 3: Examine it. Look for cracks or other obvious signs of damage.
Solution:
Found something off? Time for a replacement:
- Step 1: Unscrew the faulty damper and take it out.
- Step 2: Pop in the new damper assembly and lock it in with screws.
- Step 3: Put the panel back and secure it.
- Step 4: Reassemble your microwave.
- Step 5: Plug it in, turn it on, and you’re golden.
Expert Insight:
Matthew Keller, another seasoned tech, advises, “When replacing the damper assembly, always make sure there’s no obstruction affecting the airflow.”
He’s spot on. In my experience, ensuring a clear path for the new damper assembly will save you from a ton of headaches down the line. Trust me on this one.
6. Malfunctioning Door Switch
| Part | Door switch |
| Location | Behind the control panel |
| Ease of troubleshooting | Medium |
| Cost | $10 – $18 |
| Repairable | Yes, but highly technical |

Listen up:
If you’ve got a microwave fan that just won’t quit, you’re not alone. In my quest to help you tackle this issue, I reached out to other pros in our Facebook repair group.
Let me tell you, the advice poured in:
One frequent culprit? A bad door switch, according to a comment from a fellow repairman named Thabo.
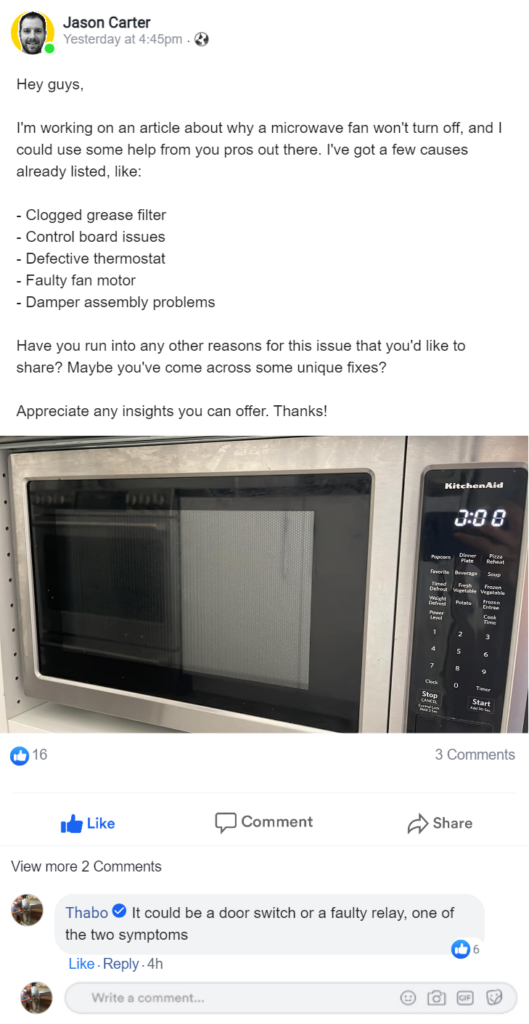
Problem:
So here’s what happens when your door switch goes rogue – it can’t signal the fan motor to shut off. That means your fan keeps running like it’s training for a marathon—even when you open the microwave door.
Identification:
Good news, folks. Pinpointing a faulty door switch is a piece of cake. You’re going to need a multimeter, and here’s how to use it:
- Step 1: Unplug your microwave, find the door switch behind the control panel, and take it out.
- Step 2: Turn your multimeter dial to zero ohms.
- Step 3: Touch each multimeter lead to the switch’s terminals. Press the actuator until you hear that satisfying click.
If everything’s working, you should see zero ohms on the multimeter—meaning your switch has continuity.
A side note:
Some of you might have a door switch with more than two terminals. If that’s you, test the COM terminal and the NO terminal first. Do the same for the NC terminal. The readings should be at infinity. And yes, as Matthew, another expert in our group, says, “Some microwaves even have three or more switches. Make sure to test them all.”
Solution:
If your test shows a lack of continuity, it’s time to get that switch replaced. Matthew and I put our heads together and came up with a foolproof game plan:
- Step 1: Turn off the microwave. Discharge the capacitor for safety.
- Step 2: Remove the screws on the grille and pull it off.
- Step 3: Take out the control panel screws and detach the control panel. Unplug all the wires.
- Step 4: Locate the guilty door switch and remove it.
- Step 5: Put the new switch in its place.
- Step 6: Plug the wires back into the control board and put the control panel back.
- Step 7: Secure the screws, slap that grille back on, and plug in the microwave.
And there you have it. Problem identified, solution implemented.
7. Faulty Relay
| Part | Relay |
| Location | On the control board |
| Ease of troubleshooting | Medium |
| Cost | $4 – $8 |
| Repairable | No |
Listen up:
If your microwave fan won’t stop running, Thabo in the comments pointed out another common issue— a faulty relay.
So, what’s a relay, and why should you care?
Matthew breaks it down well: “A microwave relay transmits signals from the main control board to their action sites.”
In simpler terms, it’s the messenger that amplifies signals so your microwave fan can understand what to do.
Problem:
Imagine sending a text and it never arrives. That’s basically what happens when your relay is faulty. It can’t amplify or transmit signals, rendering your fan a spinning zombie.
Identification:
How do you know if the relay is the culprit? You’ll need a multimeter for that. Let’s get down to it:
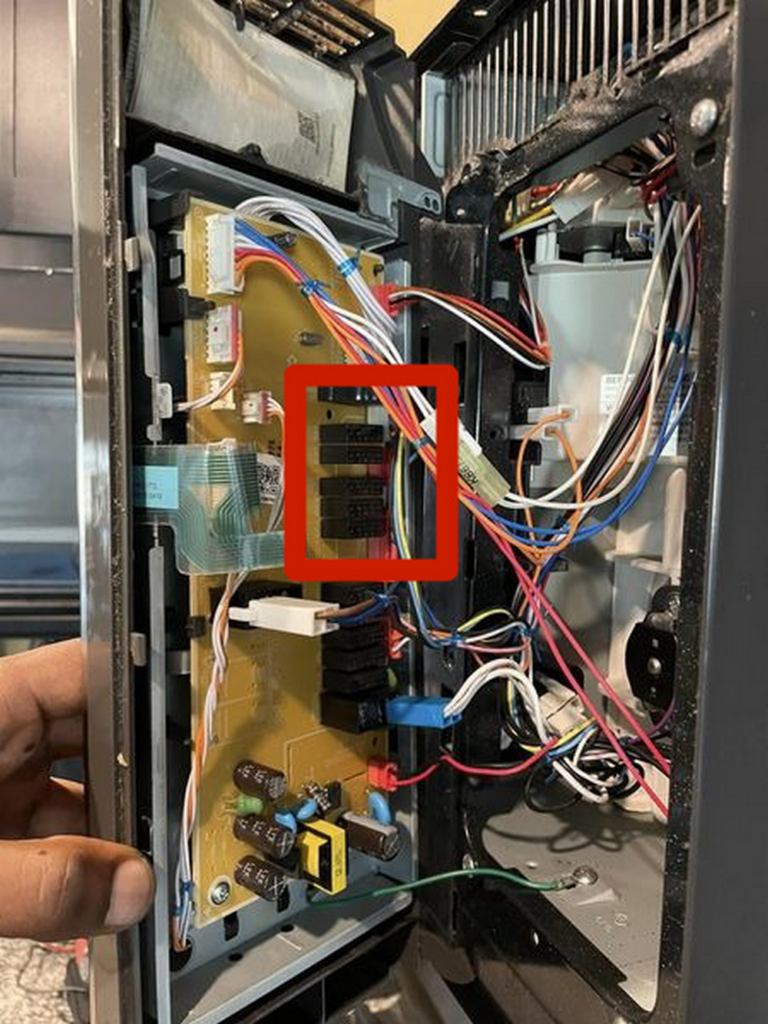
- Step 1: Place the control board on a table. Find the relays.
- Step 2: Flip it. Locate the relay terminals.
- Step 3: Connect a nine-volt battery to the board using alligator clips.
- Step 4: Keep the battery connected and touch the multimeter’s lead heads to the relay terminals.
If you hear a click, your relay has continuity. No click? It’s toast.
Solution:
Now, let me guide you through the relay replacement steps that have worked for me countless times:
- Step 1: Unplug the microwave. Wait five minutes—safety first.
- Step 2: Unscrew and remove the grille above the microwave door.
- Step 3: Disconnect the control board wires.
- Step 4: Take out the control board by undoing its screws.
- Step 5: Use a desoldering braid to remove the faulty relay’s soldering.
- Step 6: Replace the bad relay with a new one (same specs). Test it before soldering.
- Step 7: Resolder the relay.
- Step 8: Put the control board back. Tighten the screws, and reconnect the wires.
- Step 9: Secure the grille. Plug in the microwave.
And there you have it. A fan that knows when to stop.
My Final Thoughts
Alright, let’s break it down:
The exhaust fan is no small deal in the microwave world – it’s crucial. Trust me, I’ve had my fair share of clients bewildered by a non-stop fan. It’s annoying, to say the least.
Now listen up:
A quick unplug-replug of the microwave might give you a temporary fix. But let’s be honest, it’s a band-aid solution.
So, here’s the deal:
Understanding why the fan won’t stop is key. Is it a clogged grease filter? A quirky control board? A faulty relay? You get the gist.
Good news:
This guide is your one-stop-shop, no matter your microwave model.
But here’s a word of caution:
If you’ve followed this guide and still hit a wall, it’s time to bring in the pros. You can either use our “Ask the Expert” group or give a certified technician advice for free.
Questions, concerns, or insights? Drop them in the comments. Trust me, I’ve seen it all, and I’m here to help.