
Listen:
If you’ve noticed a lingering foul smell around your washing machine, it is likely from backed-up stagnant water in the tub. And from personal experience, I’ve learned this is a sign to inspect your drain pipe venting.
You see:
James, a certified plumber with 20 years of experience, helped me understand that a properly vented drain pipe is a no-brainer for maintaining a plumbing system.
The idea is that washing machine drain pipe vents regulate the air pressure and eradicate hazardous fumes from your plumbing system.
As such:
You’re in the right place if slow drainage, water backing up, or a stench is a problem you’re facing.
With the help of James’ expert recommendations, this guide will teach you the steps to install a properly functioning washing machine drain vent.
Table of Contents
Required Tools & Cost of Venting a Washing Machine Drain Pipe
Now:
Before we get to venting, it is important to source the necessary tools and acknowledge the general cost of the procedure.
Believe me, you’d need more than your basic household repair tool kit for this, and understanding the costs involved goes a long way.
In fact:
Even James, my trusted plumber, has stressed the need for the appropriate tools and equipment.
So, here’s a rundown of what you’ll need:
- Metal ducts (galvanized steel or aluminum) to create washer drain pipe vents. Avoid varying the material.
- Elbow joints to connect the washing machine drain pipe to the metal ducts.
- Utility knife and tin snips to cut the straight metal duct.
- Caulk gun, exterior caulk, and Teflon or foil tape to seal threaded connections for the duct sections and air admittance valve.
In addition:
Get a tape measure, screwdriver, corded drill with drill bit set, pipe straps, and an outdoor vent cap. You can find these conveniently in your local appliance store or an online parts store.
As for the costs involved:
Depending on your washer and plumbing defects, the price of venting your drain pipe varies. If you need to install a new drain pipe and vent, you’re looking at an average cost of $1,000.
Plus:
If necessary, hiring a professional plumber could cost between $45 and $200. Factoring in building permits should incur an added cost of about $30 to $150.
All in all:
It’s up to you to decide whether it’s worth your investment and effort. Remember, a professional plumber, like James, is just one call away, and you can always solicit their assistance.
How to Vent a Washing Machine Drain Pipe
Washing machines have complex drainage systems that rely on proper venting to regulate air pressure. I can say from experience that a clogged drain pipe vent causes a range of avoidable problems. Hence, to effectively vent your washing machine drain pipe, install or replace necessary components like the P-trap, vent pipe, and air admittance valve.
So, follow these steps…
1. Diagnose the Problem
Look:
I realized my washing machine’s drain pump was having issues when I discovered foul odors, flooding, and poor drainage in my laundry room. So, I immediately contacted James, my trusted plumber, for help.
Apparently:
That was a step in the right direction, as he emphasized the importance of an accurate diagnosis.
He asserted that because drainage malfunction symptoms are similar to the symptoms for venting issues, they are often misdiagnosed.
In any case:
After describing my situation, he found the drain pipe improperly vented.
Even when substandard drain pipe venting seems to be the problem, you still need to determine the specific cause.
You see:
James taught me that it could result from a clog, improper installation, or the absence of a vent (though rare).
After poking around, we figured out the cause of the venting failure was a clog.
It is worth highlighting that:
If you detect any faults typically associated with a poor venting system, your first step is accurately diagnosing the issue. It would be a pain to tear out the drywall only to discover that venting was never the problem.
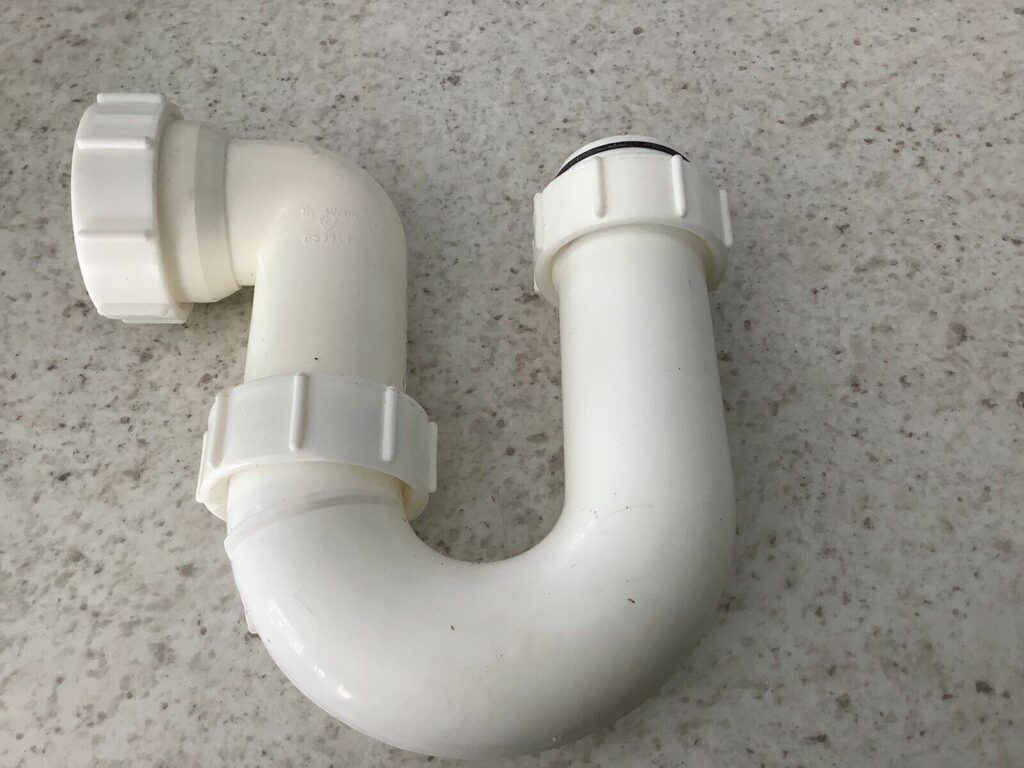
2. Ensure the Standpipe Has a P-trap
According to James:
The main drain line, a vertical or horizontal pipe connected to your washing machine, is also called the standpipe.
This standpipe is usually connected to a P-trap that prevents harmful sewer gases from filtering into your home.
You see:
The standpipe is relatively easy to install. You simply need to run a 2-inch pipe from the washer to the drain while maintaining a ¼ inch per foot slope.
After this:
Glue on a P-trap with caulk or plumber’s glue and attach the standpipe to a stud with strapping.
However, as James indicated, some people might omit the P-trap and vent, directly exposing their homes to hazardous fumes and plumbing damage.
As such:
You must ensure that your washer has a P-trap attached to the standpipe.
Then, you can install a drain pipe vent for your washer to allow the P-trap to do its job without complications.
3. Select the Vent Route
Now:
James saw me through even when I had to install my drain pipe vent. As you can tell, his help has always been extremely useful.
You see:
He advised that determining the most efficient vent route was essential, ensuring it was the shortest possible channel.
Plus, considering your washer’s location before selecting the vent route would greatly serve you.
Here’s what James taught me:
When your washer is in a basement underground,pass the vent upwards and through the outer wall and rim joist.
You may require at least 25 feet of the duct as the vent should be a minimum of 12 inches above ground level outside.
But:
You could run the vent straight out if your washer is near the outer wall. You should need a shorter length of the metal duct, but the vent must remain elevated at the same level.
Finally:
If your washer is in a room beside another, you could pass the vent through your roof, running it across the attic.
Only use this route as a final recourse because birds and other outdoor rodents nest on the vent cap.
Thanks to James:
I was able to set up an efficient vent route for my drainage system. And you can rely on these suggestions to get yours on the right track.
4. Take the Necessary Measurements
Take it from James:
Once you’ve decided on the vent location, you must take measurements to ascertain the precise duct length needed for the installment.
Make sure to provide allowances for bends and calculate the position of fittings.
So, here’s how he taught me to go about this process:
- Step 1: Measure the distance between the drain and the proposed outside vent hole.
- Step 2: Calculate the number of vent ducts you would need.
- Step 3: Consider the number of turns and have sufficient elbow fittings and joints available.
5. Drill the Vent Hole
Here’s the thing:
To install a vent, you must drill a hole. And when I was working on mine, James provided me with steps to determine the optimal placement for the vent cap installation.
Here’s what to do:
- Step 1: Drill a small hole into the wall or rim joist with a quarter-inch drill bit and inspect the exterior spot for obstructions.
- Step 2: If the location is unsuitable, you can try another spot after filling the hole.
- Step 3: Once you’ve settled on the most appropriate position, drill the actual hole with a hole saw. Pay attention to the size of the lap siding, ensuring it fits the 4¼ inch hole.
- Step 4: Continue until you bore clear through the rim joist.
Pro tip from James:
Ensure you have a firm grip on the drill and occasionally pause to clear the debris and dust for a seamless process.
6. Install the Vent Cap
Hold on to your drill; you’ll need it for this step.
Now, James first asked me to inspect the selected area for gaping spaces and seal it with acrylic caulk.
Then:
I had to drill some holes to attach the vent cap. At this point, I remember James specifying that the procedure would vary depending on the material you’re drilling into.
Listen:
If you are drilling the screw hole into a brick veneer or stucco, James recommended these steps:
- Step 1: Draw a 4½ inch circle.
- Step 2: Drill holes in it with a hammer drill and a quarter-inch masonry bit, ensuring they are closely spaced.
- Step 3: Break the hole using a cold chisel.
- Step 4: Cut the stucco’s wire mesh.
- Step 5: Drill a hole through the wood framing with a quarter-inch hole saw.
If you’re using vinyl siding, screw a vinyl surface block onto it.
Here’s what he recommended:
- Step 1: Trim the edges of the surface block to match the siding.
- Step 2: Install the mounting block over the surface block.
- Step 3: Drill larger-than-necessary holes into the vinyl siding to enable free movement.
- Step 4: Install the vent cap on the siding by detaching a section, inserting the mounting block, and installing the vinyl siding to suit the block.
All in all:
Be sure to pay attention to these expert recommendations, as they go a long way in making your process more efficient.
7. Attach the Elbow Fittings
Now:
According to James, the next step is to connect the elbow joints at designated points.
Install one elbow fitting on the drain pipe outlet, and attach the other to the exterior vent.
Here’s another suggestion from him:
Ensure the thicker end of the fitting is the connected end and accurately measure the distance between the elbow fittings. And when I followed this suggestion, the joints fit like a glove.
8. Cut the Straight Metal Duct
Subsequently:
You’ll be required to cut the metal duct. And just as James took me through the process, I’ve got you covered.
Before doing this:
Wear a pair of thick gloves to keep your hands protected from the sharp material and prevent injuries. As James likes to say, safety is vital.
Next:
Use the tin strips to divide the vents following the measurements you previously recorded for the structure. Note that just one duct segment should lead outside from the washer.
After I completed this step:
My venting system had more form, and I was quite pleased with what I had accomplished.
Speaking of accomplishments, I know this isn’t the easiest task, so good job for making it this far!
9. Align the Seam Edges
Here’s the thing:
After cutting the ducts, James directed me to align the seam edges.
Here’s how to do it:
- Step 1: Pull the long edges and merge them.
- Step 2: Create a circular structure with the alignment, beginning from one end of the straight metal duct.
- Step 3: Then keep merging until you have connected all the seams.
10. Connect the Duct Sections to the Elbow Fittings
Now:
James made sure I didn’t have a hard time with this step. And before long, I had set up an impressive vent structure.
Here’s what he advised me to do:
- Step 1: Attach the butt of the aligned metal ducts to the elbow fitting, connecting it to the ridged end of the joint.
- Step 2: Insert the rest of the metal ducts into the ends of the elbow fittings.
- Step 3: Connect the last elbow joint’s crimped end to the duct cap.
Now:
John warned that using screws to connect the duct to the elbow fitting could lead to lint buildup, and duct tape wouldn’t effectively seal the gap.
Hence, he recommended using metal foil tape to seal the connection.
11. Screw the Vent onto the Wall
After making the connections:
James expertly showed me how to screw the vent onto the wall. This is the final step that wraps up the vent installation.
So, I followed this guide:
- Step 1: Drill holes in the wall to create a pathway for screws.
- Step 2: Insert drywall anchors into the holes to hold up the fasteners.
- Step 3: Attach a U-shaped pipe strap to the vent duct.
- Step 4: Use a Phillips screwdriver to insert the screws that would hold the straight duct in place.
- Step 5: Position a pipe strap for every 7 feet of duct to reduce the joint tension.
Thankfully:
I could successfully attach the vent to the wall with James’ guidance. And it was as stable as a rock.
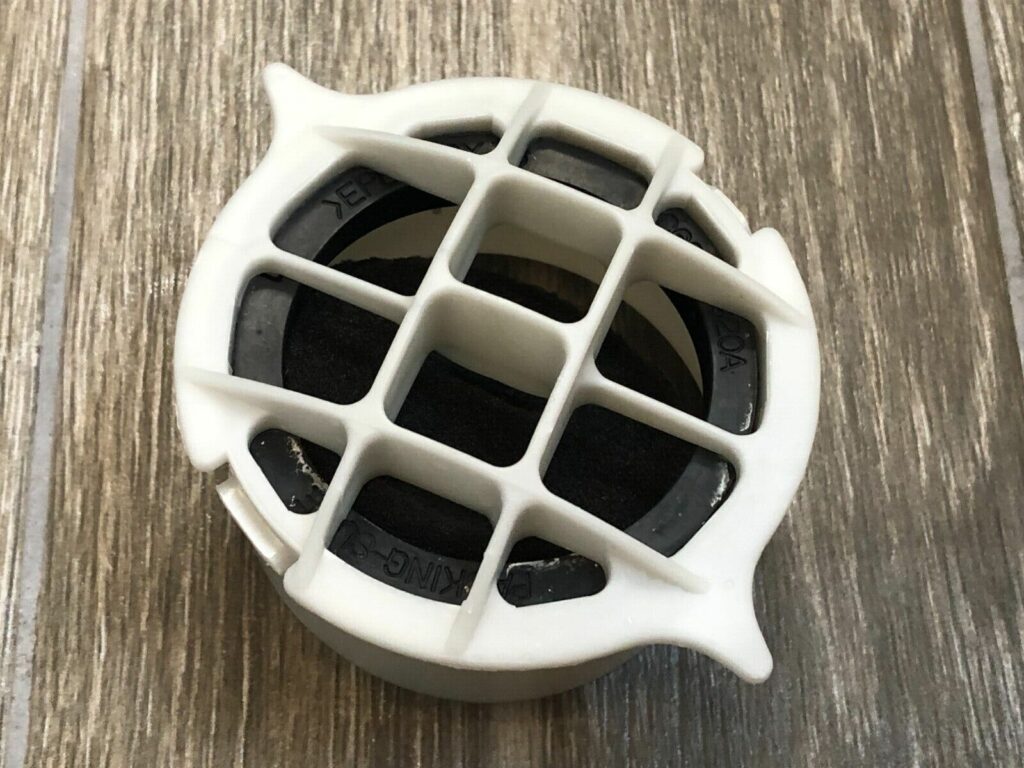
12. Install the Air Admittance Valve
Alternatively:
James recommends an air admittance valve (AAV), claiming many people use it instead of a drain pipe vent.
Bear in mind that the AAV should be at least 4 inches above the washing machine drain for proper air pressure regulation.
So:
What is an AAV? The air admittance valve is a cheater valve that opens and remains shut at its discretion using a spring-loaded mechanism.
You see:
It allows air into the washer when the drain line is negatively pressured and remains shut when there is positive pressure.
Air admittance valves are excellent alternatives to drain vents as they fundamentally perform the same function.
Now:
If your washer already has an air admittance valve installed, you must check it for functionality.
They typically give out after 20 years of consistent use, so you might have to install a new one if faulty.
Note:
Not all city laws accommodate the installation of an air admittance valve. Some city codes require that washing machine users vent the drain pipes through the roof or attic.
In line with that:
James suggests you check your city building laws before installing one and obtain a permit where necessary.
Plus, you can find air admittance valves at home construction supply stores like Lowe’s.
13. Run a Test Cycle
At the end of this process:
Reconnect your washing machine to the drainage and venting system. You should connect the red and blue hoses to the hot and cold water inlet valves, respectively.
Next:
Attach the drain hose filter, then bend the hose into a U-shape and connect it to the drain hole.
Finally:
James recommends running a test cycle on your washing machine to ensure the drainage and venting systems function properly.
Symptoms of Substandard Drain Pipe Venting
How can you tell when your washer drain pipe needs venting?
First:
It is worth noting that some of these symptoms are similar to those of a basic drainage clog.
Nevertheless:
James postulates that the first and most common sign of poor drain pipe venting is a putrid sewer gas stench from the P-trap.
When the plumbing is poorly vented, low pressure pulls the water from the drain trap, sending these foul smells across your home.
Along with fetid smells:
James explained that gurgling noises are another symptom of below-par drain pipe venting.
Fluctuations in air pressure cause these, typically occurring when you run water in some other part of the house.
Next:
If you notice standing water in your kitchen sink or bathtub when you drain your washer, the drain pump is badly vented.
Finally:
In the worst cases, a lack of proper venting could affect the general drainage speed of plumbing fixtures in the home.
Your washer may not drain properly or fill with water if the drain line isn’t vented or is clogged.
When Should You Consult a Professional?
Does this sound like you?
You’ve carefully followed all 13 steps for yourdrain pipe vent installation. You also purchased the appropriate tools and materials for the job.
Are youstill having venting issues?
Then you must enlist the help of a plumbing professional before the situation deteriorates further.
Ideally:
Venting a washing machine drain pipe is a job for a licensed plumber, not a typical homeowner.
So, from the get-go, you shouldconsult a professional like James once you notice the symptoms of poor drain pipe venting.
But:
If you insist on troubleshooting your washer yourself, you can consult a professional to ensure you’ve vented the drain pipe satisfactorily. That’s what I did by engaging James, my licensed plumber.
You never know:
Your plumbing system might need extra care to supplement the improved venting mechanism.
Conclusion
Perhaps:
Before reading this article, you might have attributed some of your washer’s plumbing faults to a drainage clog.
You might even have attempted to clean and unclog the drainage system after detecting a putrid smell or drainage overflow.
Now you know:
Improper drain pipe venting could lead to severe complications that extend to the functionality of the drainage system.
Are you looking to correct your washer’s poor venting or install a fresh drain vent?
These steps should guide you during your attempt:
- Diagnose the problem.
- Ensure the standpipe has a P-trap
- Select the vent route.
- Take the necessary measurements.
- Drill the vent hole.
- Install the vent cap.
- Attach the elbow fittings.
- Cut the straight metal duct.
- Align the seam edges.
- Connect the duct sections to the elbow fittings.
- Screw the vent to the wall.
- Install the air admittance valve.
- Run a test cycle.
Remember:
If, after attempting to vent your washing machine drain pipe yourself, you encounter further problems, contact a skilled contractor for assistance.
In any case:
We’d love to receive your feedback because your input is valuable.
Did you successfully vent your washing machine drain pipe? What were some challenges you faced?
Let us know in the comment section below!
Frequently Asked Questions
Yes, like other plumbing fixtures, it is necessary for your washing machine drain pipe to be properly vented. Drain pipe venting prevents harmful fumes from entering your living space and releases negative pressure from your drain.
To install a vent pipe on a washing machine drain, you’ll need to select a vent route, take measurements and purchase the required materials. If you are not mechanically skilled, you may need to call a plumber or an appliance service professional to assist with the installation.
Yes, an air admittance valve (AAV) is a suitable alternative to a vent pipe and is an excellent choice for venting washers. It senses positive and negative pressure and reacts accordingly to prevent water backflow and harmful gases from entering your house.
The location of the washer determines the distance between your washer drain and the vent.If your washer is in a laundry room backed by an interior wall, the vent pipe can be 10 to 15 feet away. However, the vent pipe can run outside if your washer is beside an exterior wall.
You can vent your washing machine drain pipe around the side or back of the house or through the roof. The venting route choice relies heavily on your washing machine’s location.