
The Whirlpool Cabrio series of washers and dryers can indeed be challenging to repair.
So, to help you out:
I consulted Josh, a skilled appliance technician on our team with expertise in Cabrio dryers, aiming to learn the ins and outs of the process.
Together, we developed a guide that will walk you through everything you need to know for this particular repair.
Let’s get started!
Table of Contents
Essential Tools for the Job: Simply Swider’s Recommendations
The Cabrio series of dryers require a specific set of tools for disassembly. Josh kindly shared the necessary tools for this task.
So:
Here’s a concise list of the exact tools you’ll need to replace the belt in your Whirlpool Cabrio dryer:
Additionally:
If you don’t have these tools in your toolbox, you can find them on Amazon.
Josh emphasized the importance of these tools, explaining that replacing the belt in a Cabrio dryer involves several steps. To access the drive belt, you’ll need to disassemble the dryer.
Here’s an overview of how you can do this.
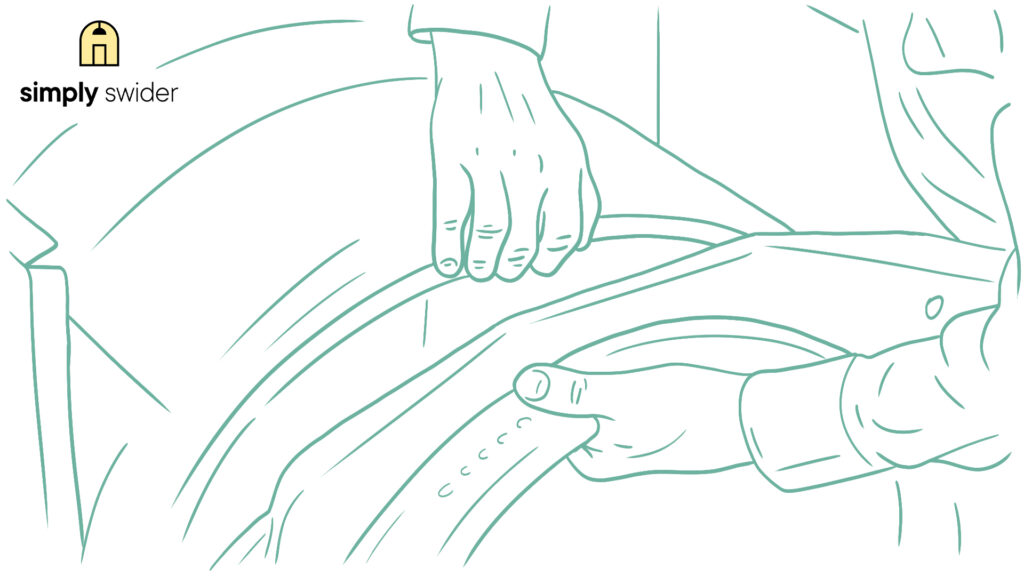
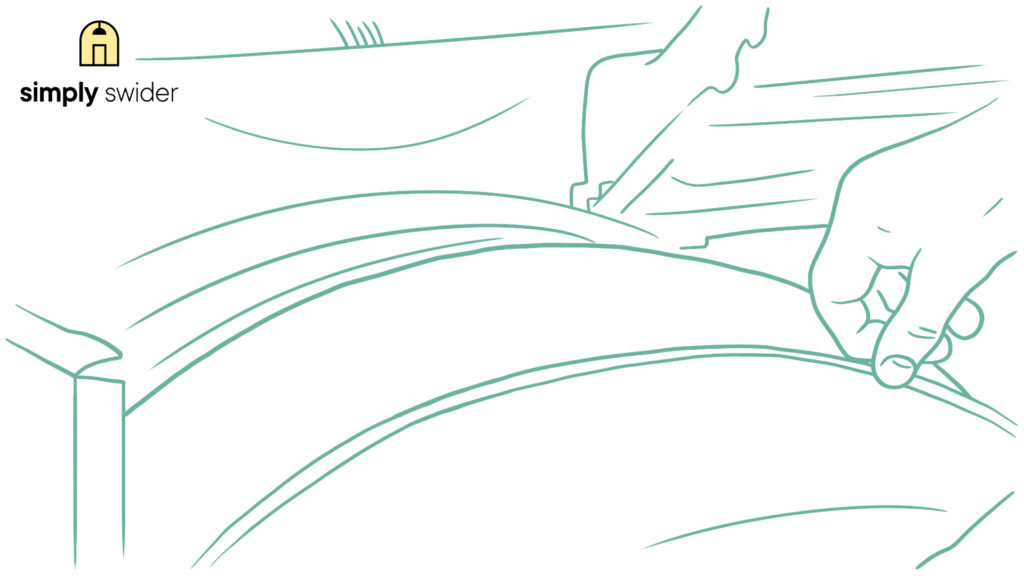
1. Removing the Top of the Dryer
The top of your Cabrio dryer acts like a bottle cap. “We need to get the top out of the way before we can work on the front panel and, ultimately, access the drive belt,” Reggie mentioned.
Note:
Ensure your dryer is unplugged before you start working to avoid the risk of electrocution.
With safety in mind, follow these steps:
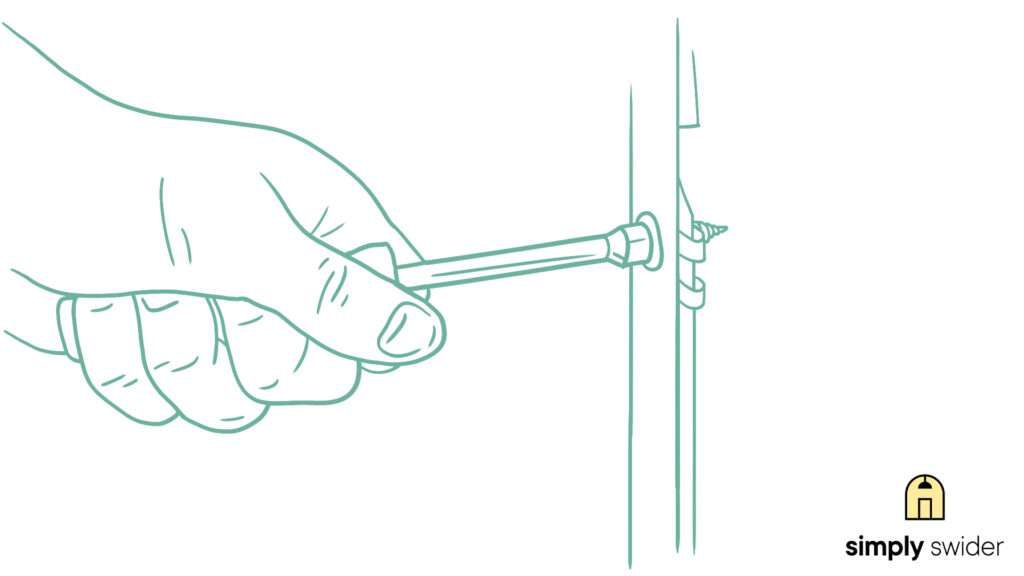
Step 1: Open the lint trap and remove the lint screen. Set it aside carefully to prevent tearing.
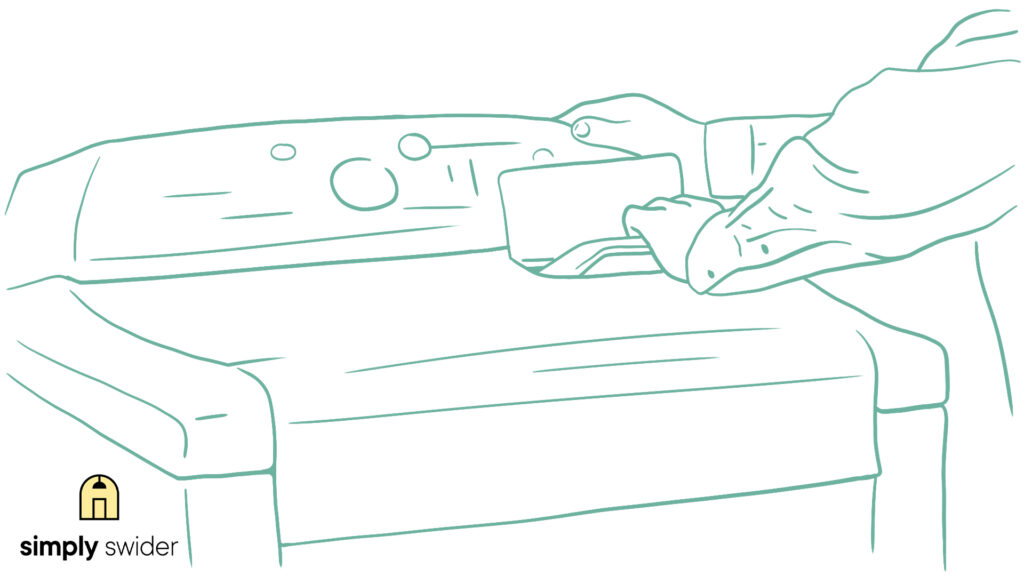
Step 2: Opening the lint trap will reveal two screws. Unscrew them with your Philips head screwdriver.
Step 3: Open the dryer door first, as it helps hold the top in place on some Cabrio dryer models.
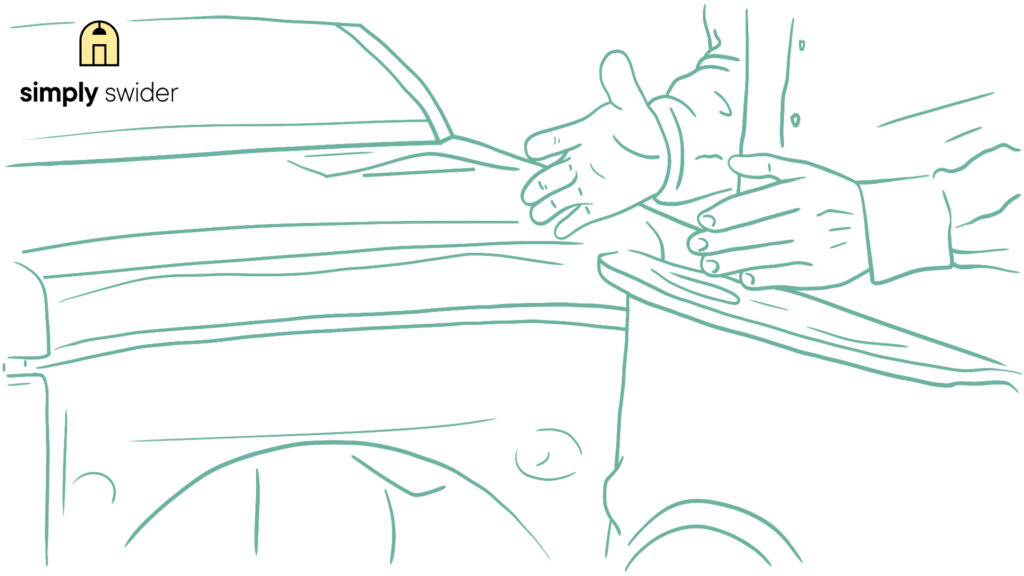
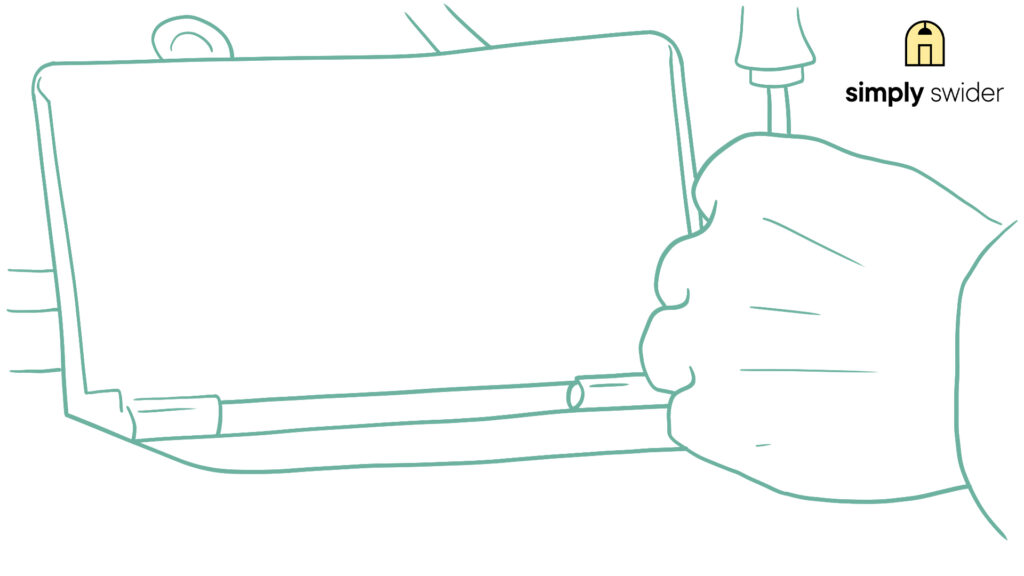
Step 4: Slide the putty knife into the gap at the corner of your Whirlpool dryer.
Step 5: You should feel some resistance. Push against the safety clip to release it.
Step 6: Repeat step five on both the left and right corners.
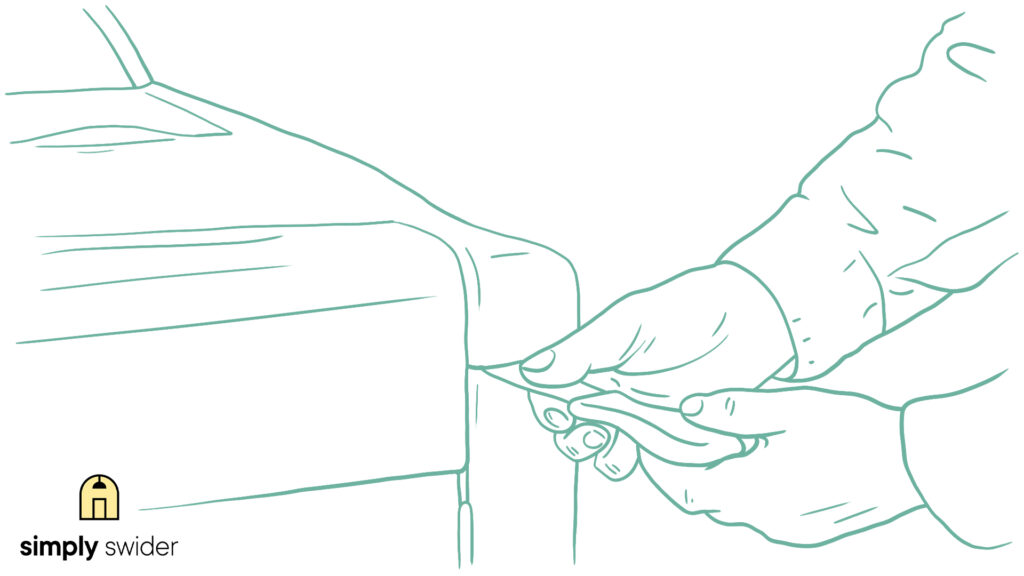
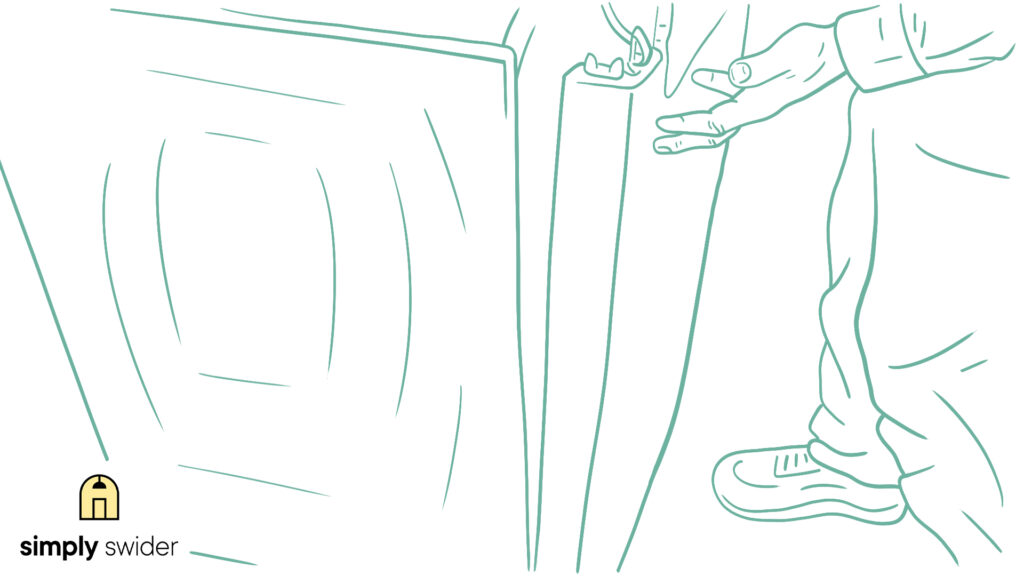
Step 7: Lift the top slightly from both corners, and it should come out of place.
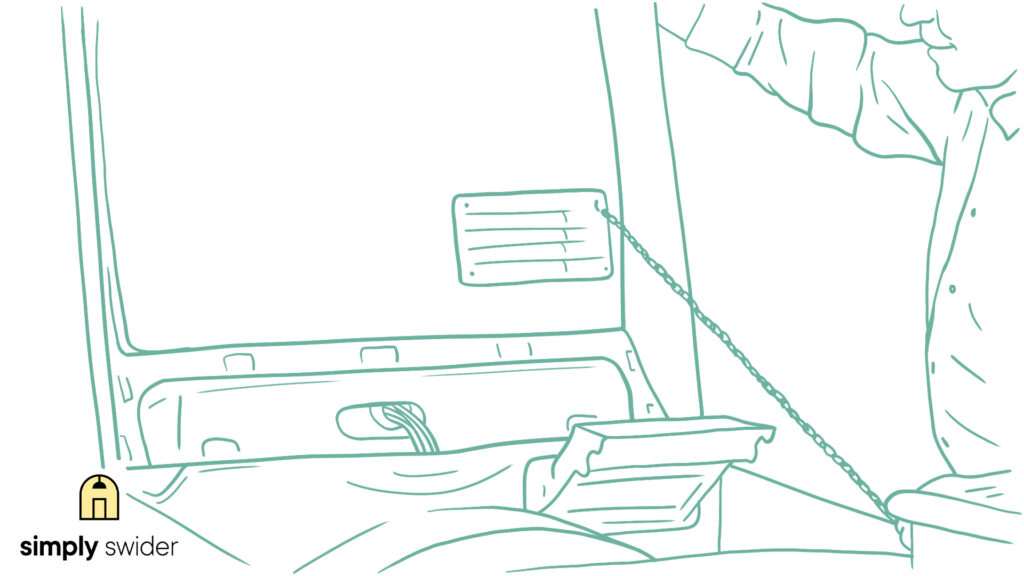
Step 8: Secure the top as you tilt it back. Slide it close to the wall or use the hook and chain for support.
Make sure the top panel is fixed securely.
Keep in mind:
The control panel is still wired to your Whirlpool dryer. You risk damaging your machine greatly if the top falls out of place.
Also:
Some users complained about finding it hard to undo the front safety clips. That part can be sticky sometimes. Make sure you are pushing against the safety clips with a putty knife.
Apply a steady force, and it will slide out of place.
Now:
We can discuss the next step in accessing the drive belt. Josh guided me through removing the front panel, and here are the key points.
2. Removing the Front of the Dryer
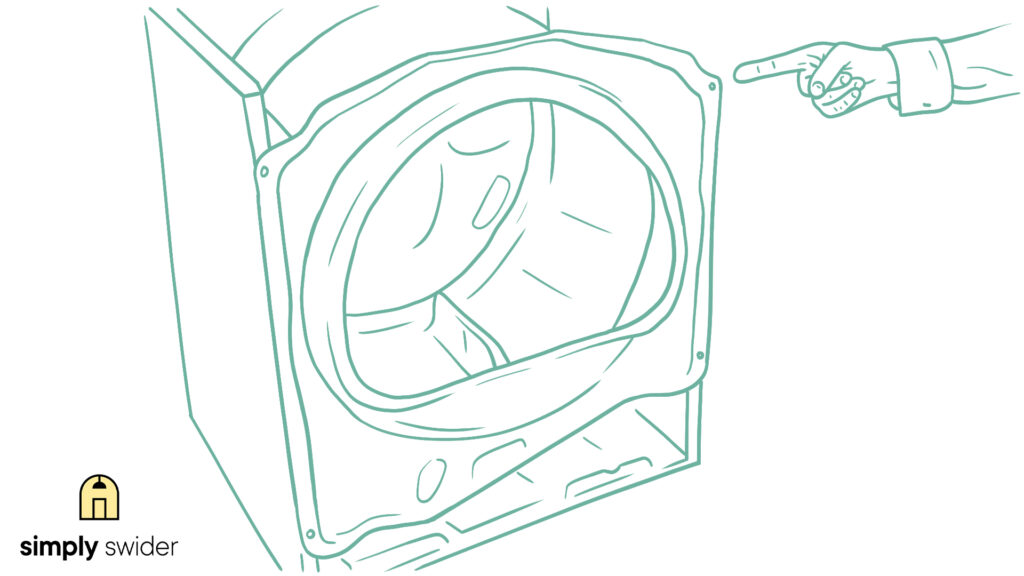
To access the tub and drive belt, you’ll need to remove the front panel of your Cabrio front load dryer.
Also:
Josh explained that this is also an essential troubleshooting step if your Whirlpool is making a grinding noise.
Fortunately:
Josh provided detailed steps to follow when removing the front panel. Here’s how:
Step 1: Locate the door switch connection.
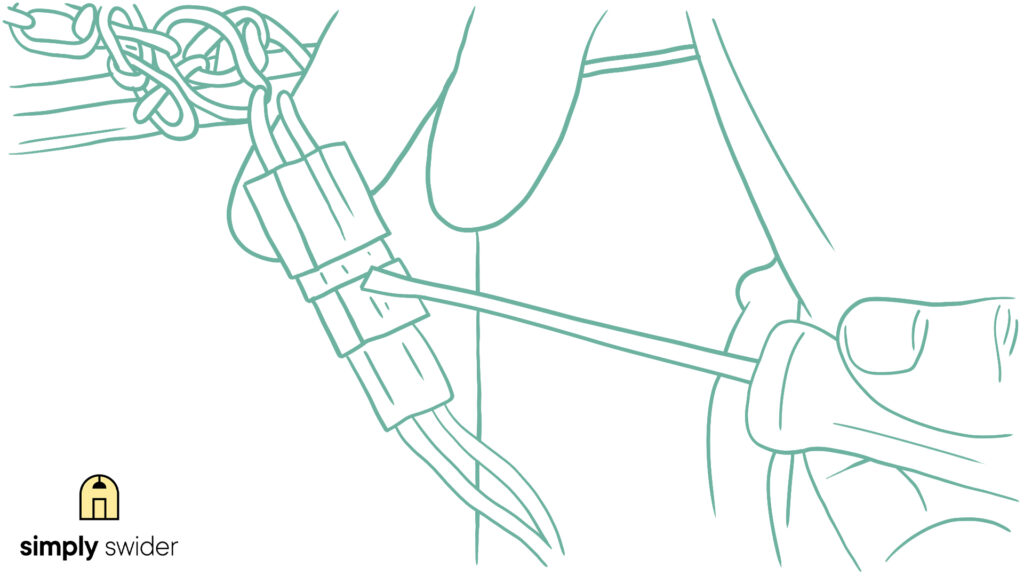
Step 2: Use a flathead screwdriver to carefully loosen the connection on each side, and it should slide free.
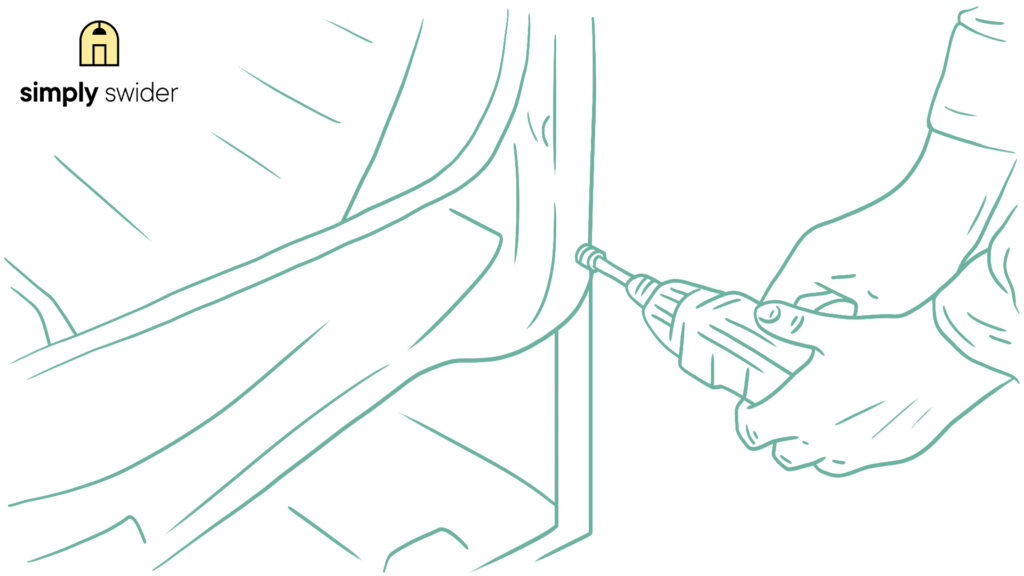
Step 3: Find the 5/16th-inch hex-head screws securing the front panel to your Whirlpool dryer. They are located inside the machine, next to the door assembly.
Step 4: Support the front panel with your body and grab your 5/16th-inch hex-head driver.
Step 5: Unscrew the 5/16th-inch nuts on both sides of the front panel.
Step 6: Slightly tilt the front panel forward and lift it to release the safety clips holding the panel in place.
Lean the freed front panel against a wall. Josh advised handling the front panel carefully since the front door assembly is connected to it. You don’t want to damage your Whirlpool dryer’s front door assembly.
At this point, you now have access to the next crucial component, the bulkhead. Let’s go through how to disassemble it.
3. Removing the Bulkhead
The bulkhead helps secure the spinning tub in place and is held in position by four 1/4th-inch nuts.
Thankfully:
I’ve put together a detailed walkthrough on how to remove the bulkhead, incorporating tips from Josh and experiences shared by some Cabrio dryer owners.
Here’s what you should do:
Step 1: Partially unscrew the top two hex-head screws securing the bulkhead.
Step 2: Completely remove the two bottom screws holding the bulkhead in place.
Step 3: Loosen the top screws a bit more so that the bulkhead can move freely.
Step 4: Support the drum and tilt the bulkhead from the bottom, allowing the support bearings to slide out from underneath.
Exercise caution when setting the bulkhead aside, as the support wheels are vital for the dryer’s functionality.
At last:
You should have access to the dryer tub and the secure drive belt.
I’m sure you’re eager to replace the drive belt, so the next section provides all the details you need to smoothly complete this process.
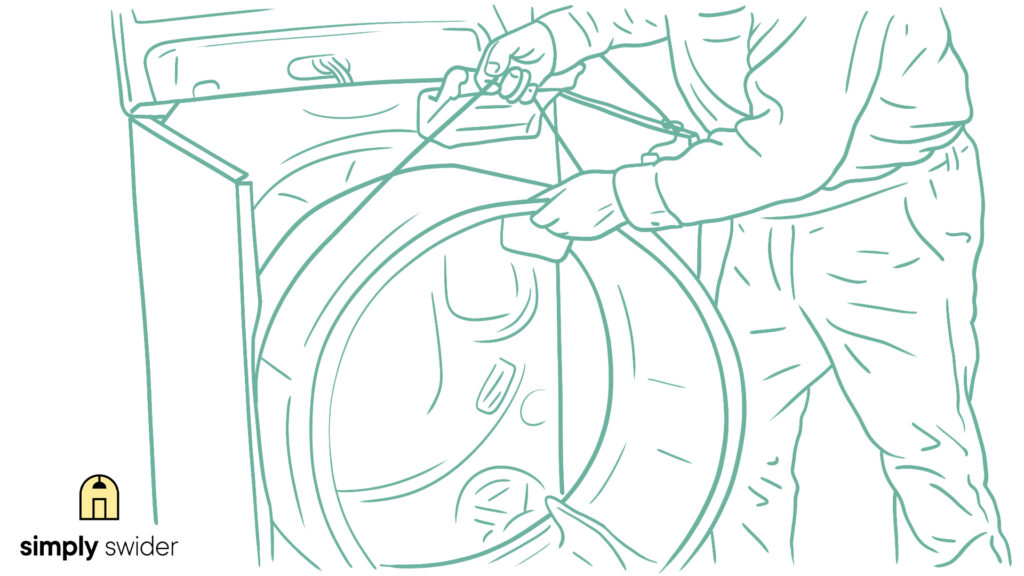
4. Replacing the Dryer Belt
Josh’s five years of dryer maintenance experience proved invaluable in creating this section.
Replacing the drive belt can indeed be an intimidating task.
However:
By following the instructions below, you should be able to replace the drive belt without trouble:
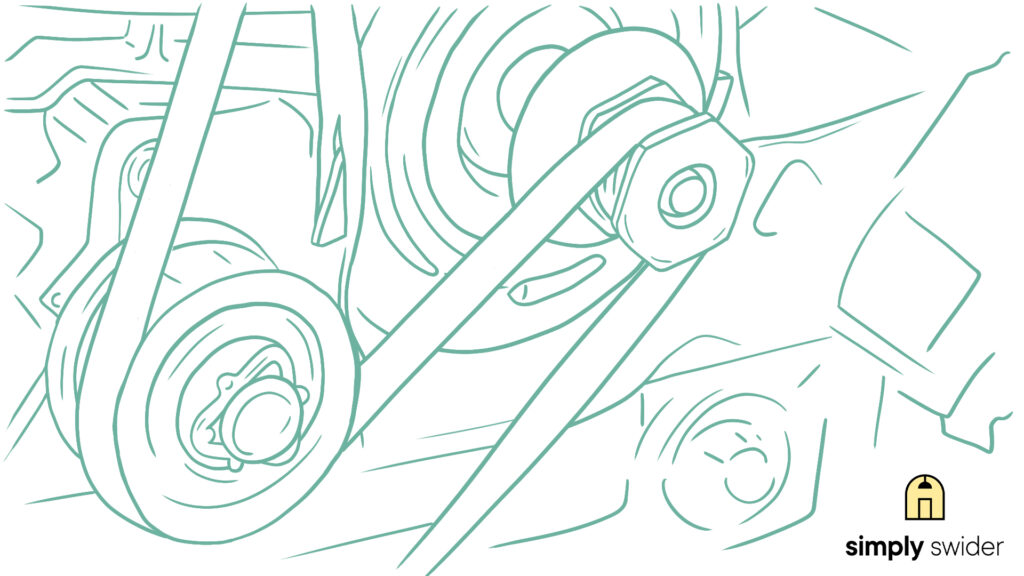
Step 1: Locate the two pulleys in the bottom right compartment of your dryer.
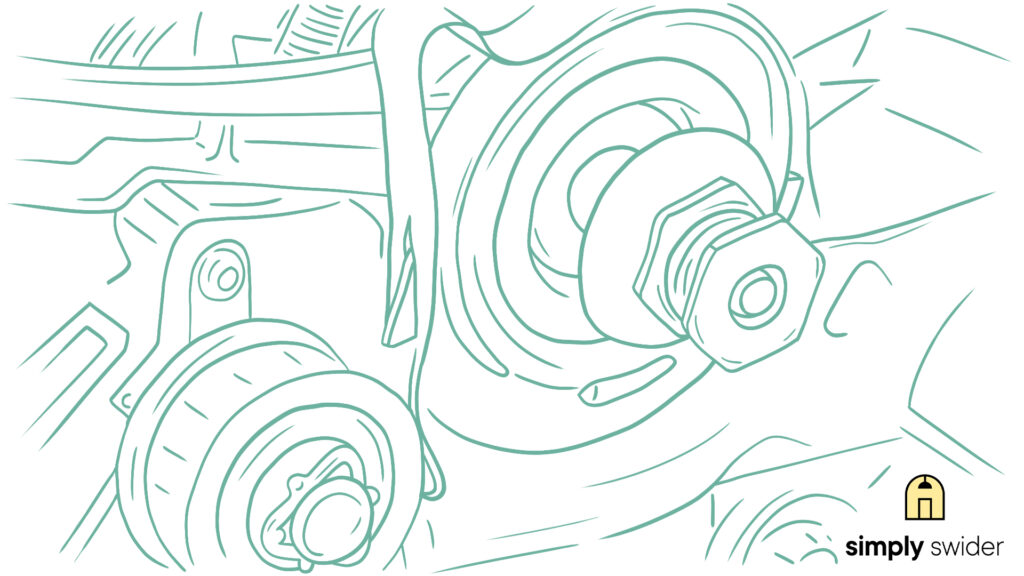
Step 2: Release the tension in the drive belt by pulling the idler pulley to the right.
Step 3: Carefully untangle the belt from both pulleys and remove the tub from the dryer compartment.
Step 4: Take your replacement belt and thread it around the tub, ensuring the grooved side of the belt rests against the tub.
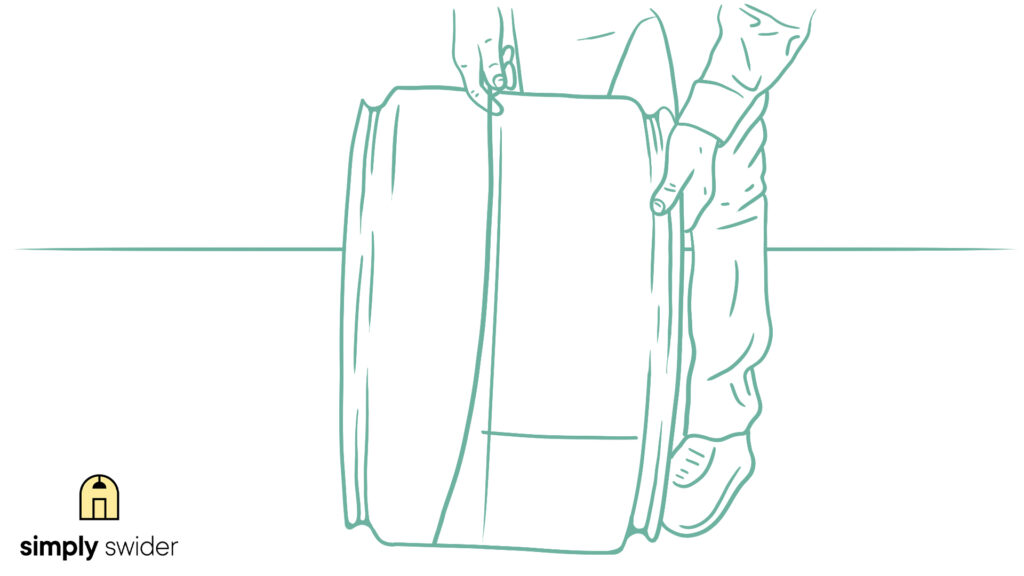
Step 5: When replacing the drum, fit it into the provided groove.
Step 6: Thread the new belt through the pulleys, making sure the grooved side hugs the motor pulley and backs the idler pulley.
Once the tub is secure, reattach the bulkhead, front panel, and top panel in that order. Refer to the respective sections in the guide when reassembling the parts to ensure they fit back in place correctly.
Note:
Keep track of all the parts as you remove them, as they all work together to ensure your Whirlpool Cabrio dryer functions properly.
Ultimately:
Don’t hesitate to contact Whirlpool customer service if you encounter any issues. Their service representatives can be quite helpful.
Simply Swider’s Handy Safety Tips
Josh wasn’t the only expert contributing to this guide. I also reached out to Douglas, a safety expert who has worked with a team of appliance technicians for seven years.
Fortunately:
Douglas had plenty of advice for staying safe while disassembling your Whirlpool Cabrio dryer.
Here are some safety concerns to keep in mind:
- To avoid the risk of electric shock, always unplug your Cabrio dryer before working on it.
- Keep track of smaller parts by placing them in groups on a colorful paper towel. This way, they stand out and are easy to retrieve.
- Exercise caution when releasing the tension on the dryer belt, as it could snap and hit you with considerable force.
- The dryer tub may fall abruptly after releasing the tension spring holding the belt in place. Support the tub while performing this step to prevent any damage.
By following these safety tips, you can ensure a safer and smoother repair process for your Whirlpool Cabrio dryer.
Final Thoughts
Dismantling any machine can seem daunting at first, and the Cabrio Dryer’s size and weight might only add to your apprehension.
However:
We hope this guide has helped you navigate the repair process with minimal difficulty.
Remember to address the following parts in sequence:
- The top panel
- The front panel
- The bulkhead
- The dryer belt
Also:
Whirlpool states hat you may be entitled to repair assistance under your warranty. If your warranty is still valid, don’t hesitate to contact customer service for help.
And there you have it! Everything you need to know about replacing the belt in a Whirlpool Cabrio Front Load Dryer.
If you think we missed anything or have any questions, feel free to let us know in the comment section below.
Frequently Asked Questions
The drive belt in your dryer may need to be replaced if the machine has trouble starting a spin cycle. You may also notice a squeaking sound coming from your Cabrio dryer.
You can safely attempt to replace the drive belt by following the instructions in the guide above. Also, pay close attention to the safety instructions.
Disconnect the dryer from the wall, and keep track of all the small parts you remove from the dryer. Also, be careful when loosening the tension on the old drive belt.
It depends on how your dryer is plugged in. Locate the power outlet, tilt your machine forward if necessary, and safely remove it.
If the power source is hard to reach, shut off power to the room via your home circuit breaker.
My dryer motor tried to run, turn out belt was bad and tensioner pulley was bad. Thanks to you I was able to troubleshoot and replace belt. Now unit will not start at all, and a sensing signal comes on. What’s should I do ?
Hi Jim,
Some dryers feature a belt switch or sensor associated with the belt pulley or tensioner. This safety mechanism detects whether the belt is broken or if it has come off its proper track. If the switch or sensor determines that the belt isn’t positioned correctly, it can prevent the dryer from starting to avoid potential damage.
Please let me know if this information is helpful!
Jason