
I’ll start by saying that I have been super excited about this project since we first started talking about it, which was when our friends (and now neighbors) asked Cody to build them one. So, what am I talking about? A custom under-the-counter cabinet to hold a microwave on our island! Not visualizing it? Then check this out. Apparently, microwaves are too plebeian to be seen in the kitchen anymore, and considering we hardly use ours anyways I am all for the trend of hiding them away. Since we gutted our kitchen we were starting from scratch, but a microwave cabinet can easily be added to the end of existing cabinetry (as our friends did).
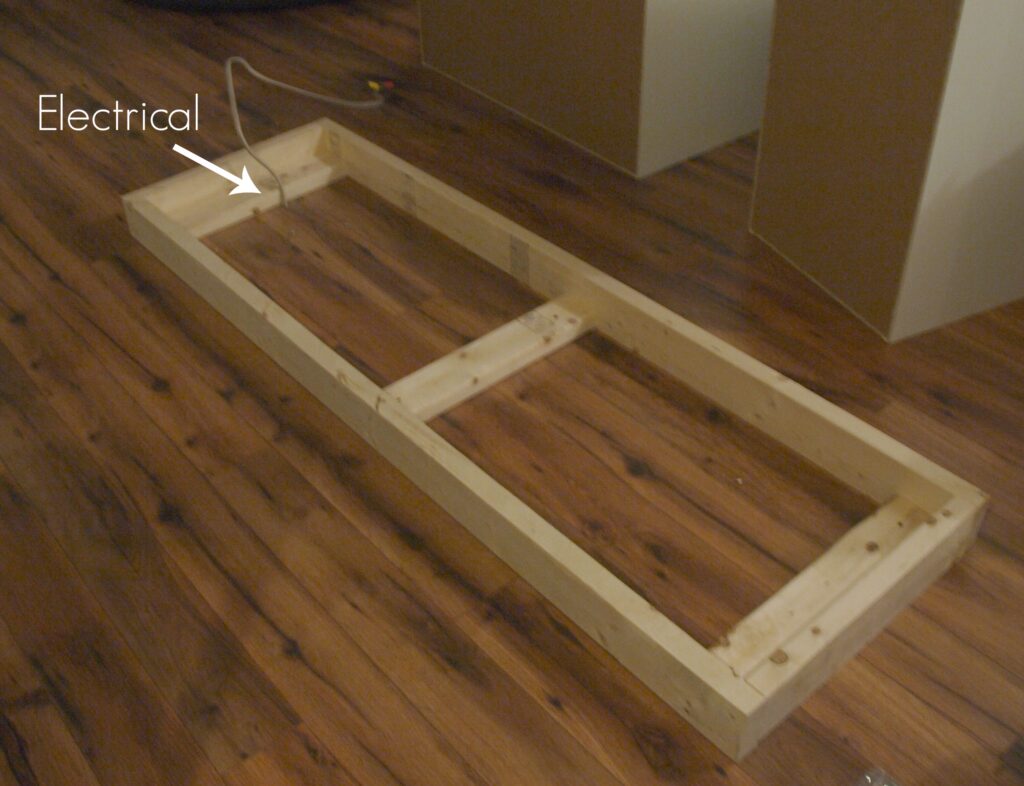
First up, we had to build and base for our island so we had something to screw the cabinets into. We were lucky that the previous island had already been run for electrical, so we just made sure to pull up the wire into the new base.
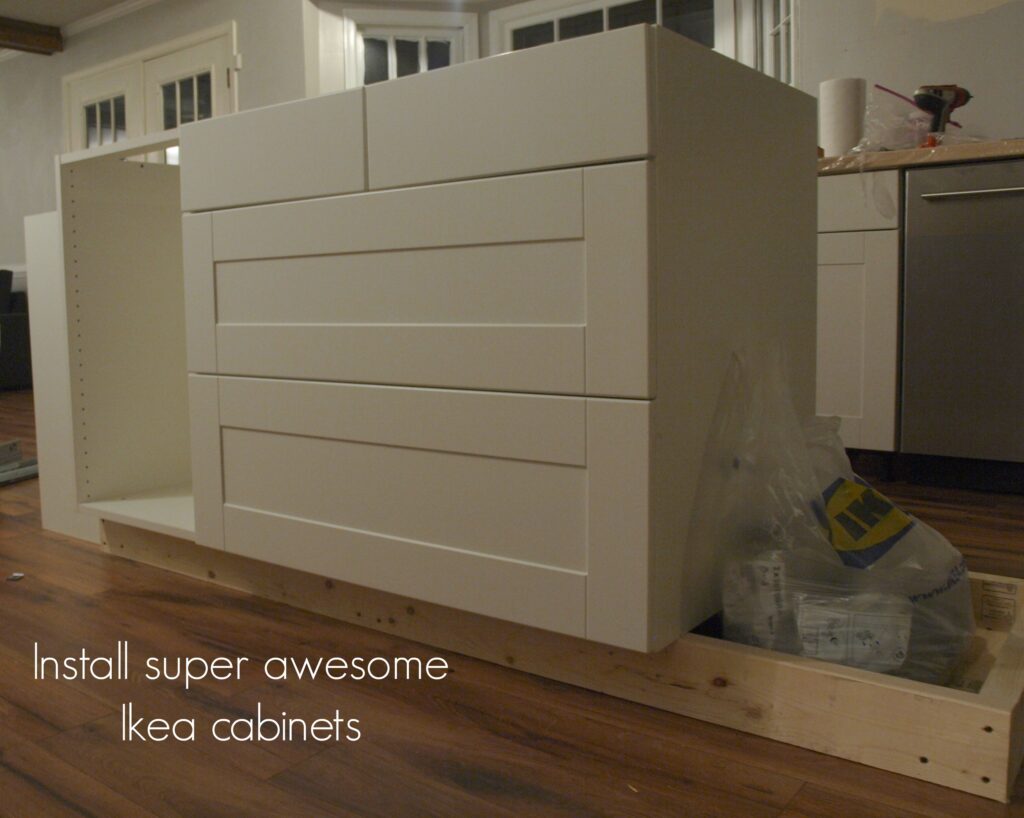
Next, we installed the base cabinets for the island that we bought from Ikea. You can see from the picture below that the base was built so the cabinets line up to it in the back but hang over a couple of inches in the front. Eventually the base will be covered with plinths that match the cabinets.
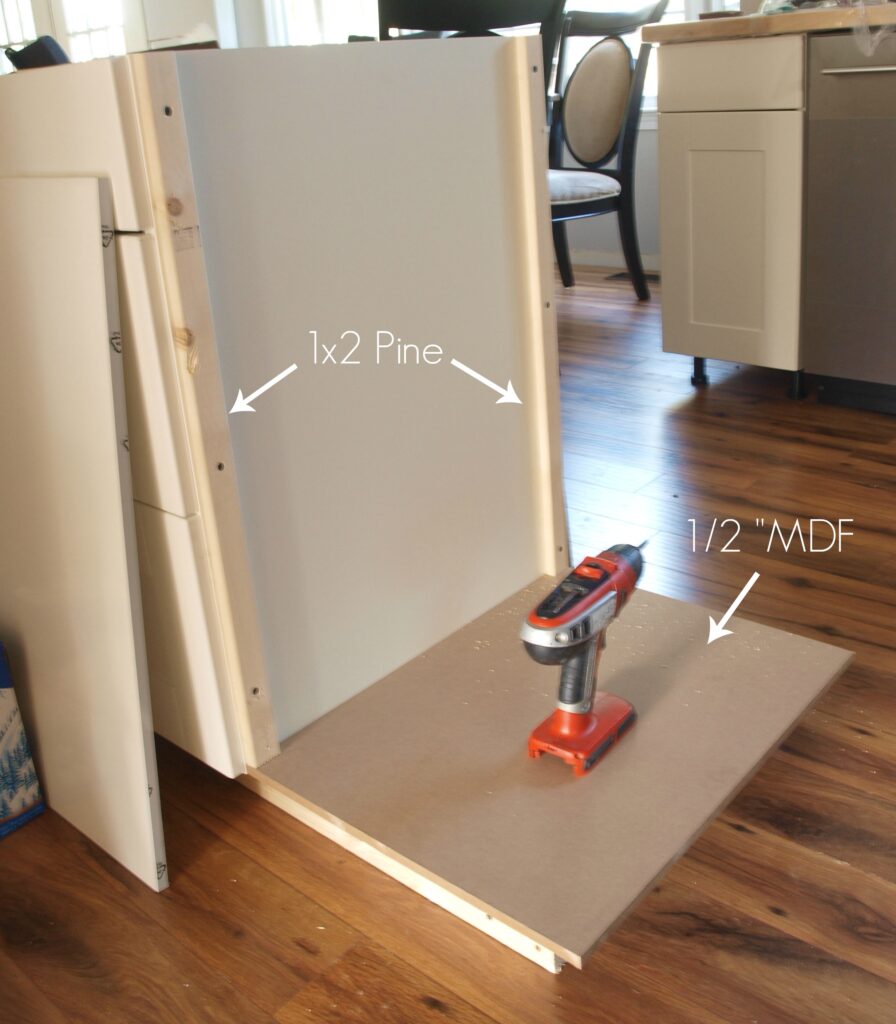
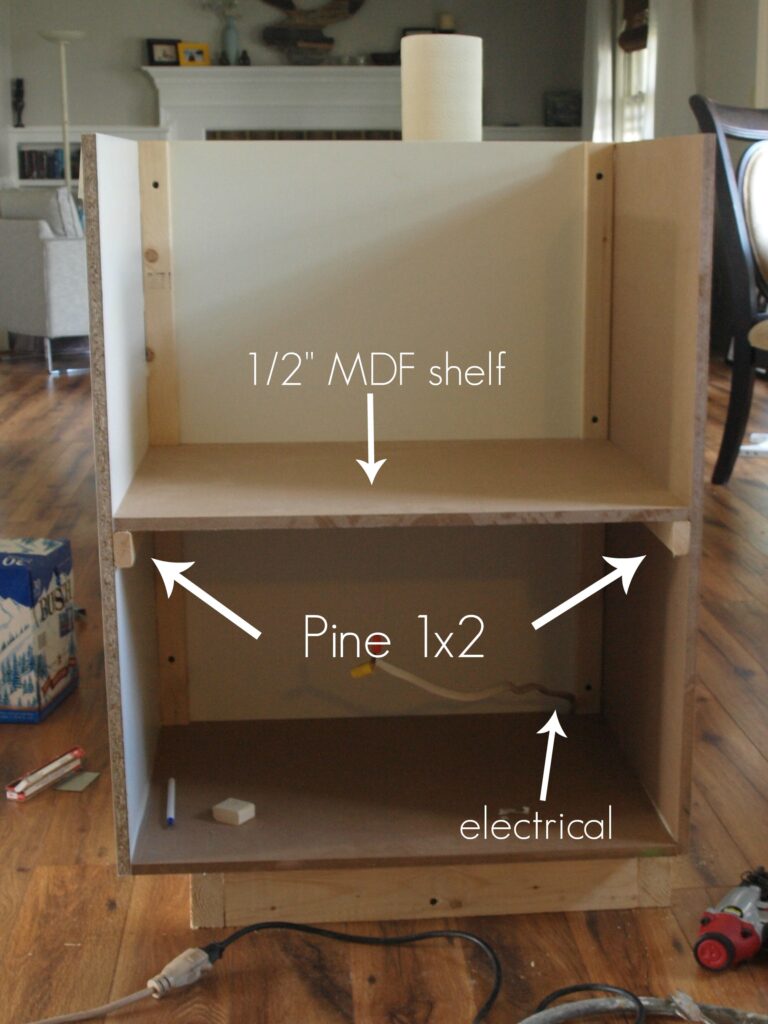
Now it’s time to start assembling the custom microwave cabinet over the exposed base. First, Cody attached a piece of 1/2″ MDF to the top of the base making sure to leave the same overhang on the front that her left on the front of the other cabinets. Next, he screwed in two pieces of 1×2 to each side of the side of the last cabinet to create a frame.
Then, Cody attached the sides of the new cabinet to the 1×2’s. On the right side he used a piece of MDF that will later be painted to match the cabinets. On the left side he used a cover panel that matches the cabinets from Ikea. Originally we were going to make the whole thing out of MDF but magically some cover panels showed up in our order (we didn’t order them) so we decided to take advantage of having them on hand.
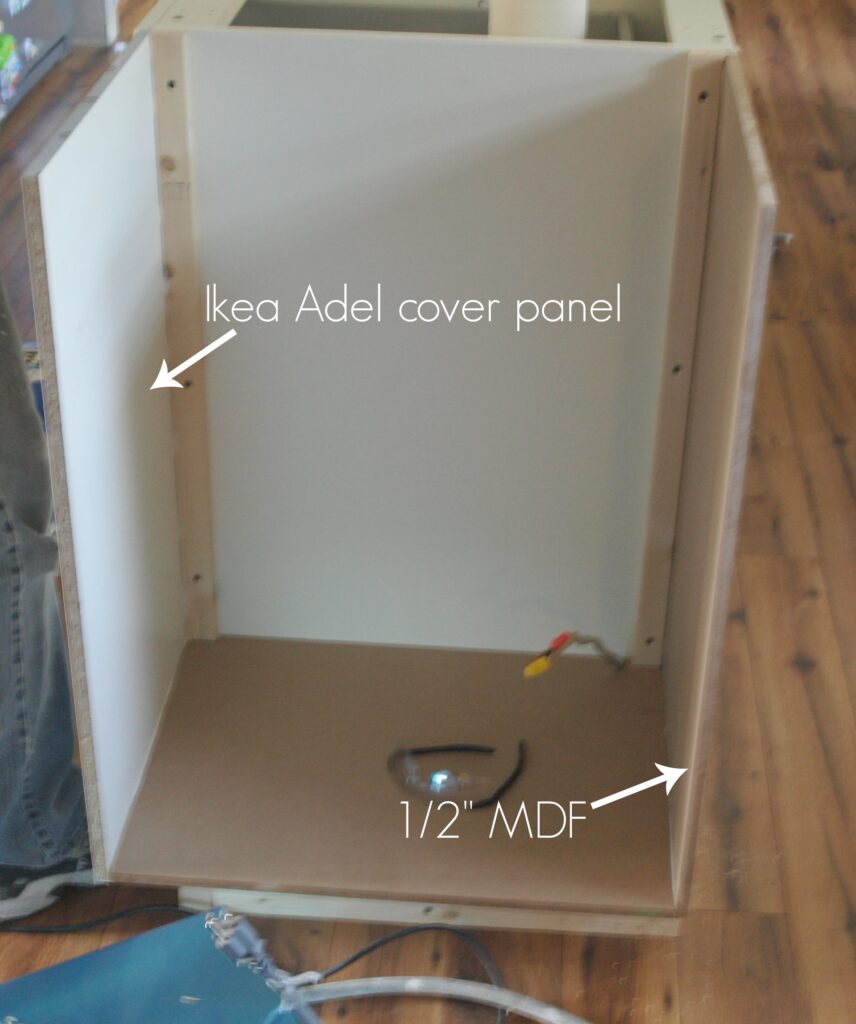
After having measured how tall the new microwave is he attached two more 1×2’s along both the sides to form a brace for the shelf that will hold the microwave. Then he attached another piece of MDF to the top of them to make the shelf the microwave will sit on. At this point he also pulled the electrical through the bottom of the cabinet and installed an electrical outlet.
The cabinet is technically complete now except for the framing. Cody framed out the cabinet with more 1×2’s. The microwave was a little wider then the framing would allow, so he had to go back and trim up the face framing on the top to get the microwave to fit.

The final step was filling in all the holes with putty and painting. We wanted the cabinet to match the IKEA Adel cabinets perfectly, so we took one of the cabinet doors to Benjamin Moore to have it color-matched. They recommended Advance Waterborne Interior Alkyd for the cabinet. The custom color is Y3-3 S1-1. I wanted as smooth as a finish as possible so I used the Wooster Chinex FTP 2″ brush to apply the paint. I particularly love how easily this brush cleans up making it an excellent investment. The paint can recommends 16 hours between coats, so it took me two days to finish up with the painting, but look at our new custom under counter built-in microwave!
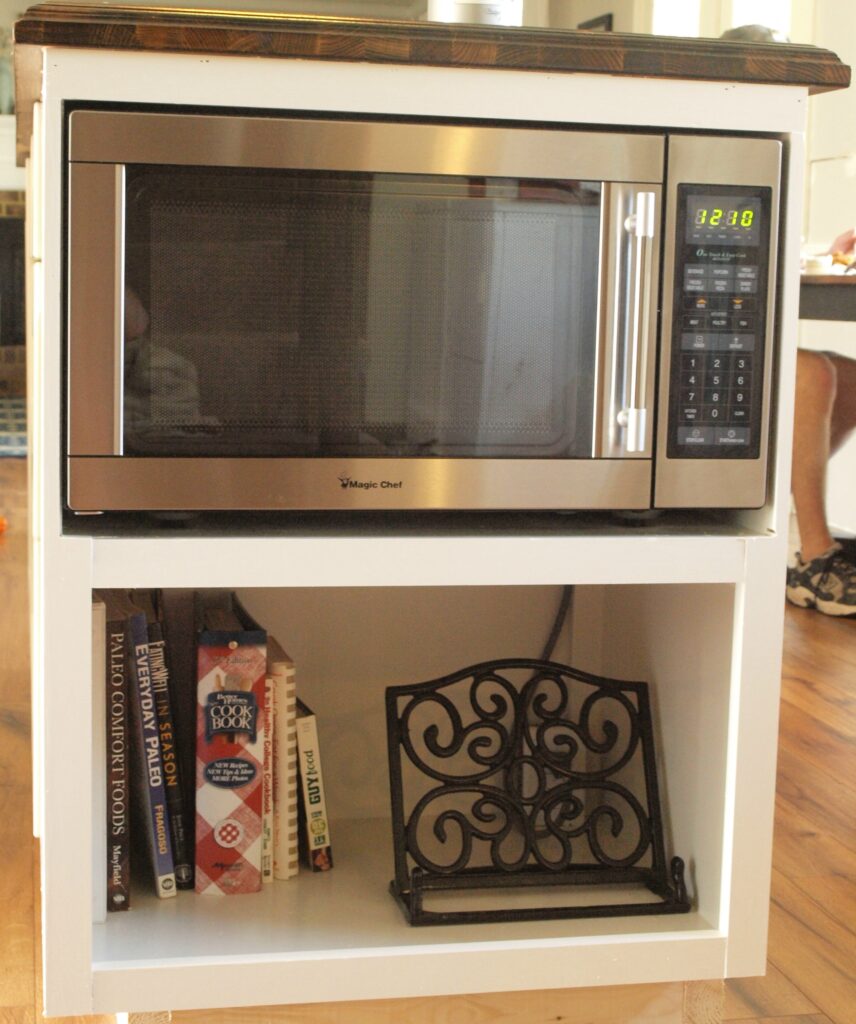
I don’t know what I love more: that the microwave is hidden away when you walk into the kitchen or that it looks so cool when you actually see it. I also love that we could carve out room for cookbook storage below it. Oh and while we left plenty of room behind the microwave for it to breathe and get airflow because it’s boxed in on the sides it’s virtually silent when on. Seriously, I keep checking on it because it’s so quiet I’m convinced I didn’t push start. The microwave itself is a Magic Chef 6.1. It was actually remarkably hard to find a microwave under 24 inches, but we finally find this cool dude at Home Depot for $100.