
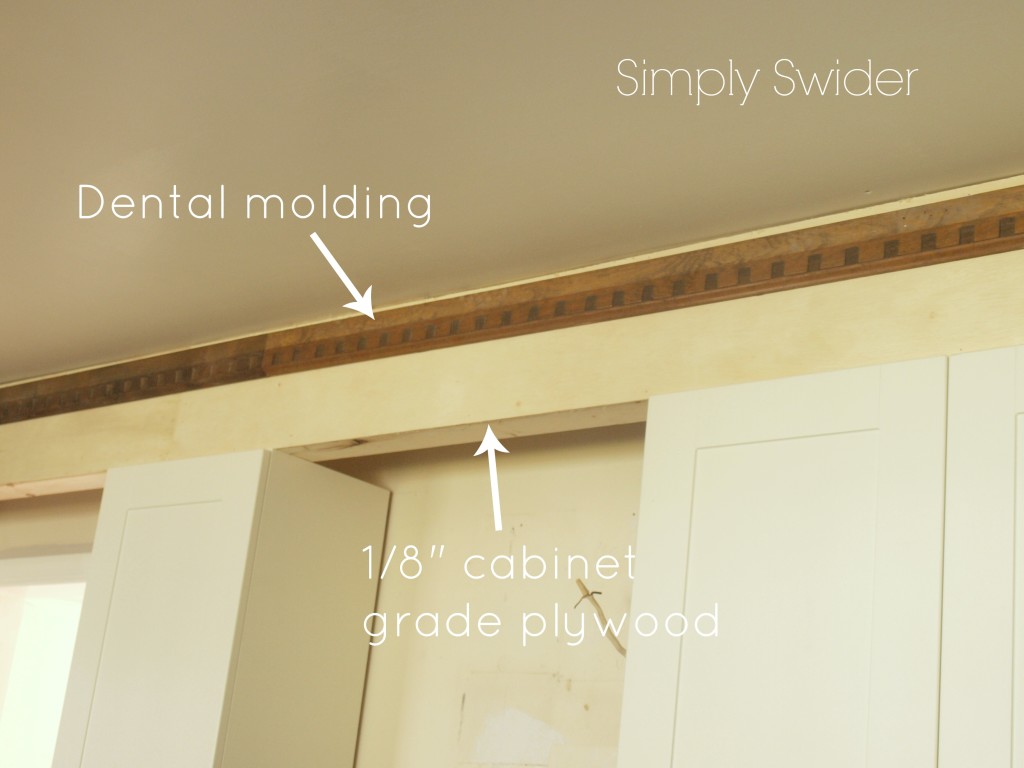
The original kitchen in the house had soffits with lovely crown molding, and we had intended on keeping them. That is until we started ripping the cabinets out and the “soffits” came down with them. It winds up they were fake soffits simply attached to the cabinets. Cody, for some reason, was attached to the idea of still having soffits, so after installing the new cabinets he built new custom soffits for the room. The are actually slightly smaller than the originals to accommodate for the larger cabinets and luckily for our budget we were able to salvage all the original crown. We decided to build the soffits out of 2x4s and cabinet grade plywood.
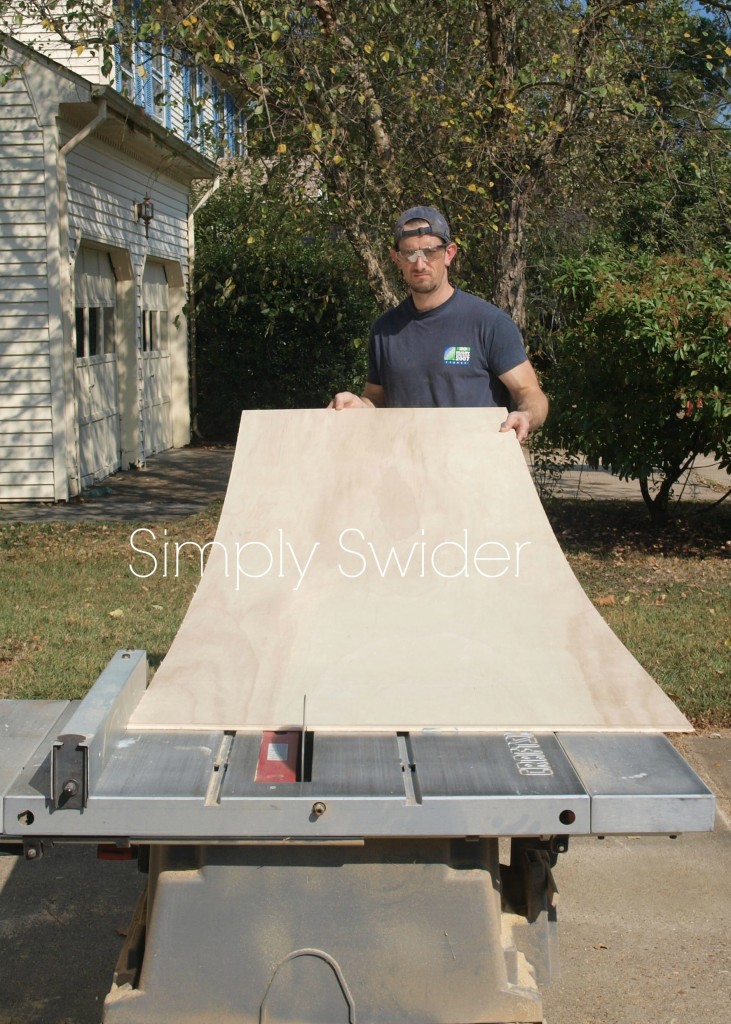
First up, Cody screwed the 2×4’s into the ceiling and the tops of the cabinets to create a frame to attached the plywood too (sorry no picture). Next, using a table saw he cut the plywood into 12 in strips to create the front of the soffits. We only needed 1 sheet of plywood to do all the soffits, so at $30 the plywood was a steal.
Cody used a nail gun to attach the plywood to the 2x4s, then we began attaching the salvaged 2 piece crown molding. Since the crown molding originally came off this wall we didn’t even have to cut it again. Once all the molding was up we caulked all the lines and filled all the holes.
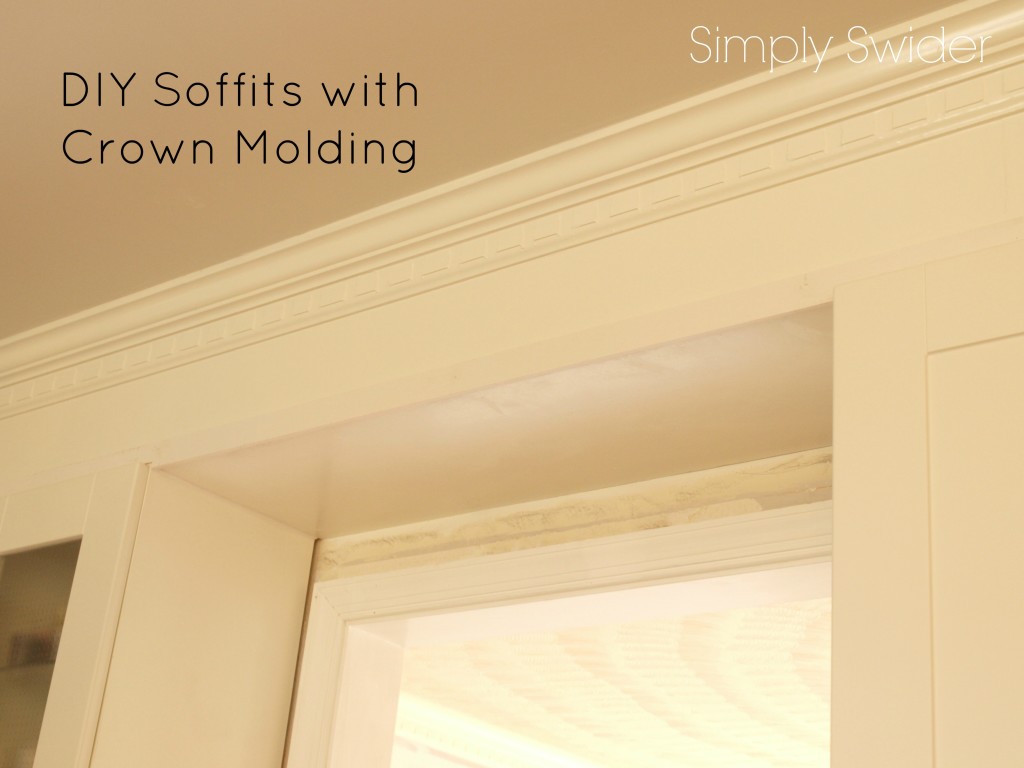
We did have to add a piece of plywood over the doorway to create a completely boxed-in soffit. We also added a 1 in piece of molding across the front bottom of the soffit to give it a clean finished look since the edge of the plywood was rather rough looking. Finally, I gave the whole thing 2 coats of primer and 2 coats of paint matched to the cabinets to give the soffits and cabinets a seamless look.
And just like that the cabinets are finished! Unfortunately the island was not……
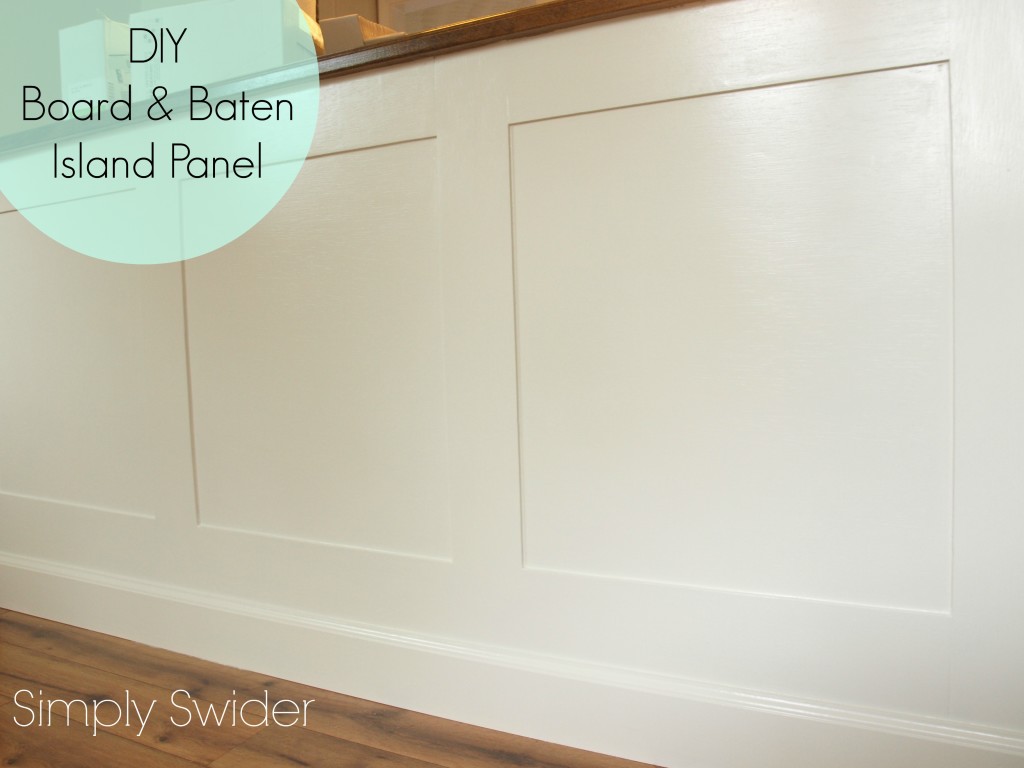
Creating a Board & Battan Cover Panel for an Island
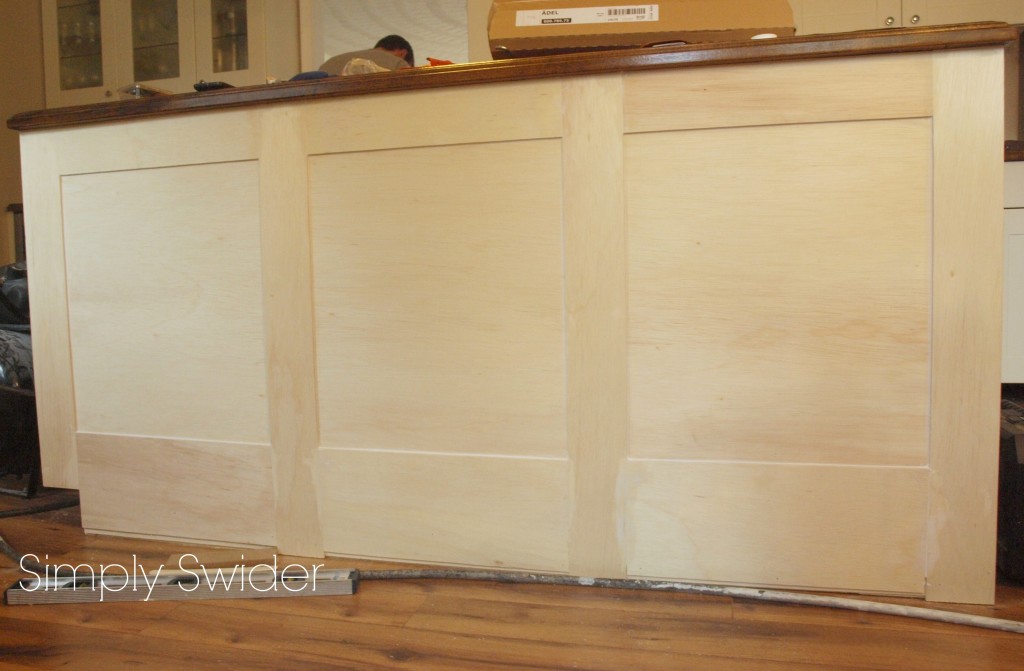
The back of the island was just a brown particle board after we installed the new cabinets, so we decided to finish it off with a custom cover panel done in the same board & batten shaker style as the cabinets. First, Cody nailed up the same cabinet grade plywood that he used on the soffits.

Next, he cut the plywood into equal width strips and attached them to the back of the island in a shaker style that created three boxes. The bottom strip is wider to accommodate a piece of baseboard that was later attached. All the lines were then caulked and allowed to dry over night.
Finally, I gave it all 1 coat of primer and 2 coats of paint matched to the cabinets. Voila! The island is finally completed! The back side of the island went from looking like a dark hole into being one of my favorite elements. I love how the white really bounces the light from the windows around too.
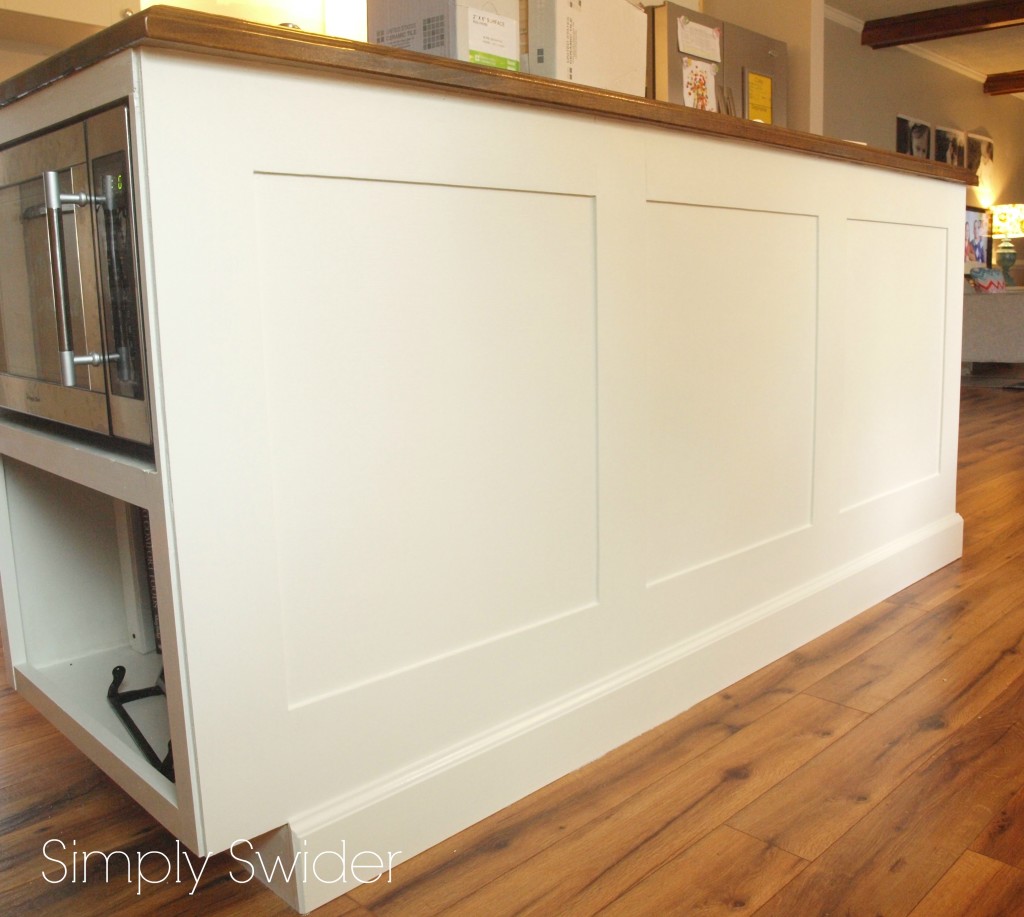
Here’s a look from the other angle. You can see our built-in microwave peeking out from the left. This was a really easy project that could even be added to an existing island to spruce it up a bit.
The kitchen is almost done! All that is left is to tile the back splash and build the custom range hood!